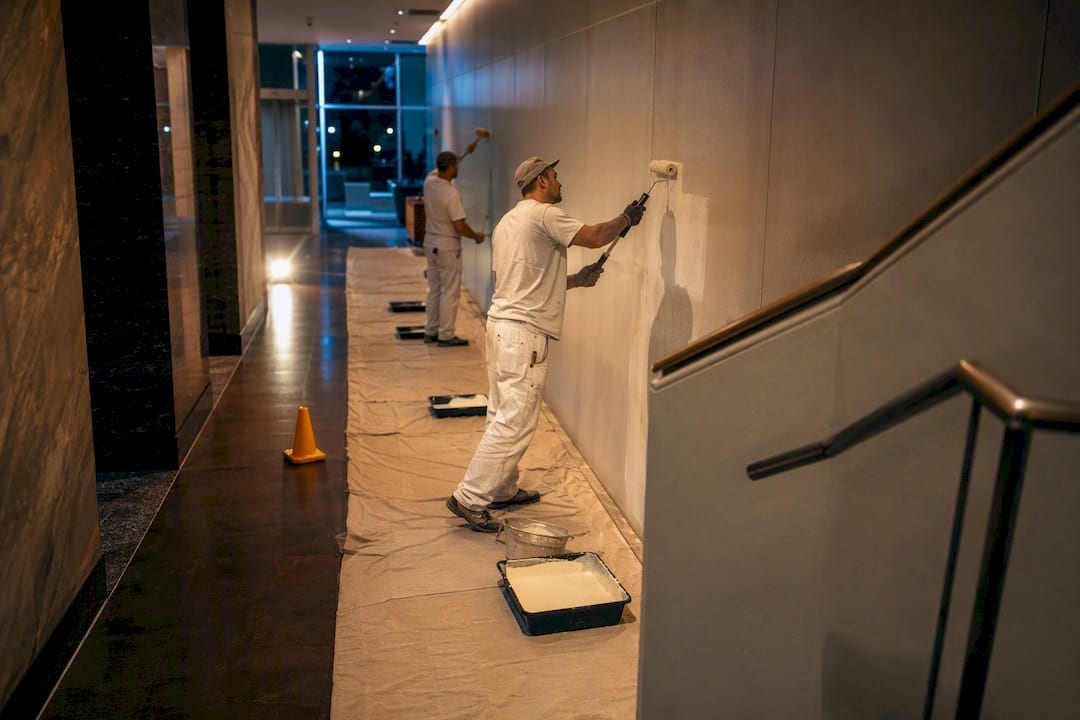
A paint punch list is a written, room-by-room record of every unfinished or defective paint item still needing correction before a project is considered done. The single rule that separates a smooth closeout from a month of callbacks: run an internal crew walk before the client ever sees the list, and require an owner, a target date, and a photo on every line. Skip that step, and every disagreement over “who said what” becomes a fight instead of a checklist.
TL;DR:
- Conduct a thorough internal crew walk before the client review to identify and photograph specific defects, ensuring clear communication and quicker corrections.
- Batch punch items by trade and sequence within each group to minimize mobilizations and reduce overall correction time.
- Use a detailed, standardized template with exact location, defect, correction, responsible party, and a target date to avoid ambiguity and resolve disputes efficiently.
- Perform inspections with raking light and physical tests, such as tape adhesion and color checks under different lighting, to catch defects invisible under normal lighting.
- Complete and close the punch list in one scheduled visit after other finish trades have finalized their work, preventing rework caused by early inspections.
Table of Contents
- What Belongs on a Printable Paint Punch List?
- What Paint Defects Actually Show Up on a Punch List?
- How Do You Inspect Paint Work Like a Professional?
- When Should You Run the Punch-Walk, and in What Order?
- How Do You Record, Assign, and Close Punch Items?
- What Do Professional Punch-List Templates and Prep Checklists Look Like?
- Why Punch Lists Fail (And the Fix Nobody Wants to Do)
- Let Sigma Painting Handle Your Punch-List Closeout
- Templates and Guides Worth Bookmarking
- Sources
- FAQ
What Belongs on a Printable Paint Punch List?
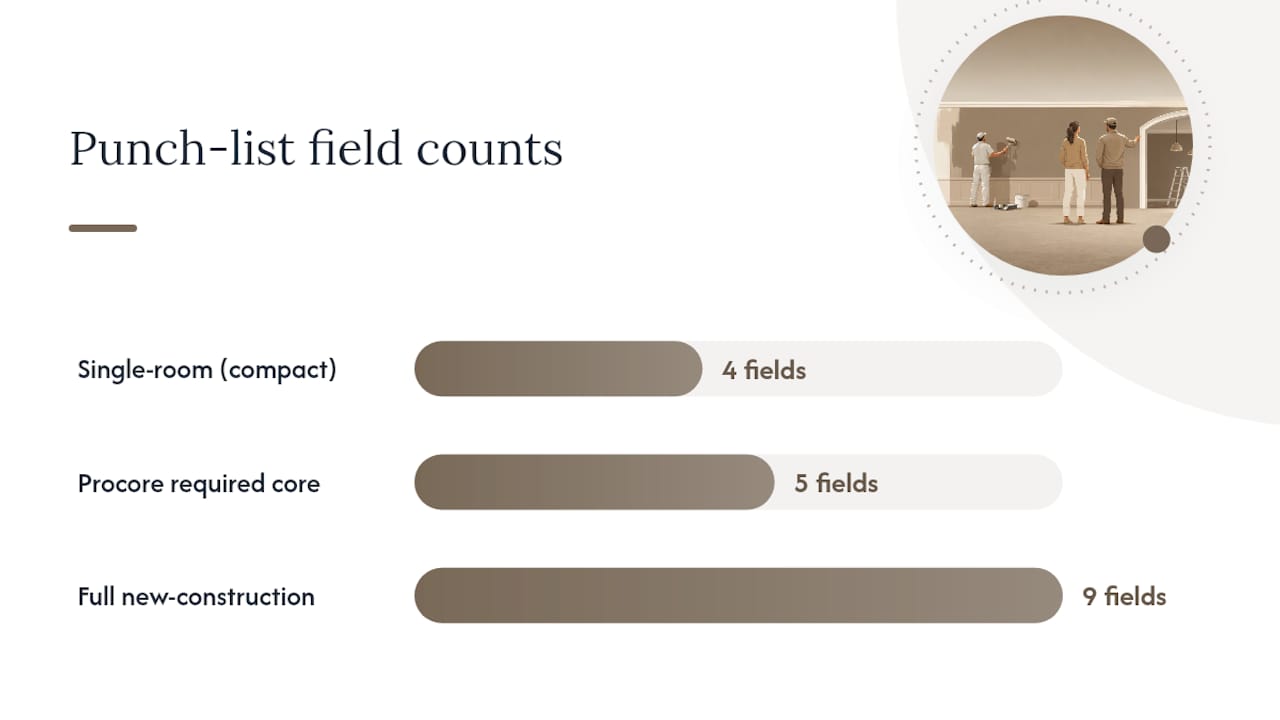
A punch list only works if it forces specificity. Vague notes like “touch up hallway” get ignored or done wrong. Procore’s punch list guidance recommends five required fields per item: location, defect description, required correction, responsible party, and target completion date. Add three more columns for a paint-specific job and you have a document any crew lead, homeowner, or superintendent can run without asking a single follow-up question.
Here’s the field structure that actually holds up on a real walkthrough:
- Item number — sequential, tied to the room order you walked
- Room or location — “Primary bedroom, north wall near closet,” not just “bedroom”
- Photo reference — file number or filename tied to the item
- Defect description — specific and visible, not interpretive
- Required correction — the fix, stated as an action (“re-cut ceiling line,” not “fix ceiling”)
- Responsible trade or person — painter, drywall sub, GC
- Materials needed — paint code, sheen, caulk type
- Priority — cosmetic, functional, or handover-blocking
- Target date and status — open, scheduled, closed
Grouping items by trade before you distribute the list matters more than most people assume. If painters, drywall, and trim carpenters each get a mixed list scattered across every room, you get three separate mobilizations to fix items that live five feet apart. Batch by trade first, then sequence within that batch by room, and one visit closes what would otherwise take three. PaintPricing’s punch-list guidance frames this as a fixed-route walkthrough for exactly that reason: it stops the crew from doubling back.
Small jobs don’t need all nine columns. A single-room repaint can run on location, defect, correction, and date. A new-construction unit or commercial buildout needs the full template, plus a materials column, because different subs are correcting different surfaces on the same visit.
What Paint Defects Actually Show Up on a Punch List?
Painting tends to generate a disproportionate share of final punch items on any finish-trade project, and the construction punch list data from EstimationPro shows the recurring culprits are almost always the same handful of defects. Knowing the names and how to phrase them shortens the whole inspection.
- Holidays (missed spots) — “Ceiling above closet door, 6-inch unpainted patch, missed on first coat”
- Runs, drips, or sags — “Trim board, hallway, vertical drip line 3 inches, needs sand and recoat”
- Roller or brush marks — “Living room accent wall, visible stipple pattern under raking light”
- Sheen flashing — “Bedroom closet wall, patched area shows satin flash against surrounding eggshell”
- Cut-line wander — “Kitchen ceiling line, uneven cut varies up to half inch over 8 feet”
- Missed caulking — “Baseboard to floor transition, dining room, gap visible at three points”
- Overspray — “Garage door hardware, fine overspray dusting from exterior trim work”
- Substrate show-through — “Drywall patch, second bedroom, joint compound visible through single coat”
Pro Tip: Write the correction, not just the complaint. “Recut ceiling line with 2-inch angled brush” gets fixed faster than “ceiling line looks messy,” because the painter doesn’t have to guess what “fixed” means.
Acceptance tolerances vary by finish and by contract, but professional QA/QC paint inspection templates commonly flag brush marks visible from three feet under raking light as a correctable defect on matte and eggshell finishes, per Infralens’s finish quality reporting standards. Matte finishes hide more than semi-gloss and high-gloss, which show every roller stipple and lap mark, so tolerance thresholds should shift with sheen.

How Do You Inspect Paint Work Like a Professional?
The naked eye under flat overhead lighting misses most of what ends up on a punch list. Here’s the sequence pros actually use:
- Bring a raking light or a strong flashlight. Hold it near-parallel to the wall surface. This single move reveals sheen flashing, roller stipple, and texture inconsistencies that vanish under normal room lighting, according to PunchPad’s inspection guidance.
- Check color consistency against the physical swatch, not memory, under both daylight and the room’s actual artificial lighting, since LED and incandescent bulbs shift undertones differently.
- Run a basic tape adhesion check on any patched or repaired area, and carry a small magnifying glass for close inspection of cut lines and caulk joints.
- Photograph every item three ways: a context shot showing the room, a close-up of the defect, and a shot with a tape measure or coin for scale.
Small tools worth carrying: flashlight, painter’s tape, a paint swatch deck, a magnifying loupe, and a phone with a numbered photo folder ready to go before you start walking.
When Should You Run the Punch-Walk, and in What Order?
Painting sits near the end of the finish sequence for a reason. It’s the layer that shows every mistake made underneath it, so running the paint punch walk too early just means repainting after drywall, trim, or flooring work dings the walls again.
- Run the internal crew pre-walk first, ideally 3 to 5 days before the client walkthrough. This gives the crew time to correct items and produces a shorter, cleaner list for the client to review, a sequence PlanUpPro’s punch-list process treats as standard practice.
- Schedule the pre-walk after other finish trades have completed their work, not before, since drywall repairs, flooring installation, and trim carpentry all create new scuffs and dust that affect paint.
- Correct items in batches by trade and by room, following the fixed route from the checklist rather than jumping around.
- Run the client walkthrough only once the internal list is mostly closed. A homeowner or GC walking into a 40-item open list loses confidence fast, even when every item is minor.
- Aim to close the full remaining list in one scheduled return visit. Mobilization time for a crew to return to a site usually costs more than the correction labor itself, which is the real argument for batching.
On a typical residential repaint, budget the internal walk and correction window inside the same timeframe you’d plan for a standard interior painting schedule, so punch-list closure doesn’t quietly extend the project by another week.
How Do You Record, Assign, and Close Punch Items?
Every line on the list needs the same five fields, filled out the same way, every time: location (room and wall, not just room), defect description (specific and visible), required correction (an action, not a complaint), responsible party (name or trade), and target date. A sample entry: “Second-floor hallway, east wall near light switch. Sheen flash visible on 8-inch patch. Recoat full wall section with matched sheen. Assigned: lead painter. Target: Thursday.”
Photo discipline matters as much as the written description. Name files by item number so a photo folder with forty images still maps cleanly to the list. Procore’s structured approach treats the punch list as a closed set once agreed: anything added after sign-off is a change order, priced and approved separately, not a punch item slipped in for free.
- Log punch items and change orders in separate columns or separate documents entirely.
- Photograph before and after each correction for the file.
- Tie final payment or retainage release to a signed punch-list completion form, not a verbal “looks good.”
| Trigger | What happens |
|---|---|
| All items marked closed | Client signs completion form |
| Signed completion form | Final payment or retainage releases |
| New issue found post-signoff | Logged as change order, priced separately |
What Do Professional Punch-List Templates and Prep Checklists Look Like?
Some painting contractors build punch-list discipline into projects through working documents like a New Build Painting Schedule that maps out sequencing so paint lands after the trades that would otherwise damage it, and a Preparation Checklist that catches surface issues before the first coat goes on, cutting the number of items that ever reach the final list.
- The New Build Painting Schedule shows builders how to time paint against drywall, flooring, and trim.
- The Painting Preparation Checklist reduces defects before they happen, which shrinks the punch list before anyone walks the site.
- Photo-first, single-visit-close practices mirror what the industry’s own punch-list standards recommend.
Homeowners comparing color-match issues on a repaint job can also check Sigma Painting’s guidance on matching existing paint and cut lines, a recurring source of punch-list disputes on partial repaints.
Why Punch Lists Fail (And the Fix Nobody Wants to Do)
Most punch-list disputes trace back to one habit: skipping the internal walk and letting the client’s list become the first list anyone writes. That guarantees a longer, angrier document and a crew that feels ambushed instead of prepared. The fix isn’t complicated, it’s just unpopular, because it means scheduling an extra site visit before the one everyone’s actually waiting for.
Do the internal walk, photograph everything, batch corrections by trade, and close in one trip. Keep punch-list sign-off separate from warranty language in the contract. Punch items are things you agreed weren’t done right the first time. Warranty claims are things that failed later. Mixing the two into one document is how simple touch-ups turn into six-month arguments.
— Enrico
Let Sigma Painting Handle Your Punch-List Closeout
Running a punch walk, batching corrections by trade, and chasing down a crew for a single touch-up visit takes real time most homeowners and property managers don’t have to spare. Sigma Painting builds that process into every project from the start: a written pre-walk, photo documentation on every item, and a single scheduled visit to close corrections rather than three separate ones.

Whether the job is a full interior repaint, a kitchen cabinet refinish, or a commercial unit with a tight handover date, Sigma Painting’s crews work from the same field-tested checklists covered above, across our full range of services. If you’re mid-project and want a professional to take punch-list management off your plate, request an estimate through the instant quote calculator and get a straight answer on cost and timeline before you commit to anything.
Templates and Guides Worth Bookmarking
- Procore’s punch list template — five-field structure for any trade
- PlanUpPro’s construction punch list guide — closeout sequencing and timing
- PaintPricing’s painting punch list guide — sample phrasing and fixed-route walkthroughs
- For broader pre-handover planning beyond paint, see this home maintenance checklist
Sources
- Procore — Punch list template
- EstimationPro AI — Construction punch list template
- PlanUpPro — Construction Punch List: What to Include and How to Close Out Projects Faster 2026
- PaintPricing — How to create a painting punch list
FAQ
What Should Be Included on a Punch List?
Every item needs five fields: exact location, a clear defect description, the required correction, the responsible party, and a target completion date, per Procore’s punch list standard. A photo reference for each item is standard practice and makes disputes far easier to resolve.
What Are the Essential Items for a Painter’s Checklist?
The recurring paint-specific defects are holidays, runs and drips, roller or brush marks, sheen flashing, cut-line wander, missed caulking, and overspray. A painter’s checklist should also track materials needed (paint code and sheen) so corrections match the original coat exactly.
What Is a Punch List in Piping?
In piping and mechanical work, a punch list tracks incomplete connections, pressure test failures, insulation gaps, and labeling errors rather than surface finish issues. The document format is the same as a paint punch list: location, defect, correction, owner, and date, just applied to a different trade.
Who Prepares a Punch List?
The general contractor, project manager, or lead trade (in this case, the painting contractor) typically prepares the initial internal punch list before the client ever sees it. Some contractors build this internal pre-walk into their process specifically to shorten the client-facing list and reduce back-and-forth after handover.