Yes, you should power wash your exterior before painting in almost every case. The main exceptions are homes with fragile or failing siding, surfaces with hairline stucco cracks, and any house built before 1978 where lead paint may be present. For those, a gentler approach or a certified contractor is the right call.
Before you go any further, run through these three checks:
- Always wash first if you see mildew, chalking, heavy dirt, peeling paint, or salt deposits on the surface.
- Skip high pressure if siding is split, joints are open, caulk is failing, or you have reason to believe lead paint is present.
- Test a small area before committing to any pressure setting, and check your home’s build year before disturbing any existing coating.
Pro Tip: If your home was built before 1978, stop before you scrape, sand, or pressure wash anything. The EPA’s Renovation, Repair and Painting program requires certified contractors and specific containment methods when disturbing lead-based coatings.
Key Takeaways
Power washing before painting is standard practice for most exteriors, but the prep sequence, drying time, and surface condition all determine whether the paint job lasts.
| Point | Details |
|---|---|
| Wash before painting | Most exteriors need washing to remove mildew, chalk, and loose paint before new coatings will adhere. |
| Match PSI and nozzle to material | Vinyl and wood need 1,500–2,500 PSI with a 25°–40° tip; brick and concrete can handle up to 2,500 PSI. |
| Wait before priming | Wood needs at least 48–72 hours to dry; use a moisture meter to confirm below 15% before priming. |
| Check for lead on older homes | Homes built before 1978 require EPA RRP-certified contractors before any coating is disturbed. |
| Sigma Painting | Sigma Painting’s exterior service includes washing, scraping, caulking, and priming as a sequenced prep workflow. |
Table of Contents
- Should you power wash before painting? Deciding when it’s worth it
- What can go wrong when you power wash before painting
- How to power wash safely, step by step
- PSI, nozzle, and distance settings for common siding materials
- Which cleaning solutions actually work, and how to protect your plants
- How long to wait after washing before you prime or paint
- When to choose soft-wash, hand-scrubbing, or a specialist
- DIY rental vs. hiring a pro: what it actually costs
- What to inspect and repair after washing, before you prime
- Why professional painters schedule washing weeks ahead of paint day
- An honest perspective on prep work and when to call a pro
- Sigma Painting handles the prep so the paint actually lasts
- Sources
Should you power wash before painting? Deciding when it’s worth it
The short answer is that most exterior surfaces genuinely need a wash before paint goes on. Mildew, chalk, road grime, and loose paint all prevent new coatings from bonding properly, and paint manufacturers warn that poor surface prep can void warranties outright. That said, “power wash everything” is not a universal rule.
Wash first when you see any of these:
- Mildew or algae (dark streaks, green patches, fuzzy growth)
- Chalking, which shows up as a powdery residue that rubs off on your finger
- Heavy dirt, pollen, or cobwebs embedded in the surface
- Loose or peeling paint that needs to be removed before priming
- Salt or mineral deposits, common on coastal homes or near driveways
Consider a softer method or skip high pressure when:
- Siding is old, split, or already showing signs of water intrusion
- Caulk around windows and trim is cracked or missing
- Stucco has hairline cracks that water could widen
- The home was built before 1978 (lead-paint risk applies)
- You’re working on a surface that’s never been painted and is in good condition
A quick scenario map: a vinyl-sided ranch with mildew streaks is a textbook power-wash job. A 1960s wood-clapboard house with soft spots near the foundation calls for hand-scrubbing and targeted spot cleaning instead. A two-story stucco facade with visible cracks belongs with a professional who can assess whether high pressure would push water into the wall assembly.
What can go wrong when you power wash before painting
High pressure applied carelessly does real damage, and the mistakes are predictable enough that most of them are avoidable.
The four most common risks:
- Water intrusion behind cladding. Spraying upward or at a steep angle forces water under laps and behind siding, where it sits and causes rot or mold long after the paint looks fine.
- Surface gouging. Too much PSI on wood or vinyl etches the material, raises the grain on wood, and creates a surface that holds moisture instead of shedding it.
- Stripping sound paint. A zero-degree nozzle at close range will strip paint you wanted to keep, creating more prep work and bare spots that need priming.
- Lead-dust aerosolization. On pre-1978 homes, aggressive power washing can scatter lead particles into the air and soil, creating a regulated hazard.
Common technique mistakes that cause these problems:
- Using a red (0°) or yellow (15°) nozzle on siding when a green (25°) or white (40°) tip would do the job
- Holding the wand closer than 12 inches to the surface
- Spraying upward at window sills, trim, or horizontal laps
- Staying in one spot too long while the machine is running
- Skipping detergent and relying on pressure alone to remove mildew (pressure spreads spores; detergent kills them)
Pro Tip: Start with the widest nozzle and the greatest distance that still moves dirt. You can always step closer or switch to a narrower tip. You cannot un-gouge a board.
How to power wash safely, step by step
Follow this sequence and you’ll arrive at a surface that’s genuinely paint-ready, not just wet.
Equipment checklist before you start:
- Gas or electric pressure washer (1,500–2,500 PSI for most residential siding)
- Nozzle set: 25° and 40° tips for siding, 15° for concrete if needed
- Extension wand for second-story work (avoids ladder use while spraying)
- Safety glasses, non-slip footwear, and waterproof gloves
- Plastic sheeting or tarps for electrical outlets, light fixtures, and AC units
- Drop cloths or plastic to cover foundation plantings
- Garden hose for pre-wetting plants and rinsing runoff
Step-by-step procedure:
- Cover and protect. Tape plastic over outlets, close all windows, cover plants and garden beds with drop cloths. Pre-wet any exposed landscaping with a garden hose so diluted runoff is less concentrated.
- Pre-rinse top-down. Use plain water at low pressure to knock off loose debris and wet the surface. Work from the roofline down.
- Apply detergent bottom-up. Apply your cleaning solution starting at the bottom and working upward. This prevents streaking from cleaner running down a dry surface. Use low pressure for application.
- Let it dwell. Allow the detergent to sit for 5–10 minutes. Do not let it dry on the surface. On hot days, mist the surface lightly to keep it wet.
- Rinse top-down. Switch to your rinse nozzle and work from the top down, keeping the wand at a downward angle. Overlap passes by about 50% to avoid streaks.
- Inspect while wet, then again when dry. Wet surfaces hide rot, cracks, and adhesion failures. Mark problem areas with painter’s tape, then do a second inspection once the surface is fully dry.
Safety reminders: Never use a ladder while operating a pressure washer. The recoil can throw you off balance. Use an extension wand instead. Always plug electric units into a GFCI outlet. Keep the wand moving and never point it at people, pets, or glass.
Pro Tip: Apply detergent at low pressure and let chemistry do the work. Dwell time on a mildew cleaner is more effective than cranking up the PSI.
PSI, nozzle, and distance settings for common siding materials
Matching your equipment to the substrate is the single biggest factor in avoiding damage. Wrong pressure or angle can drive water behind siding or etch the surface, so use this as your reference before you start.
A few rules that apply across all materials:
- Always test on an inconspicuous area first, such as a section behind a shrub or near the foundation.
- Keep the wand moving. Lingering in one spot concentrates pressure and causes damage.
- Spray at a downward angle, roughly 45°, to direct water away from joints and laps.
- GPM (gallons per minute) matters as much as PSI for rinsing. A higher flow rate clears detergent faster and reduces residue.
- Electric homeowner units (1,500–2,000 PSI) handle most siding jobs. Gas units above 2,500 PSI are usually overkill for painted surfaces and carry a higher risk of damage.
Which cleaning solutions actually work, and how to protect your plants
Plain water handles loose dirt. For mildew, chalk, and biological growth, you need a cleaning agent.
Common options and when to use each:
- Diluted bleach solution (1 part bleach to 3 parts water): Effective against mildew and algae. Apply at low pressure, let dwell 5–10 minutes, rinse thoroughly. Do not use on aluminum or near metal fixtures.
- Oxygen bleach (sodium percarbonate): Gentler than chlorine bleach, safer for wood and landscaping, and still effective against organic growth. Mix per product instructions, typically 1–2 oz per gallon of water.
- TSP substitute (trisodium phosphate alternative): Good for heavy grease, chalking, and general grime. Follow label dilution rates. Rinse completely before painting.
- Biodegradable house wash concentrates: Pre-formulated blends designed for pressure-washer application. Convenient and generally plant-safe when diluted correctly.
Pro Tip: Soft-wash methods, meaning low pressure with a longer detergent dwell, kill mildew more effectively than blasting with high PSI. High pressure spreads spores; the right biocide eliminates them.
Protecting your landscaping:
- Pre-wet all plants, grass, and garden beds with a garden hose before applying any cleaner.
- Cover sensitive plants with plastic sheeting during application and rinse off immediately after.
- Rinse the surrounding ground thoroughly after washing to dilute any runoff.
- Avoid washing on windy days when overspray can carry cleaner onto unintended surfaces.
Lead safety: If your home was built before 1978, the EPA’s RRP program requires certified contractors for work that disturbs existing paint. Do not attempt to power wash, scrape, or sand those surfaces yourself without confirming the lead status first.
How long to wait after washing before you prime or paint
Rushing this step is the most common reason paint fails within the first year. Trapped moisture migrates outward through the paint film, causing blistering and peeling from behind.
Minimum and recommended wait times by material:
- Vinyl siding: Minimum 24 hours; 48 hours recommended in humid conditions.
- Wood siding: Minimum 48 hours; 72 hours or more in humid weather. Wood holds moisture longer than any other common siding material.
- Stucco and masonry: Minimum 48–72 hours; up to 5–7 days after heavy washing or if the surface was very saturated.
Temperature and humidity both extend these windows. Cold temperatures below 50°F slow evaporation significantly. For more on how temperature affects paint cure times, see exterior painting temperature guidance.
How to test for dryness:
- Visual check: No dark patches, no sheen, no damp feel when you press your palm flat against the surface.
- Shade check: Shaded areas dry last. If the north-facing wall still feels cool and damp, the surface is not ready.
- Moisture meter: The most reliable method for wood siding. Pros aim for a reading below 15% before priming. Moisture meters are inexpensive and remove all guesswork.
When to choose soft-wash, hand-scrubbing, or a specialist
High pressure is not always the right tool. Soft-wash systems use low pressure combined with a detergent dwell to clean surfaces without the mechanical force that causes damage.
Choose soft-wash when:
- Siding is older wood, cedar shake, or any material showing signs of weathering
- Stucco has visible cracks or soft spots
- You know the home has open joints or failing caulk around windows
- Mildew is the primary problem (chemistry beats pressure for killing organic growth)
Choose hand-scrubbing or spot cleaning when:
- The surface is mostly clean and only a few areas need attention
- You’re working on a small section, such as trim or a single wall
- The substrate is fragile enough that even soft-wash pressure could cause damage
Call a specialist when:
- The home was built before 1978 and lead paint has not been ruled out
- The facade is two stories or more and fragile (stucco, old wood, painted brick)
- Mold growth is severe or appears to be coming from inside the wall assembly
- You find soft, punky wood during your inspection that suggests active rot
Hiring a certified pro for a lead-paint situation is not just a safety choice. It is a legal one under EPA RRP rules.
DIY rental vs. hiring a pro: what it actually costs
Typical cost ranges:
Cost figures sourced from FoxHaven Roofing’s pressure washing cost guide. Actual prices vary by location, home condition, and scope.
Time estimates for a 2,000 sq ft home:
- Setup and covering: 30–60 minutes
- Washing: 2–4 hours depending on condition
- Drying time: 24–72 hours (not labor, but calendar time)
- Post-wash inspection and repairs: 1–3 hours
Factors that extend the job: heavy mildew requiring multiple passes, second-story work, complex trim details, and surfaces that need hand-scrubbing in addition to washing. For a full picture of what exterior painting projects cost, the exterior painting cost guide breaks down the full budget.
What to inspect and repair after washing, before you prime
A clean surface reveals problems that dirt was hiding. Do this inspection when the surface is completely dry.
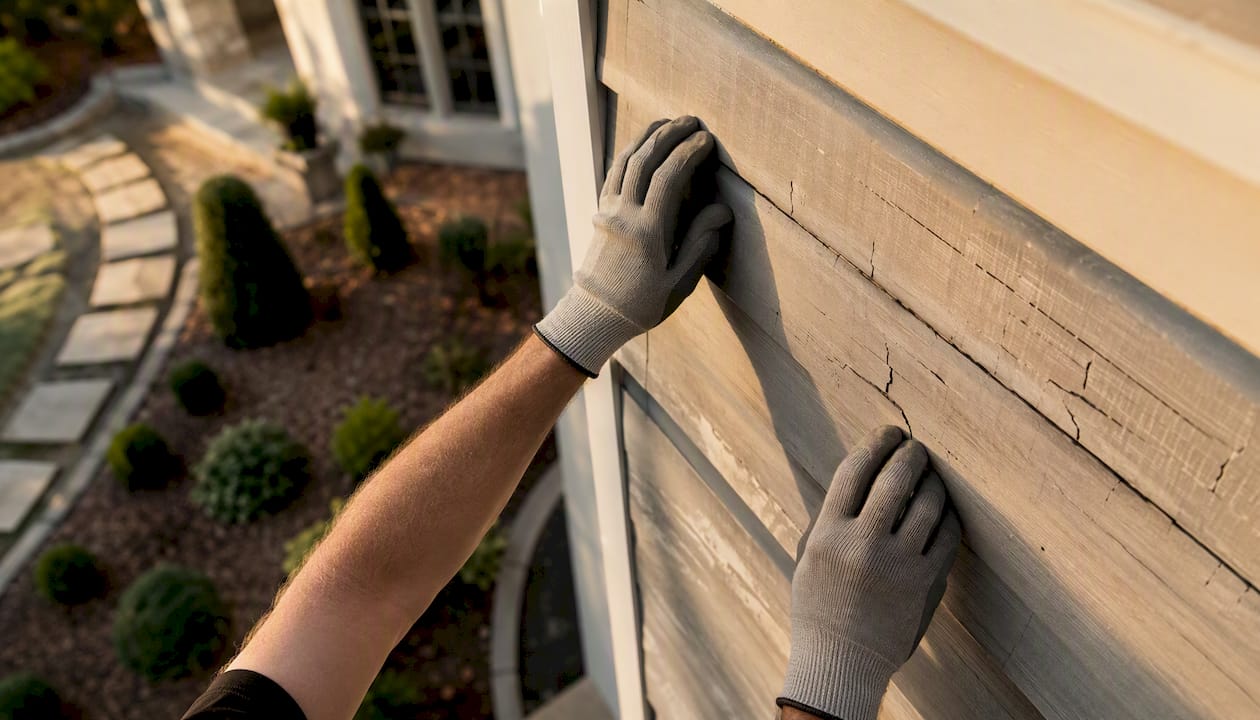
Work through this checklist in priority order:
Safety and structural (fix these first):
- Probe all wood with a screwdriver. Any wood that compresses or crumbles is rotten and must be replaced before painting.
- Check fascia, soffits, and window sills, which are the most common rot locations.
- Look for gaps where water can enter the wall assembly.
Adhesion-critical repairs (these directly affect paint life):
- Scrape all remaining loose or peeling paint with a stiff scraper. Feather the edges with 80-grit sandpaper so the transition is smooth.
- Re-caulk any open joints around windows, doors, trim, and where siding meets other materials. Use a paintable exterior caulk.
- Spot-prime all bare wood immediately. Bare wood left exposed absorbs moisture and will cause adhesion failure even if the topcoat goes on perfectly.
Cosmetic repairs (do these last):
- Fill minor dents or holes with exterior wood filler and sand smooth.
- Sand any rough or raised grain on wood siding that the washing may have lifted.
When to re-wash: If more than a week passes between washing and painting, and the surface has been exposed to rain, pollen, or heavy dew, a light rinse or spot clean may be needed before priming. You do not need to repeat the full wash, but painting over fresh contamination defeats the purpose of the original prep.
Why professional painters schedule washing weeks ahead of paint day
Professional crews treat washing as the first step in a planned sequence, not a same-day task. Experienced painters often schedule the wash about two weeks before paint day so the surface has time to dry completely, hidden defects can be found and repaired, and the crew arrives on paint day to a surface that is genuinely ready.
The sequence looks like this:
- Week 1: Wash, let dry, do a full inspection.
- Days 3–7: Complete scraping, wood replacement, caulking, and spot priming.
- Week 2: Final moisture check, confirm surface is clean and dry, prime and paint.
This spacing reduces callbacks. Paint applied over a surface that was washed and immediately primed without adequate drying time is one of the most common causes of early failure, and it is entirely preventable with scheduling discipline.
Professional painters include washing in their scope of work because they know that a paint job is only as good as the surface underneath it. A warranty on a premium coating means nothing if the prep was rushed. The wash-to-paint interval is not a suggestion — it is the mechanism that makes the coating last.
When reviewing a contractor’s proposal, look for washing, scraping, caulking, and priming listed as separate line items. A bid that bundles everything into “prep” without detail is worth questioning. For guidance on what a thorough scope looks like, the painting contractor checklist covers what to ask before signing.
An honest perspective on prep work and when to call a pro
The most common mistake homeowners make is treating pressure washing as a shortcut rather than a first step. A clean surface is necessary, but it is not sufficient. The wash reveals what needs to be fixed. Skipping the inspection that follows, or painting before the surface is genuinely dry, wastes the effort of the wash entirely.
Moisture meters are worth buying if you have wood siding. They cost less than a gallon of premium paint and remove the single biggest variable in exterior prep.
For large jobs, two-story facades, homes with suspected lead paint, or any situation where the siding condition is genuinely uncertain, hiring a professional is the more cost-effective choice in the long run. The cost of repainting a job that failed due to poor prep is always higher than the cost of doing it right the first time.
Sigma Painting handles the prep so the paint actually lasts
Exterior prep done properly takes longer than most homeowners expect, and the margin for error on a two-story facade or a home with aging siding is thin. Sigma Painting’s exterior painting service includes washing, scraping, caulking, and priming as part of every project scope, using premium materials and a sequenced workflow that gives coatings the best possible foundation.

If your home has mildew, peeling paint, suspected lead, or siding that needs more than a rinse before it’s ready for color, that is exactly the kind of job where professional prep pays for itself. Get a fast estimate with the quote calculator and see what a properly prepped exterior costs in the GTA.
Sources
- Pressure Wash Before Painting: Complete Guide for Homeowners - D and G Flooring
- Lead Renovation, Repair and Painting Program | EPA
- Pressure Washing Prep for Painting | Bluegrass Finish
Recommended
- How to Choose a Painting Contractor: A Homeowner’s Checklist | Sigma Painting
- 5 Signs It’s Time to Repaint Your Exterior — GTA Painter’s Guide | Sigma Painting
- Cabinet Painting vs Replacement — GTA Homeowner’s Guide | Sigma Painting
- Exterior Painting Cost: A Homeowner’s 2026 Budget Guide | Sigma Painting