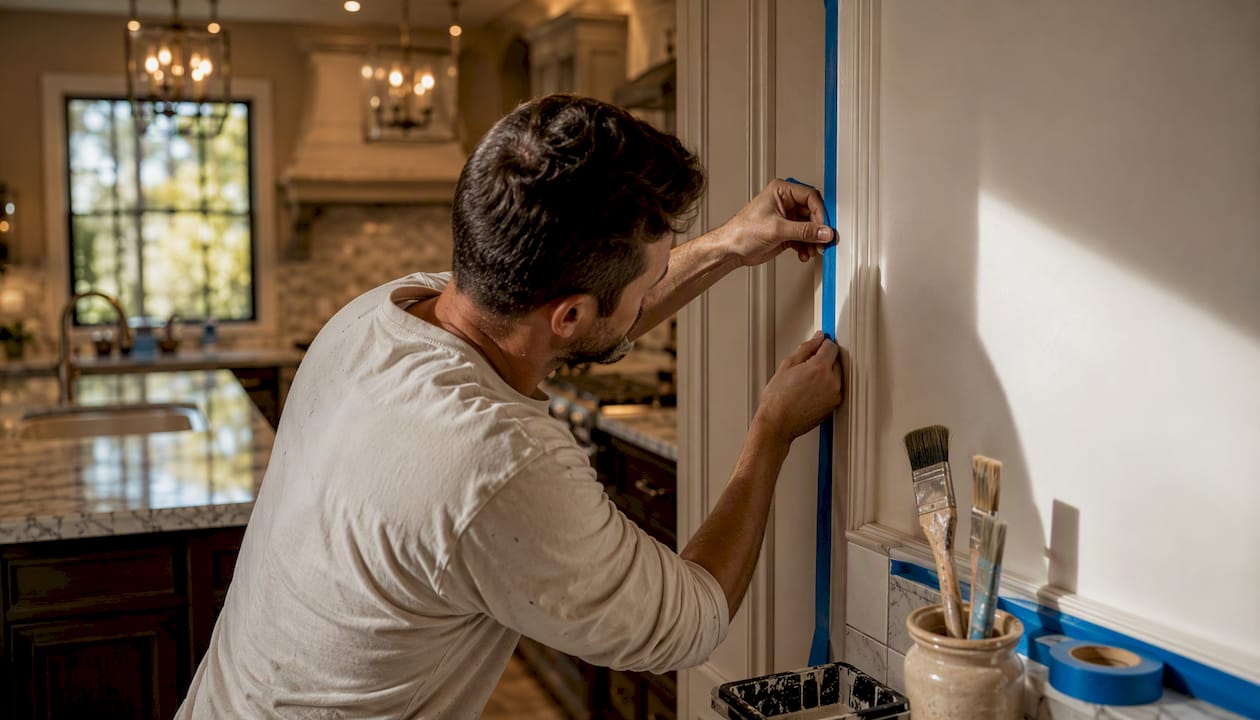
In the 24–72 hours before your painting crew arrives, complete this core list: remove all wall hangings and small furniture from the work areas, move larger pieces to the center of each room (at least 6 feet from walls), pack and store valuables and electronics securely, confirm your final color selections and sheen choices in writing, verify that your contractor has provided proof of general liability and worker’s compensation insurance, and clear parking and site access for the crew’s vehicles and equipment. That’s the short version. Everything below explains why each step matters and what happens when any one gets skipped.
Your 24–72 hour pre-paint checklist:
- Remove all artwork, mirrors, clocks, and wall-mounted décor
- Move small furniture out of the room; push larger pieces to the center
- Take down curtains, blinds, and area rugs
- Pack electronics, artwork, and labeled valuables into a secure room
- Confirm final paint colors, sheen levels, and number of coats in writing
- Verify contractor’s proof of insurance (liability and worker’s comp)
- Clear driveway and staging areas for crew vehicles and equipment
- Confirm access: keys, gate codes, and an on-site contact number
Sigma Painting builds thorough prep and cleanup into every project, so arriving at a cleared, organized site lets the crew start immediately rather than spending billable time waiting.
Key Takeaways
A complete painting preparation checklist protects your timeline, your belongings, and your budget by clarifying owner and contractor responsibilities before the crew arrives.
| Point | Details |
|---|---|
| Start prep 1–2 weeks out | Confirm scope, coats, sheen, and insurance certificates at least 14 days before the start date. |
| Clear rooms 24–72 hours before | Remove wall hangings, move furniture 6 feet from walls, and secure valuables and electronics. |
| Verify insurance in writing | Request certificates showing general liability and worker’s compensation before signing any contract. |
| Document everything you remove | Label hardware bags by room and send a morning-of photo to the crew lead to prevent disputes. |
| Sigma Painting | Handles thorough prep, cleanup, and complimentary color consultation for GTA residential and commercial projects. |
Table of Contents
- What should you confirm with the contractor before day one?
- Room-by-room interior prep: what you need to clear before the crew arrives
- How do you prepare your exterior for a professional painting crew?
- What repairs and hazards should you flag before painting starts?
- Day-of logistics: what the crew needs from you on day one
- Who is responsible for what: owner vs. professional crew
- How early should you start preparing, and how long does it take?
- What should you expect at job completion?
- How to stay comfortable if the work disrupts your normal routine
- What environmental conditions affect your paint job?
- How should you handle ventilation and air quality during painting?
- How do you verify paint and materials delivery before work begins?
- The habit that actually prevents delays
- Sigma Painting makes the prep process straightforward for GTA owners
- Sources
What should you confirm with the contractor before day one?
Several key project details should be confirmed in writing before the crew shows up. Get them confirmed in a signed scope document or a brief email thread you can reference later.
- Scope by room: Which rooms, surfaces, trim, and ceilings are included. Ambiguity here is the single biggest source of billing disputes.
- Number of coats: One coat versus two changes both the timeline and the materials cost. Confirm this per surface.
- Sheen level: Flat, eggshell, satin, semi-gloss, and gloss each perform differently in high-traffic or high-moisture areas. Sheen also affects how a finished wall cleans, so locking it in before prep starts prevents a costly repaint.
- Who moves heavy furniture: Most crews will protect furniture that remains in the room, but moving heavy pieces is typically the owner’s responsibility unless negotiated otherwise.
- Access and parking: Confirm where crew vehicles can park, where equipment stages, and whether a key or code will be left for early-morning access.
- Insurance certificates: Request a certificate of insurance showing general liability and worker’s compensation before anyone sets foot on site. Sigma Painting’s contractor insurance guide explains exactly what those certificates should include and why they protect you if something goes wrong.
For a thorough contractor-selection checklist covering credentials, warranties, and references, Sigma Painting’s homeowner contractor checklist is worth reviewing before you sign anything.
Pro Tip: After any mid-job scope change, send a one-line email to the crew lead: “Confirming we’ve added the hallway ceiling at the quoted rate of $X.” That paper trail prevents billing surprises at final invoice.
Room-by-room interior prep: what you need to clear before the crew arrives
The three highest-impact tasks in any room are removing wall hangings, pulling furniture 6 feet from the walls, and taking down any textiles that trap dust. Do those three things and you’ve eliminated most of the common day-one delays.
Quick room actions:
- Bedrooms: Remove all wall art, mirrors, and shelving. Strip curtains and rods. Push the bed and dressers to the center.
- Living areas: Take down gallery walls and mounted TVs. Roll up area rugs. Move coffee tables and side tables out entirely if possible.
- Kitchens: Clear countertops completely. Unplug and move small appliances. Check under the sink and around the backsplash for moisture stains — flag any you find to the contractor before work begins.
- Bathrooms: Remove toiletries, towel bars, and toilet paper holders. Note any mold or water staining around the tub or window frames.
- Closets and hallways: Clear shelving near walls. Remove coat hooks and any mounted storage.
For electronics and artwork, pack them into a single labeled room and photograph the wall arrangement before you take anything down. Reinstalling a gallery wall from memory takes far longer than reinstalling from a photo.
Pro Tip: When removing outlet covers and switch plates, bag each plate’s screws with the plate itself and tape the bag to the back of the plate. Reinstallation takes minutes instead of a hardware-store run.
| Room | Owner handles | Crew handles |
|---|---|---|
| Bedrooms | Remove wall items, center furniture | Protect remaining furniture, mask trim |
| Living areas | Roll rugs, unplug electronics | Drop cloths, tape, surface prep |
| Kitchen | Clear counters, flag moisture stains | Mask cabinets, prep surfaces |
| Bathrooms | Remove fixtures and toiletries | Mask tile edges, prep walls |
| Hallways | Clear hooks and shelving | Mask doors and baseboards |
How do you prepare your exterior for a professional painting crew?
The five fastest exterior prep tasks: clear a 2–3 foot perimeter around the building for ladder and scaffold access, trim back any branches or shrubs touching the siding, move planters and outdoor furniture away from the work zone, clear the eaves and soffits of debris, and wash off heavy surface dirt if the contractor has requested it before arrival.
Staging matters more than most owners expect. Crews need driveway or garage space for ladders, scaffolding sections, and material storage. If that space is blocked on day one, setup time eats directly into your project timeline.
- Clear the driveway or a designated staging area the evening before
- Move vehicles that won’t be moved during the workday
- Mark irrigation heads, gas meters, and fragile plantings with flags or stakes
- Confirm whether the contractor will power-wash or whether you need to arrange it separately
Before any exterior work begins, walk the perimeter yourself and mark anything that needs protection: sprinkler heads, exterior lighting, gas meter covers, and any fragile ground cover. A five-minute walk saves a half-day of damage claims.
For exterior painting services in the GTA, Sigma Painting handles scaffolding coordination and surface washing as part of the project scope — confirm what’s included in your specific quote.
What repairs and hazards should you flag before painting starts?
Seven conditions require a conversation with your contractor before the crew arrives, not after they discover the problem mid-job.
- Active leaks or water intrusion: Any wet surface must dry completely before paint is applied. Hidden moisture adds days.
- Soft or rotted wood: Rotten siding, fascia, or window frames need replacement before painting. Painting over rot accelerates failure.
- Mold or mildew: Visible mold requires remediation, not just a coat of paint. Flag it and ask for the contractor’s remediation protocol.
- Extensive blistering or peeling: Large areas of failed paint indicate a substrate problem. The contractor needs to assess before pricing.
- Major cracks: Hairline cracks are normal; wide or recurring cracks may signal structural movement and need professional assessment.
- Suspected lead paint: Properties built before 1978 may contain lead-based paint. Do not sand or scrape without professional testing first.
- Electrical hazards: Exposed wiring near surfaces to be painted must be addressed before any work begins.
If your property was built before 1978, assume lead paint is present until a certified inspector says otherwise. Disturbing lead paint without proper containment is a health and legal risk — not a painting prep step.
Sigma Painting’s exterior condition guide covers the visual signs owners should look for before scheduling any exterior job.
Day-of logistics: what the crew needs from you on day one
Eight items make day one predictable. Have all of them confirmed the night before.
- Clear parking and a staging area for equipment
- Bathroom access for the crew
- Entry procedure: key location, door codes, or a site rep on-site
- Gate and lock codes for any secured areas
- An on-site contact number the crew lead can call
- A safe, closed room for pets for the full workday
- A designated disposal area for waste materials
- Electrical access: confirm outlets are accessible and circuits aren’t overloaded
Crews typically arrive between 7:30 and 8:30 AM. If the property is tenant-occupied, notify tenants at least 48 hours in advance and confirm whether they need to vacate during spraying or high-VOC application.
Pro Tip: Set up one room as a “safe zone” for kids and pets with food, water, and entertainment. Send the crew lead a quick photo of the cleared rooms each morning — it confirms readiness and creates a timestamped record if any dispute arises about site conditions.
Who is responsible for what: owner vs. professional crew
| Owner’s responsibility | Crew’s responsibility |
|---|---|
| Remove wall hangings and décor | Protect furniture left in the room with drop cloths |
| Secure valuables and electronics | Final surface prep: sanding, filling, priming |
| Clear access and parking | Professional masking of trim, hardware, and floors |
| Move small and medium furniture | Application and touch-ups |
| Flag repairs and hazards in advance | Post-job cleanup of materials and drop cloths |
Heavy furniture is the common gray area. Most professional crews will work around large pieces if they cannot be moved, but they will not be responsible for damage to items left in the work zone without prior agreement. For tenant-occupied units, coordinate with the tenant on access and furniture movement at least a week ahead.
Any change to the agreed scope mid-job — an added room, a different sheen, extra coats — should be documented in a brief written change order before the work begins. One sentence in an email is enough: “Adding the master bedroom ceiling at the agreed rate.” Undocumented changes are the most common source of final-invoice disputes.
When doors are being prepped for painting, avoiding common reinstallation mistakes during the process saves time at job completion.
How early should you start preparing, and how long does it take?
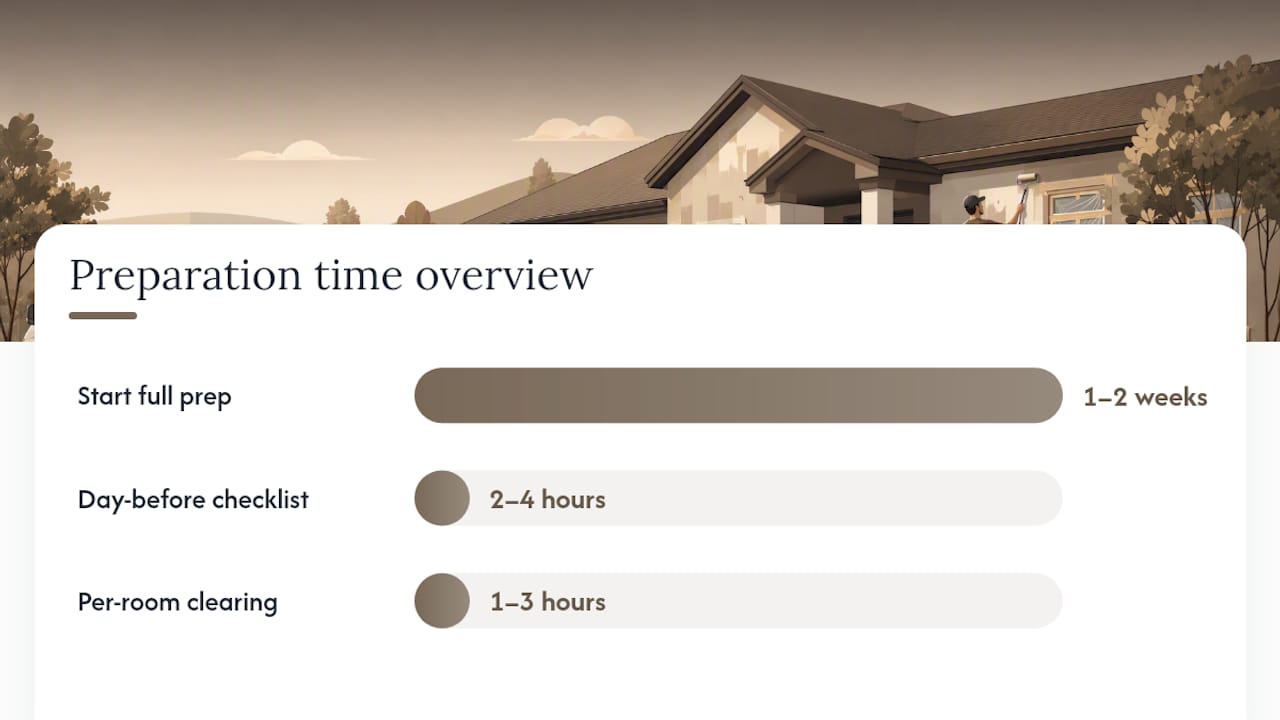
Start the full prep process 1–2 weeks before the crew’s start date. The day-before checklist takes 2–4 hours for a typical home; individual rooms average 1–3 hours of clearing time depending on how much is on the walls and floors.
Prep timeline:
- T-minus 14 days: Confirm scope, number of coats, sheen, and access in writing. Request insurance certificates.
- T-minus 7 days: Finalize color selections and approve physical paint samples on the actual walls.
- T-minus 3 days: Clear wall hangings, pack valuables, arrange furniture moves for heavy pieces.
- T-minus 1 day: Final walkthrough of all rooms, confirm parking and access, send crew lead a site-ready confirmation.
- Day of: Pets secured, entry confirmed, on-site contact available.
Cost factors that can affect your bill: the extent of repairs discovered on-site, inaccessible areas requiring special equipment, last-minute scope additions, and any protective materials not included in the original quote. Use Sigma Painting’s quote calculator to validate line items before signing.
What should you expect at job completion?
Before releasing final payment, walk every painted surface with the crew lead and a written punch list. A standard walkthrough covers:
- Cut-in edges and corners for clean lines
- Drips or runs in the finish coat
- Uniformity of sheen across each surface
- Hardware and fixture reinstallation
- Any areas where coverage looks thin
Minor touch-ups are typically included in the agreed scope. Larger issues discovered after the crew has left should be documented with photos and reported within the warranty period specified in your contract. Keep before-and-after photos of every room — they’re the fastest way to resolve any warranty claim.
On payment: most professional contractors collect a deposit at signing, a progress payment at a defined milestone, and a final payment after the walkthrough sign-off. Withholding a small retainage until punch-list items are resolved is reasonable and common practice.
How to stay comfortable if the work disrupts your normal routine
For jobs spanning multiple days or entire floors, plan around the crew’s schedule rather than against it. Identify which rooms will be inaccessible each day and set up a temporary living area the night before work begins in that zone.
Practical steps: move bedding, toiletries, and daily essentials into an unaffected room before day one. If the kitchen is being painted, arrange meals that don’t require cooking for 24–48 hours after application, since paint fumes and wet surfaces make the space unusable. For landlords with occupied units, provide tenants a written schedule showing which areas are off-limits each day and confirm alternative bathroom or kitchen access if those rooms are in the work zone.
For extensive commercial projects, a stakeholder kickoff meeting that includes operations and maintenance staff helps sequence work windows so production impact stays minimal.
What environmental conditions affect your paint job?
Temperature and humidity directly affect how paint cures, how long it takes to dry, and whether the finish holds long-term.
Above 85°F, latex paint dries too fast and leaves lap marks. High humidity slows drying and can cause adhesion failures, particularly in bathrooms and basements.
For exterior work, most latex paints require surface temperatures above 50°F and below 90°F, with no rain forecast for at least 24 hours after application. Sigma Painting’s exterior temperature guide covers the specific thresholds for GTA weather conditions and how crews adjust scheduling around them.
If you’re scheduling an exterior job, avoid booking during periods of forecast rain or high humidity. A one-week weather window is the minimum buffer for most exterior projects.
How should you handle ventilation and air quality during painting?
Open windows and run exhaust fans in every room being painted. Cross-ventilation — air moving in one window and out another — clears fumes faster than a single open window. For rooms without operable windows, a box fan placed in the doorway exhausting into a hallway works well.
During application of oil-based products or high-VOC primers, keep children, elderly occupants, and pets out of the work area entirely. After the crew finishes for the day, keep ventilation running for at least 2–4 hours. Low-VOC latex paints dry faster and off-gas less, but ventilation still matters for the first 24 hours.
For interior painting projects, Sigma Painting uses premium low-VOC products as a standard, which reduces the ventilation burden significantly compared to conventional paints.
How do you verify paint and materials delivery before work begins?
A missing product on day one can delay the entire job. Confirm the following the day before the crew arrives:
- All specified paint colors and sheens are on-site and match the approved samples
- Primer is available in the correct formulation for the substrate (drywall, wood, masonry)
- Sufficient quantity: confirm can counts against the room-by-room scope
- Specialty materials (cabinet primer, deck stain, brick coating) are present if in scope
- Drop cloths, masking tape, and protective materials are accounted for
If the contractor is supplying materials, ask for a delivery confirmation the day before. If you’re supplying any materials yourself, have them on-site and accessible 24 hours before the start date.
The habit that actually prevents delays
The single most effective thing a property owner can do is document everything they remove and send a brief photo to the crew lead the morning of day one. Not because crews need supervision, but because a timestamped photo of a cleared, organized room eliminates any ambiguity about site conditions if a dispute arises later.
Label every bag of hardware, every removed fixture, and every stored item with the room it came from. That habit takes five minutes and saves hours of reinstallation guesswork. The owners who skip this step are the ones calling contractors two weeks later asking where their curtain rod brackets went.
Sigma Painting makes the prep process straightforward for GTA owners
Most painting delays trace back to one thing: the owner and the crew had different expectations going in. Sigma Painting closes that gap before day one with a complimentary color consultation, a transparent written scope, and a crew that arrives knowing exactly what has been agreed.

For homeowners, landlords, and property managers across the GTA, Sigma Painting’s interior painting services and commercial painting services include thorough surface prep, premium low-VOC materials, and a final walkthrough with documented sign-off. No surprise line items, no scope creep. Get a project estimate using the online quote calculator and have a confirmed scope in hand before your crew’s start date.
Sources
- How to prepare your home for painters