
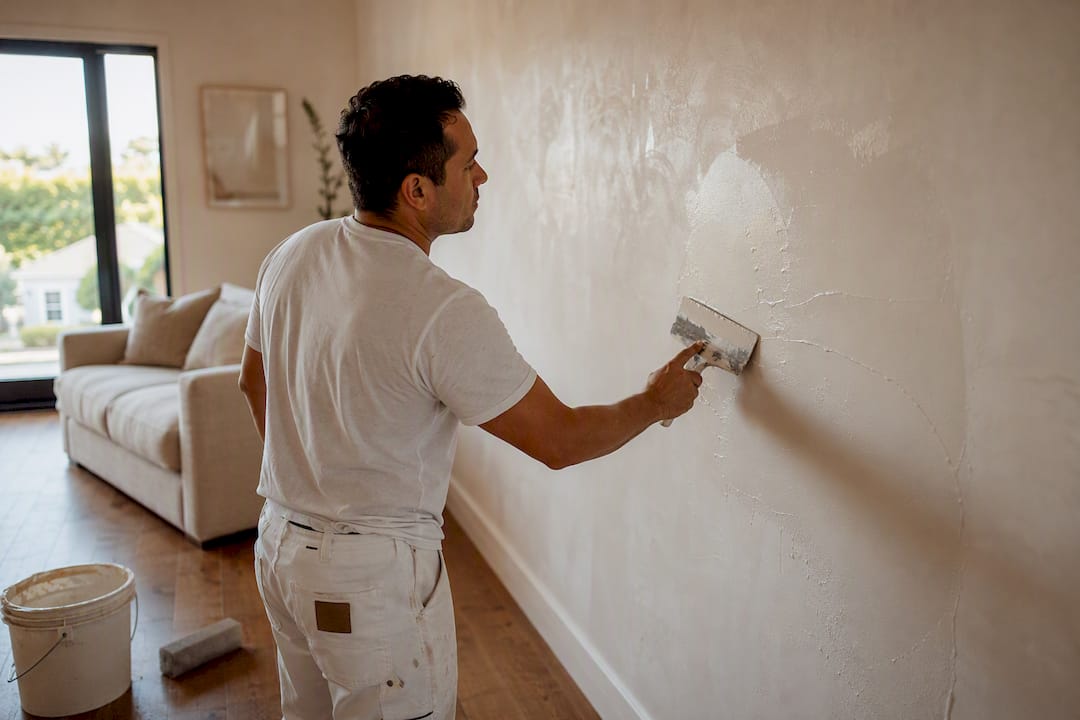
A Level 5 drywall finish is a thin, full-surface skim coat of joint compound applied over a properly finished Level 4 surface, exactly as described in the Gypsum Association’s GA-214 standard. The single action that determines whether your paint job succeeds or fails is this: apply a full skim coat (or a manufacturer’s Level 5 surfacer) and follow it with a correctly chosen, correctly applied high-solids primer, often backrolled by hand. Skip either half of that equation and you’ll see every joint under the right light.
You need Level 5 when:
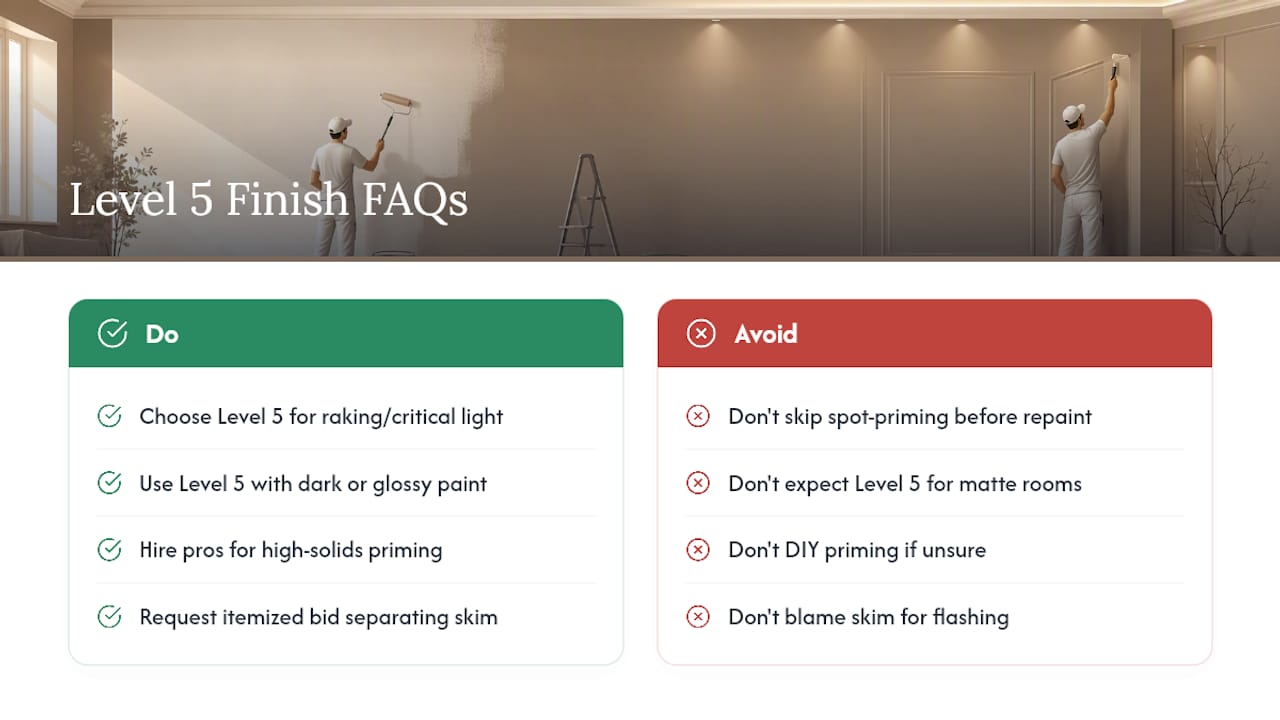
- The room has critical lighting: low, raking light from windows or track fixtures
- You’re painting dark, saturated, or high-gloss colors that amplify surface flaws
- The surface is a ceiling, feature wall, showroom, or gallery space where flawless is the standard
Key Takeaways
A Level 5 finish succeeds or fails on two decisions: whether the skim coat covers the full surface evenly, and whether the primer is a high-solids formula applied and backrolled correctly.
| Point | Details |
|---|---|
| Skim coat covers everything | A true Level 5 skims the entire surface, not just joints, per GA-214. |
| Primer choice is critical | High-solids primer or a Level 5 surfacer-primer prevents flashing between compound and paper. |
| Save it for critical lighting | Reserve Level 5 for raking light, dark or glossy paint, ceilings, and premium spaces. |
| Inspect before you commit to paint | Check under raking light at multiple distances before applying finish coats. |
| Sigma Painting sequences it correctly | Sigma Painting pairs full skim coats with premium primers and backrolling on GTA interior projects. |
Table of Contents
- What Is a Level 5 Drywall Finish?
- When Does a Project Actually Need Level 5?
- What Materials and Tools Does Level 5 Require?
- How Do You Apply and Prepare the Skim Coat?
- How Do You Prime and Paint a Level 5 Wall Correctly?
- How Do You Inspect for and Fix Common Failures?
- How Much Does Level 5 Cost and How Long Does It Take?
- How Sigma Painting Delivers Level 5 Results
- The Conventional Wisdom on Level 5 Gets the Priority Backwards
- Get a Level 5 Finish Without the Guesswork
- Frequently Asked Questions
- Sources
What Is a Level 5 Drywall Finish?
GA-214 defines five finish levels for gypsum board, and Level 5 sits at the top: a Level 4 finish (tape, three coats of compound over joints and fasteners) plus a skim coat of joint compound applied to the entire wall or ceiling surface, not just the joints. That skim coat exists for one reason: it evens out porosity differences between the paper face of the drywall and the compound covering the joints and screws.
Without it, paint absorbs unevenly, and the joints “photograph” through the finish, meaning you can see their outline once the paint dries.
- GA-214 restated in plain terms: skim the whole surface, not just the seams
- Purpose of the skim coat: uniform porosity, no telegraphing through paint
- CertainTeed’s Level V surfacer can replace a hand-applied skim coat when used strictly per the manufacturer’s instructions, though it still demands correct mixing, application thickness, and cure time to perform as intended.
When Does a Project Actually Need Level 5?
Not every room justifies the extra labor. Critical lighting, meaning light that rakes across a wall at a low angle from a window wall or a row of pot lights, is the biggest trigger. That kind of light exaggerates every ridge and flat spot a Level 4 finish would hide just fine under normal ambient light.
Dark colors and high-sheen paints are the second trigger. Satin, semi-gloss, and gloss finishes reflect light directly back at the viewer, and dark pigments make shadow lines on imperfections far more visible than a pale eggshell would.
- Ceilings under bright fixtures or skylights
- Feature walls, foyers, and open-concept living areas with large windows
- Commercial showrooms, galleries, and lobbies where finish quality is part of the brand experience
- Standard bedrooms, closets, and low-light hallways painted in flat or matte finishes, where Level 4 remains perfectly adequate
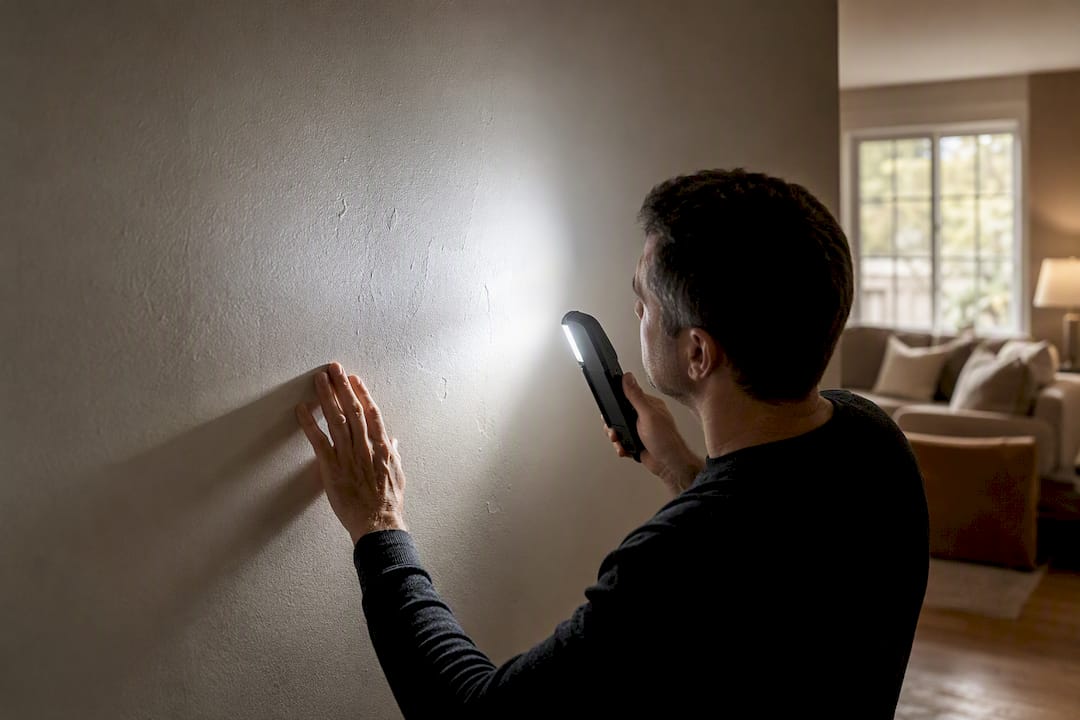
Pro Tip: Before committing to Level 5 on an entire home, walk the space at the time of day the room gets the harshest light and hold a work light at a low angle against a sample Level 4 patch. If you can’t see the joints, you may not need to pay for the upgrade.
What Materials and Tools Does Level 5 Require?
Two categories of joint compound matter here. Setting-type (chemical hardening) compounds work well for the base coats where you need speed and strength; drying-type, all-purpose compounds are usually preferred for the final skim because they sand more forgivingly and shrink less unevenly.
Primer selection is not optional at this stage. High-solids primers and dedicated Level 5 surfacer-primers fill residual texture differences that ordinary wall primer leaves behind, which is exactly what prevents the flashing problem discussed later in this guide.
- Setting compounds for base and fill coats; drying-type compound for the finish skim
- A high-solids primer or manufacturer surfacer-primer rated for Level 5 use
- Airless spray rig with fine-finish tips, plus trowels, squeegees, and pole sanders for hand work
- Dust-control vacuum sanders to control airborne compound dust during finish sanding
- A quality backroller for even primer distribution after spraying
- Sanding progression: start around 120 to 150 grit for correction, move to 220 to 320 for refinement, and finish with 400 grit for polishing on premium jobs
How Do You Apply and Prepare the Skim Coat?
Before any compound goes on the wall, confirm the substrate actually qualifies as Level 4: joints taped and filled with three coats, fasteners spotted and sanded smooth, no visible ridges or gouges. Skim coating over an incomplete Level 4 just bakes those flaws into the final surface.
- Hand skim: Mix compound to a workable, slightly thinned consistency, apply a thin coat across the full surface with a wide trowel or squeegee, let it dry fully (often 24 hours depending on humidity), then sand lightly to knock down trowel marks.
- Roll-and-scrape: Roll compound on with a thick-nap roller, then immediately scrape it flat and thin with a wide squeegee or trowel. This method moves faster than pure hand-troweling and suits mid-size rooms well.
- Spray-and-wipe or spray surfacer: Spray a thinned compound or manufacturer surfacer across the surface using fine-finish tips in the 0.035 to 0.041 inch range at roughly a 12-inch work distance, then knock down or leave as specified. This is the fastest method for large commercial jobs but requires tight masking and controlled airflow to manage overspray.
Watch for three recurring mistakes: lapping, where overlapping passes leave visible ridges; over-thick application, which extends dry time and increases shrinkage cracking; and skipping the intermediate sanding pass between coats, which locks tool marks under the next layer.
Pro Tip: Work in sections no larger than you can keep wet at the edges. A skim coat that starts skinning over before you blend the next pass is what causes visible lap lines once primer hits the wall.
How Do You Prime and Paint a Level 5 Wall Correctly?
This is where most Level 5 jobs actually fall apart, and it has nothing to do with the skim coat itself. A standard wall primer soaks into the skim compound and the original drywall paper at different rates, and that difference shows up as blotchy, shiny or dull patches once paint goes on, a defect painters call flashing.
High-solids primers or dedicated surfacer-primers even out that absorption rate, and it’s the single most common point of failure the trade associations flag when a Level 5 job goes wrong after the compound work was done right.
- Backroll after spraying primer, or after rolling it on large walls, to work primer into the surface evenly and break up any pooling
- Choose 100% acrylic latex paint for durability and consistent sheen
- Use eggshell or flat sheens on Level 5 walls where possible; satin and gloss show even minor imperfections more readily
- Plan for two full coats of finish paint regardless of primer quality
Spraying the final coats gives the most uniform film thickness across a large wall, but rolling gives you more control on smaller feature walls and better adhesion in corners. Many painters spray then backroll for the best of both.
How Do You Inspect for and Fix Common Failures?
Inspect under the harshest light the room will actually see, held at a low angle, and view the wall from several feet back and up close. The DWFC inspection method recommends exactly this combination, since small ridges and absorption differences that vanish under overhead light show up clearly under raking light.
Sand progressively with a block sander rather than a hand pad to keep the surface flat, working from 150 up through 220 and 320 before priming.
If you see joints ghosting through paint or blotchy sheen variation, the cause is almost always uneven primer absorption or a missed sanding pass, not the skim coat itself. A light spot-prime and recoat often fixes small flashing; widespread photographing usually means re-skimming the affected section.
- Inspect at a low light angle from multiple viewing distances
- Sand with a block, not a random hand pad, to avoid dishing
- Spot-repair flashing with primer touch-up; re-skim if joints show through broadly
- Call a professional if repeated priming attempts still show ghosting
Pro Tip: Take a photo of the wall under raking light before you prime. Compare it to the same shot after the first coat of paint. If new flaws appear that weren’t in the “before” photo, the primer is the problem, not the drywall work.
How Much Does Level 5 Cost and How Long Does It Take?
Level 5 costs more than Level 4 because of three added labor blocks: the full-surface skim itself, an extra sanding pass, and dry time between coats that can’t be compressed without risking cracking. Extra inspection time before paint goes on adds further hours a Level 4 job never needs.
For a single average bedroom, expect roughly: one day for surface prep and repair, one day to apply and dry the skim coat, a half day for sanding, and one to two days for priming, backrolling, and two coats of paint.
- Ask any bidding contractor to itemize skim coat labor separately from paint labor
- Request a small mock-up panel under your room’s actual lighting before committing to full-wall Level 5
- Confirm which primer the contractor plans to use and whether backrolling is included in the quote
How Sigma Painting Delivers Level 5 Results
Sigma Painting handles interior painting projects across the Greater Toronto Area with the sequencing that Level 5 demands: full skim coat, correct primer, backroll, then finish paint, never skipping the drying window between stages.
Materials come from established suppliers including Cloverdale Paint and PPG Paints, chosen specifically for consistent absorption and sheen behavior on skim-coated surfaces.
- Mock-up panels offered before committing an entire room or commercial space to Level 5
- Transparent, itemized pricing that separates skim coat labor from paint application
- Timely project completion without cutting dry-time corners that cause flashing later
The Conventional Wisdom on Level 5 Gets the Priority Backwards
Most guides to Level 5 finishing treat the skim coat as the hard part and priming as an afterthought, a formality you handle once the “real work” is done. That’s backwards, and it’s why so many Level 5 jobs fail after the compound work was flawless. The trade associations are blunt about this: flashing and photographing after paint almost always trace back to primer choice or primer application, not to the skim coat itself.
If you’re a homeowner vetting bids, don’t just ask how the skim coat will be applied. Ask what primer the contractor plans to use, whether it’s rated for Level 5 surfacer work, and whether they backroll after spraying. A contractor who can’t answer that specifically hasn’t done enough Level 5 work to be trusted with it.
The other overlooked piece is inspection timing. Checking a wall under flat, overhead light after the skim coat tells you almost nothing. The real test happens under the room’s harshest raking light, and it should happen before primer goes on, not after the final coat when fixing a flaw means re-doing finished work.
Get a Level 5 Finish Without the Guesswork
Getting Level 5 right means matching the skim coat to the right primer, the right sheen, and the right sequencing, and that margin for error is exactly why so many DIY and budget jobs show flashing within the first year. Sigma Painting handles that sequencing as standard practice on every interior painting project across Pickering and the wider GTA, from mock-up panel to final backrolled coat, with pricing that separates skim labor from paint labor so you know exactly what you’re paying for.

Sheen choice matters just as much as primer, especially on feature walls and doors where light hits at an angle; a resource like Refinishing Studio’s guide to paint finishes is worth a look if you’re still deciding between satin and eggshell. If your project involves cabinetry alongside walls, Sigma Painting’s cabinet painting and refinishing team can coordinate sheen across both surfaces in one visit. Ready to see what your room would cost? Run the numbers through Sigma Painting’s instant quote calculator and get a real number before you call anyone else.
Frequently Asked Questions
Is Level 5 finish painting worth it for a normal living room? Only if the room has critical lighting, such as large west-facing windows or low-angle track lighting, or you’re using a dark or glossy paint. A living room with ambient overhead light and a flat or matte finish usually looks fine at Level 4.
Can I apply a Level 5 finish myself without professional experience? Hand skimming is achievable for a patient DIYer on a small room, but the priming step is where most amateur jobs go wrong. If you’re not confident choosing and backrolling a high-solids primer, that’s the stage worth hiring out even if you skim the walls yourself.
How much more does Level 5 cost than Level 4? The premium comes from added skim coat labor, extra sanding, and dry time between coats rather than from the joint compound itself, which is inexpensive. Get an itemized bid that separates skim labor from paint labor so you can see exactly what the upgrade costs.
What causes joints to show through paint after a Level 5 finish? Almost always uneven primer absorption between the skim compound and the drywall paper, a defect called flashing, rather than a flaw in the skim coat. The fix is usually a spot-prime and recoat, though widespread ghosting may mean re-skimming that section.
Does Level 5 finish work on ceilings the same way it does on walls? Yes, and ceilings under skylights or bright fixtures are actually one of the strongest cases for Level 5, since raking light from above exposes flaws that would go unnoticed on a wall.
Sources
- Level 4 vs. Level 5 drywall finish: key differences explained
- Problem solved: primer used on a wall ruins your Level 5 finish? — AWCI
- DWFC method for inspecting interior wall surfaces (inspection checklist)


