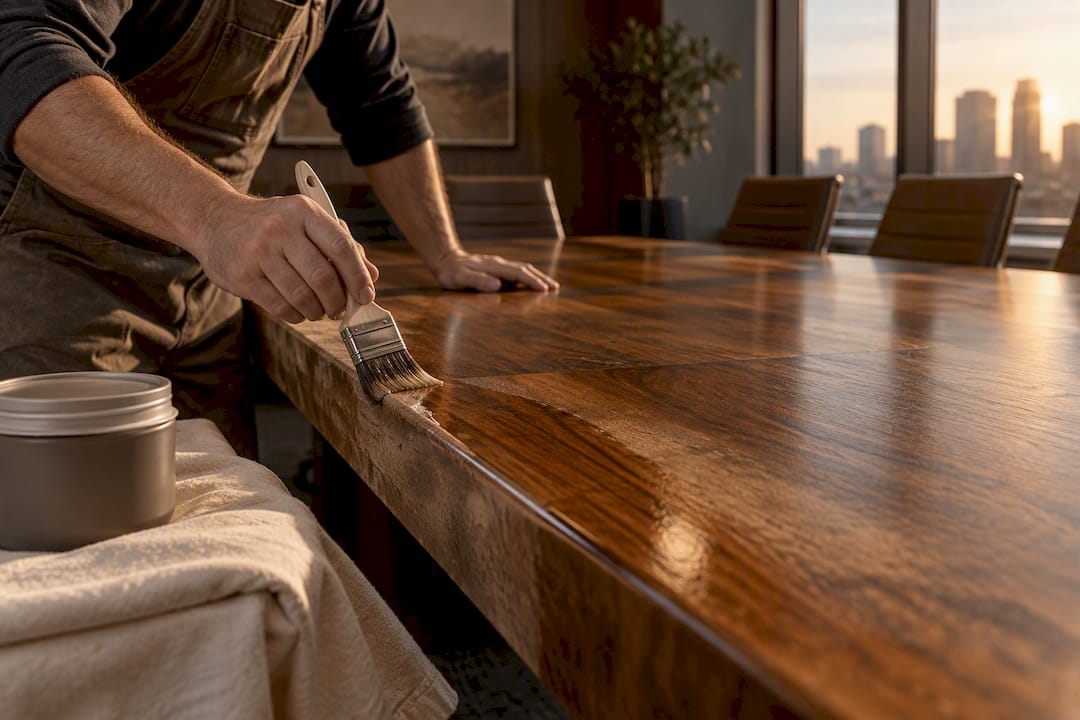
You can reliably paint over dark walls with three non-negotiable steps: thorough surface prep, a high-hide primer (or stain-blocking primer for stubborn pigments), and two thin topcoats of quality paint. Skip any one of those and you’ll be back at the hardware store within a week.
Do this:
- Clean the wall with sugar soap or a mild degreaser before anything else
- Fill every hole and crack, then sand smooth
- Apply at least one coat of high-hide primer; two coats for very dark or saturated colors
- Use a quality paint in a flat or matte finish for maximum hiding power
- Let each coat dry fully before the next one
Don’t do this:
- Skip primer because the paint label says “paint and primer in one”
- Apply thick coats to speed up coverage — thin, even coats always win
- Rush recoat times in humid or cold conditions
Key Takeaways
Covering dark walls successfully comes down to prep, the right primer, and patience with drying times between coats.
| Point | Details |
|---|---|
| Prep is non-negotiable | Clean, fill, sand, and scuff-sand glossy surfaces before any primer goes on. |
| Match primer to the problem | Use high-hide primer for standard jobs; switch to stain-blocking or shellac for severe bleed-through. |
| Two thin topcoats beat one thick one | Thin coats dry evenly, hide better, and reduce lap marks on the finished wall. |
| Test before you commit | Apply a primed patch and view it in daylight before rolling the full wall. |
| Sigma Painting for complex jobs | For large-scale color reversals or damaged surfaces, Sigma Painting’s interior painting services cover full prep, premium materials, and cleanup. |
Table of Contents
- What tools and supplies do you need before you start?
- How should you prepare the surface before painting?
- Which primer should you use over dark paint?
- What paint finish works best for covering dark colors?
- How do you apply paint over dark walls without streaks?
- How many coats do you need and how long does it take?
- How do you fix bleed-through, patchiness, and other common problems?
- What makes black, navy, red, and purple especially hard to cover?
- What does a DIY dark-wall makeover actually cost?
- When should you hire a professional instead of doing it yourself?
- How do you test paint compatibility on dark surfaces?
- How do humidity and temperature affect your paint job?
- A painter’s honest take on covering dark walls
- Sigma Painting handles the hard version of this job
- Sources
What tools and supplies do you need before you start?
Gathering everything upfront saves a mid-job hardware run. Here’s what the job actually requires.
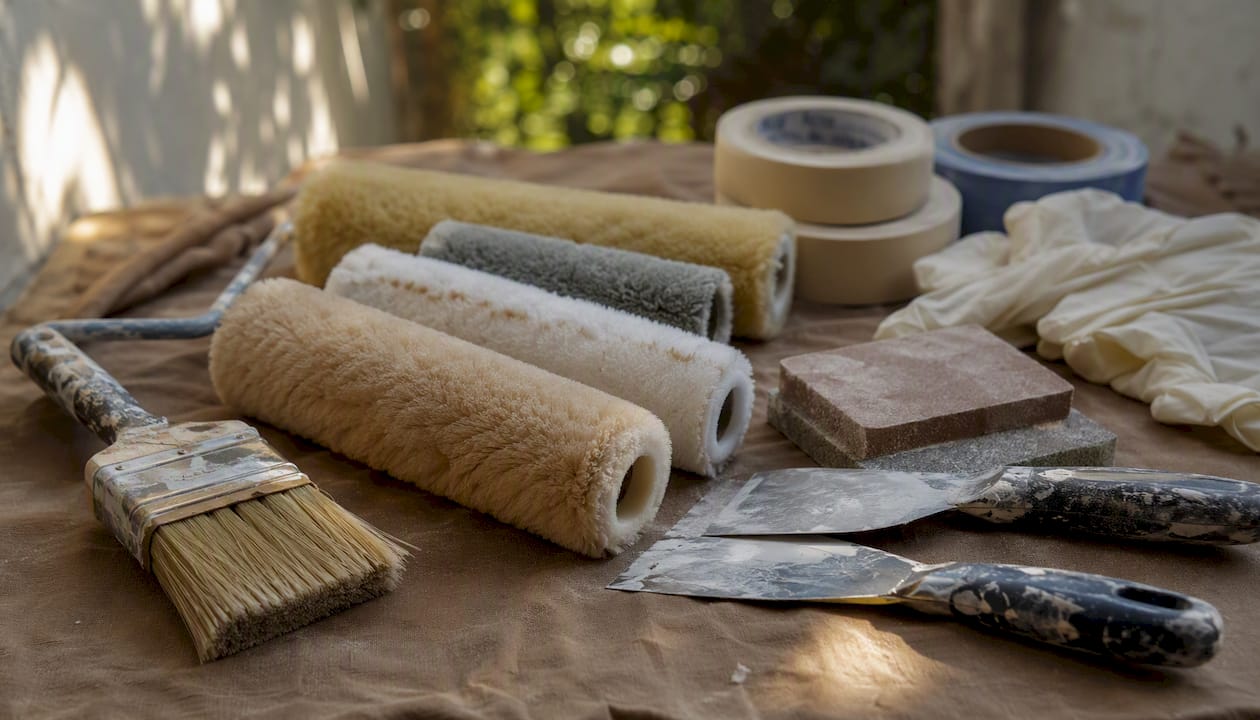
Tools:
| Tool | Purpose |
|---|---|
| 2.5" angled brush | Cutting in along trim, ceilings, and corners |
| roller frame + covers | Rolling large wall sections efficiently |
| 3/8" nap roller cover | Smooth drywall surfaces |
| 1/2" nap roller cover | Light to medium texture |
| Extension pole | Reaching upper walls without a ladder |
| Sanding block | Smoothing repairs and scuff-sanding |
| Putty knife | Applying and scraping filler |
| Drop cloths | Protecting floors and furniture |
| Painter’s tape | Masking trim and outlets |
Consumables and safety gear: sugar soap or TSP substitute, spackling compound or lightweight filler, sandpaper in 80-, 120-, and 220-grit, tack cloths, latex gloves, and an N95 mask for sanding dust.
Primers and paints: For covering dark paint with light, you’ll want a dedicated high-hide primer. Brands like KILZ, Zinsser, Behr, and PPG all make products in this category. KILZ and Zinsser also offer shellac-based stain-blocking options for severe bleed-through. For topcoats, Behr and PPG both carry premium interior lines with strong hiding power.
How should you prepare the surface before painting?
Surface prep is where most DIY paint jobs succeed or fail. Grease, dust, and small cracks become much more visible under a fresh light color than they ever were under a dark one.
- Clean the wall. Wash with sugar soap or a TSP substitute mixed with warm water. Pay extra attention to areas near light switches, door handles, and baseboards where grease accumulates. Rinse with clean water and let the wall dry completely, at least two hours.
- Identify and scrape loose paint. Run your hand across the surface. Any flaking or bubbling paint must come off with a scraper before you fill.
- Fill holes and cracks. Use lightweight spackling for drywall and a setting-type compound for plaster. Apply slightly proud of the surface, let it dry, then sand flush.
- Sand the repairs. Start with 120-grit to level the filler, then finish with 220-grit for a smooth surface. Scuff-sand any glossy areas with 220-grit so primer can grip.
- Remove dust. Vacuum the wall, then wipe with a tack cloth. Any dust left behind shows up as bumps under the primer.
- Mask and protect. Apply painter’s tape to trim, ceiling edges, and outlet covers. Lay drop cloths across the entire floor.
Pro Tip: Wait at least 30 minutes after sanding before you prime. Sanding generates fine airborne particles that settle on the wall surface. Prime too soon and you’ll lock that dust into the first coat.
Which primer should you use over dark paint?
The right primer is the single biggest variable in how many topcoats you’ll need. Choosing a high-quality white primer is the standard move for dark-to-light jobs, but the type matters.
High-hide primers (water-based, high titanium dioxide content) are designed specifically to block color. They work well for most dark-to-medium color changes. Behr’s Premium Plus Primer and PPG’s Speedhide line fall in this category.
Stain-blocking primers (oil-based or shellac-based) go further. Use these when you see tannin stains, water marks, or when a very saturated color like burgundy or forest green keeps bleeding through after one high-hide coat. KILZ Original and Zinsser BIN (shellac-based) are the go-to options for severe cases.
Tinted primers are a smart middle ground. Adding a small amount of your topcoat color to the primer reduces the color gap between the dark wall and the light finish, which often cuts the number of topcoats from three down to two.
| Primer type | Best for | Typical coats | Example brands |
|---|---|---|---|
| High-hide water-based | Standard dark-to-light changes | 1–2 | Behr, PPG |
| Stain-blocking oil-based | Tannin stains, heavy pigment bleed | 1 | KILZ Original |
| Shellac-based | Severe bleed-through, smoke damage | 1 | Zinsser BIN |
| Tinted primer | Very dark to very light, fewer topcoats | 1–2 | Any of the above, tinted |
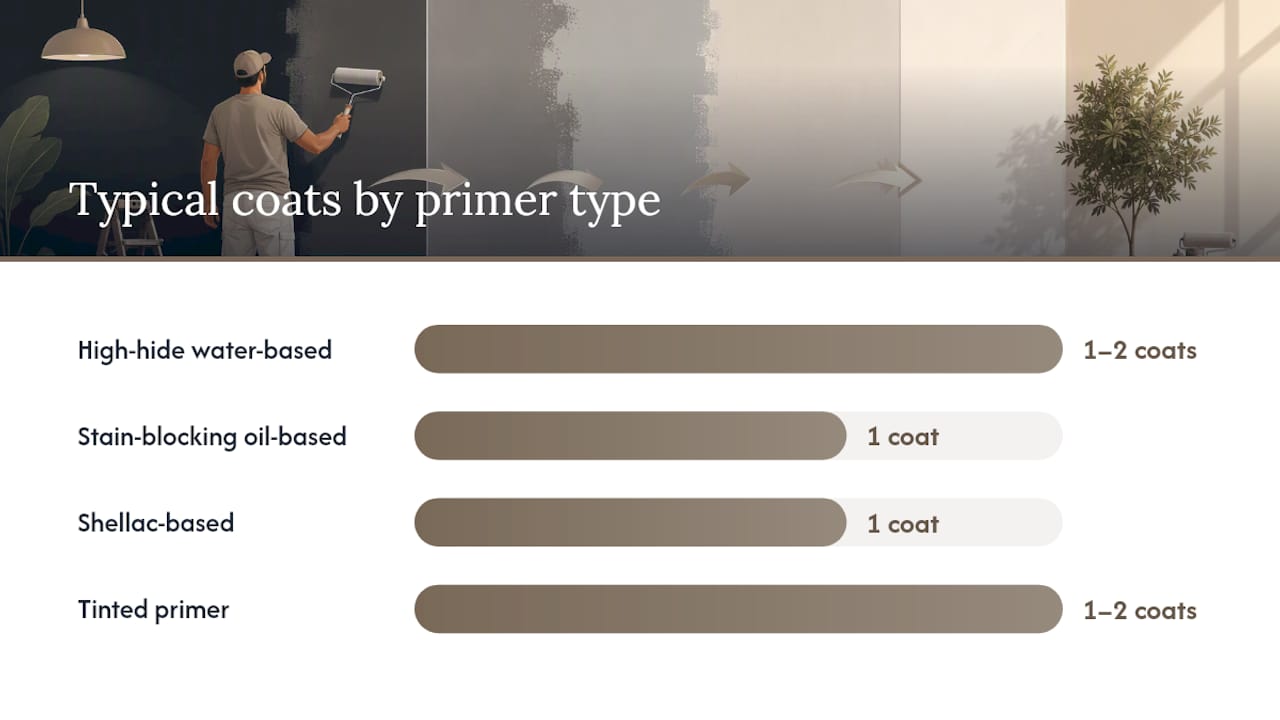
Apply primer with a 3/8" nap roller on smooth walls, a 1/2" nap on textured surfaces. One coat typically covers in 60–90 minutes; allow full drying time (check the label, usually 1–2 hours) before assessing.
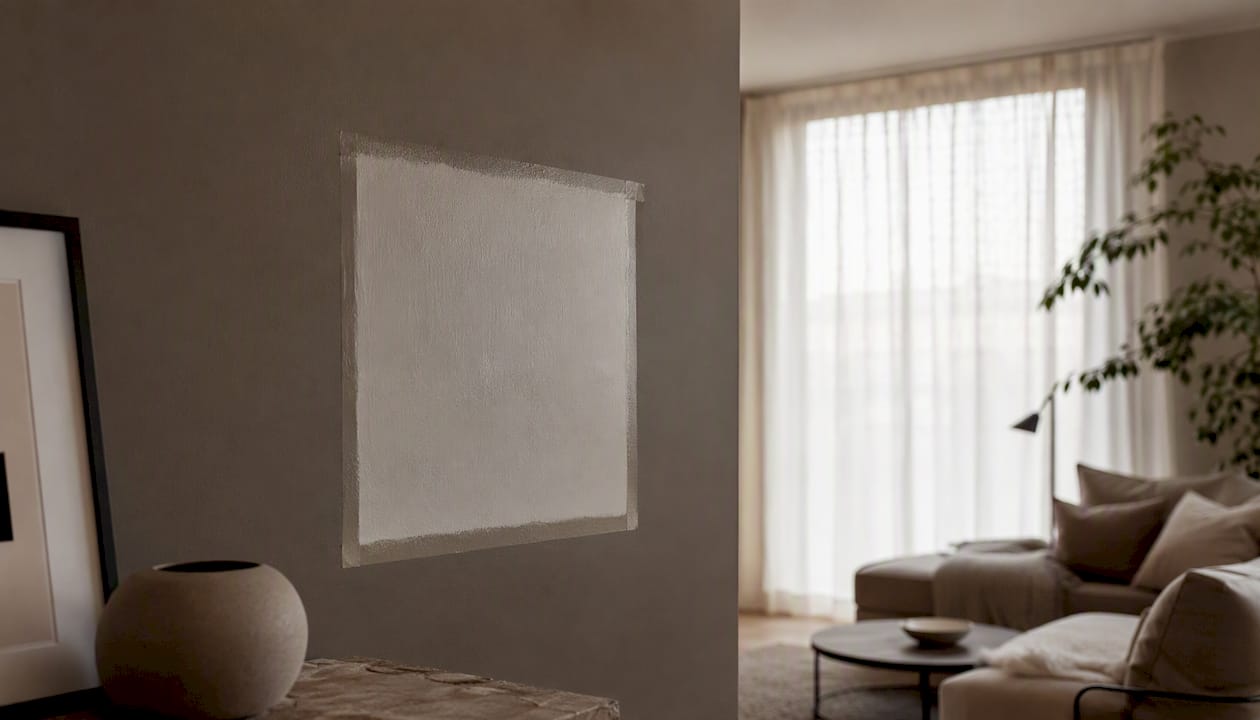
Pro Tip: Before rolling your topcoat, paint a roughly 2-foot-square patch of primer and let it dry completely in daylight. If the dark color shows through clearly, add a second primer coat before you commit to the full wall.
What paint finish works best for covering dark colors?
Paint quality directly affects hiding power. A premium paint with a higher pigment load and better binders covers in fewer coats than a budget option, which usually means less total paint purchased despite the higher per-gallon price.
For finish selection:
- Flat/matte: The best hiding power of any finish. Scatters light rather than reflecting it, which minimizes the appearance of imperfections and color variation. Best for bedrooms and low-traffic areas.
- Eggshell: A slight sheen that’s more washable than flat. Acceptable hiding power, good for living rooms and hallways.
- Satin: Noticeably shinier. Use on trim and doors rather than large wall surfaces when covering dark colors, since sheen amplifies any patchiness.
- High gloss: Avoid on large walls during a dark-to-light conversion. Every roller mark and coverage gap shows.
Check the Behr color detail pages when selecting your tint to confirm how a specific color reproduces in different finishes. Tint variance is real: a color that looks warm in the store chip can read cooler on a large wall under natural light.
For paint quantity, a standard gallon covers roughly 350–400 square feet per coat. A standard 12x12 foot room with 8-foot ceilings has roughly 350–400 square feet of wall surface, so plan paint quantity accordingly.
When deciding on your new color direction, current paint color trends can help narrow down which light neutrals and warm whites are holding up well in real interiors.
How do you apply paint over dark walls without streaks?
Proper technique reduces visible lap marks and roller texture more than any single product choice.
- Cut in first. Load a 2.5" angled brush and paint a 2–3 inch band along all edges: ceiling line, trim, corners, and around outlets. Work in 3-foot sections so the cut-in edge stays wet when you roll.
- Load the roller correctly. Dip the roller into the tray, roll it back and forth on the ridged section to distribute paint evenly. The roller should be saturated but not dripping.
- Start the M/W pattern. Place the roller on the wall and roll in a large M shape, then fill it in with W strokes without lifting the roller. This distributes paint evenly before you spread it.
- Blend into the cut-in. While the cut-in edge is still wet, roll close to it so the two wet surfaces merge. This eliminates the visible brush-to-roller line.
- Maintain a wet edge. Work in vertical sections roughly 3 feet wide. Never let a section dry before rolling the adjacent one.
- Apply thin coats. Two thin coats beat one thick coat every time. Thick coats sag, take longer to dry, and show roller texture more.
Pro Tip: For first-time DIYers, back-rolling (rolling over a freshly applied section one more time with a nearly dry roller) smooths out texture and blends any marks before the paint sets.
For smooth drywall, use a 3/8" nap. For orange-peel or light texture, step up to 1/2". A thicker nap on a smooth wall leaves stipple marks that are hard to fix once dry.
How many coats do you need and how long does it take?
Going from dark to light takes more time and material than painting light over light. Plan for this upfront.
Typical sequence:
- 1–2 coats of high-hide primer (2 for black, deep navy, or burgundy)
- 2 coats of topcoat paint
- A third topcoat only if coverage is still uneven after the second coat dries fully
Drying and recoat times under normal interior conditions (65–75°F, 40–50% humidity):
- Most water-based primers: dry to touch in 30–60 minutes, recoat in 1–2 hours
- Most latex topcoats: dry to touch in 1 hour, recoat in 2–4 hours
- Full cure (when the paint reaches maximum hardness): 2–4 weeks
Realistic timeline for a single bedroom:
- Day 1 morning: Clean, repair, sand, mask (2–3 hours)
- Day 1 afternoon: First primer coat (1–2 hours), let dry
- Day 1 evening: Second primer coat if needed (1–2 hours), let dry overnight
- Day 2 morning: First topcoat (1–2 hours), let dry 2–4 hours
- Day 2 afternoon: Second topcoat (1–2 hours), let dry overnight
- Day 3: Assess in daylight; third topcoat only if needed
Colors like black, deep navy, and burgundy commonly need multiple primer coats plus several topcoats. Budget extra time for those.
How do you fix bleed-through, patchiness, and other common problems?
- Dark color showing through after one topcoat: Add a second topcoat; if it still bleeds after two, go back and add a second primer coat before the next topcoat.
- Lap marks: Usually caused by rolling over a section that’s already dried. Work faster in smaller sections, or add a paint conditioner to extend open time.
- Patchy sheen differences: Often caused by uneven primer coverage or spot-priming repairs without feathering. Sand lightly with 220-grit and apply a full even topcoat.
- Peeling or adhesion failure: The wall wasn’t clean or the existing paint was glossy and unscuffed. Strip the peeling area, sand, clean, and re-prime before repainting.
- Severe bleed-through after two primer coats: Spot-apply a shellac-based stain-blocking primer to the affected areas, let it dry, then re-prime the full wall.
- Textured walls: Heavy texture can hide coverage gaps. Use a thicker nap (3/4") and apply primer and paint in two directions (vertical then horizontal) to fill the texture fully.
- Wallpaper under paint: If the existing surface is painted-over wallpaper, test a corner before wetting it. Wet prep can lift the paper. In most cases, skim-coating over the wallpaper or stripping it entirely is the right call before a full color change.
What makes black, navy, red, and purple especially hard to cover?
Saturated colors carry a high concentration of pigment, and that pigment doesn’t disappear just because you paint over it. It migrates through water-based coatings, especially when the new color is much lighter.
- Black and deep navy: High-hide primer is non-negotiable. Two primer coats are standard. Tinting the primer to a medium gray reduces the contrast gap and typically saves one topcoat.
- Red and burgundy: Red pigment (particularly iron oxide-based reds) is notoriously persistent. Expect two primer coats minimum, and consider a stain-blocking primer as the first coat. Tinting the primer toward a warm beige helps neutralize the red undertone before topcoating.
- Purple and deep plum: Similar to red, purple undertones bleed through white primers visibly. A gray-tinted primer neutralizes the undertone better than white primer alone.
- Forest green: High pigment load similar to navy. Two coats of high-hide primer, then two topcoats of a quality flat paint.
Pro Tip: Paint a 2x2-foot primed patch on the actual wall, let it dry completely, then view it in natural daylight. Artificial light masks undertones that daylight reveals. If you can still see the original color, add a second primer coat before continuing.
When choosing your new light color, pairing it with updated door and trim finishes makes a big difference. Check what sheen works best for interior doors to make sure the whole room reads cohesively.
What does a DIY dark-wall makeover actually cost?
Costs vary by room size, but a standard 12x12 bedroom gives a useful baseline.
| Item | Estimated cost |
|---|---|
| High-hide primer (1 gallon) | $25 |
| Premium topcoat paint (2 gallons) | $60 |
| Roller covers (2–3) | $10 |
| Angled brush (2.5") | $8 |
| Painter’s tape (2 rolls) | $10 |
| Drop cloths | $10 |
| Sandpaper, filler, tack cloths | $10 |
| Total materials | around $133 |
Time investment for a single bedroom is typically spread over multiple days, including prep, primer coats, and multiple topcoats.
A professional painter for the same room typically runs $300–$600 in labor, depending on your region. That gap narrows fast when you factor in your time, the risk of rework, and the cost of a third or fourth coat if the first attempt doesn’t cover. Use Sigma Painting’s instant quote calculator to get a real number for your specific space before deciding.
Cost-saving tips that don’t cut quality:
- Buy a better primer and a mid-range topcoat rather than budget versions of both
- Rent a quality roller frame instead of buying a cheap one
- Skip the foam roller; it leaves bubbles and requires more coats
When should you hire a professional instead of doing it yourself?
Some jobs are genuinely beyond DIY scope, and recognizing them early saves money.
Red flags that point to hiring a pro:
- The existing paint is pre-1978 and may contain lead. Disturbing lead paint without proper containment is a health and legal issue.
- The walls have significant structural cracks, water damage, or require skim-coating.
- You’re covering an entire open-plan living area with high ceilings and multiple accent walls.
- The surface is textured plaster that needs repair before painting.
- You need the job done in one or two days without disruption.
Decision checklist:
- Can you identify the existing paint type and confirm it’s lead-free?
- Do you have 2–3 days available across a weekend?
- Are the walls in good structural condition?
- Are you comfortable cutting in cleanly around crown molding and detailed trim?
If you answered no to any of those, a professional quote is worth getting. When you do, ask specifically: what prep is included, which primer and paint brands will be used, whether cleanup is part of the scope, and what the warranty covers. A contractor who can’t answer those questions clearly isn’t worth hiring. Sigma Painting’s guide to choosing a painting contractor walks through exactly what to ask.
How do you test paint compatibility on dark surfaces?
Before committing to a full wall, a quick compatibility test saves you from discovering a problem at the worst possible time.
Apply a small patch of your chosen primer to a cleaned, sanded section of the dark wall, roughly 12x12 inches. Let it dry fully (not just to touch) and check for adhesion by pressing a piece of painter’s tape firmly over the patch, then pulling it off quickly. If primer lifts with the tape, the surface needs more scuff-sanding or a different primer formulation.
Once the primer patch passes the tape test, apply one coat of your topcoat over it. Let that dry, then view it in natural daylight. This tells you whether the primer is actually blocking the dark color and whether your chosen topcoat color reads the way you expect it to in real light conditions.
If the existing paint is unknown, test for oil-based paint by rubbing a cotton ball soaked in denatured alcohol over a small area. If paint transfers to the cotton, it’s latex. If it doesn’t, it’s likely oil-based, and you’ll need an oil-compatible primer or a bonding primer before any water-based product.
How do humidity and temperature affect your paint job?
Interior conditions matter more than most DIYers expect. Water-based paints and primers need the right environment to cure properly.
Temperature: Most latex paints specify application between 50°F and 90°F. Below 50°F, the paint film forms unevenly and adhesion suffers. Above 90°F, the paint dries too fast, which causes lap marks and poor film formation. The sweet spot is 65–75°F.
Humidity: High humidity (above 70%) slows drying dramatically and can cause the paint film to sag or develop a milky appearance called blushing. Low humidity (below 30%) speeds drying too fast, which creates the same lap-mark problem as high heat. Aim for 40–60% relative humidity.
Practical steps:
- Run the HVAC system to stabilize temperature before and during painting
- Use a dehumidifier in basements or rooms with moisture issues
- Avoid painting on rainy days even indoors, since humidity levels rise throughout the house
- Check the manufacturer’s label for the specific temperature and humidity range for your primer and paint
Drying times listed on paint cans assume ideal conditions. In a humid summer basement or a cold garage in winter, double those times before recoating.
A painter’s honest take on covering dark walls
The number of homeowners who underestimate this job is striking. Not because it’s technically difficult, but because the gap between “dry enough to touch” and “ready for the next coat” is where most DIY paint jobs fall apart. Rushing a recoat on a dark-to-light job is the single most common reason people end up with three or four coats of topcoat when two would have been enough.
The other thing worth saying plainly: primer quality matters more than topcoat quality when you’re covering a saturated color. A $40 gallon of high-hide primer doing its job properly means your $55 topcoat only needs two coats instead of four. That’s not a minor difference in time or cost.
Sigma Painting’s approach on dark-to-light projects starts with a thorough assessment of the existing surface before any product is chosen. The premium suppliers Sigma Painting works with are selected specifically for hiding power and durability, which is why the results hold up years later rather than showing undertones after the first winter.
Sigma Painting handles the hard version of this job
Dark-to-light color changes are straightforward on paper and genuinely demanding in practice, especially across large rooms, high ceilings, or walls with existing texture and repairs. If your project involves any of those, the DIY math changes quickly.

Sigma Painting’s interior painting services in the Greater Toronto Area cover the full scope: surface assessment, proper prep, premium high-hide primers, and two or more topcoats with full cleanup included. No guessing on primer type, no second trip to the store for more paint, and no recoat surprises. Every project comes with a complimentary color consultation so the finish you end up with matches what you had in mind. Get an instant estimate with the quote calculator and see what a professional result costs for your specific room.
Sources
- Painting over dark walls | Crown Paints
- Steps For Painting Over Dark Walls With A Light Color | Glidden Paints
- 7 Pro Tips for Painting Over Dark Colors on Your Walls
- Pro Tips for Painting Over a Dark or Light Wall
- How To Paint A Dark Wall White
- BEHR color detail