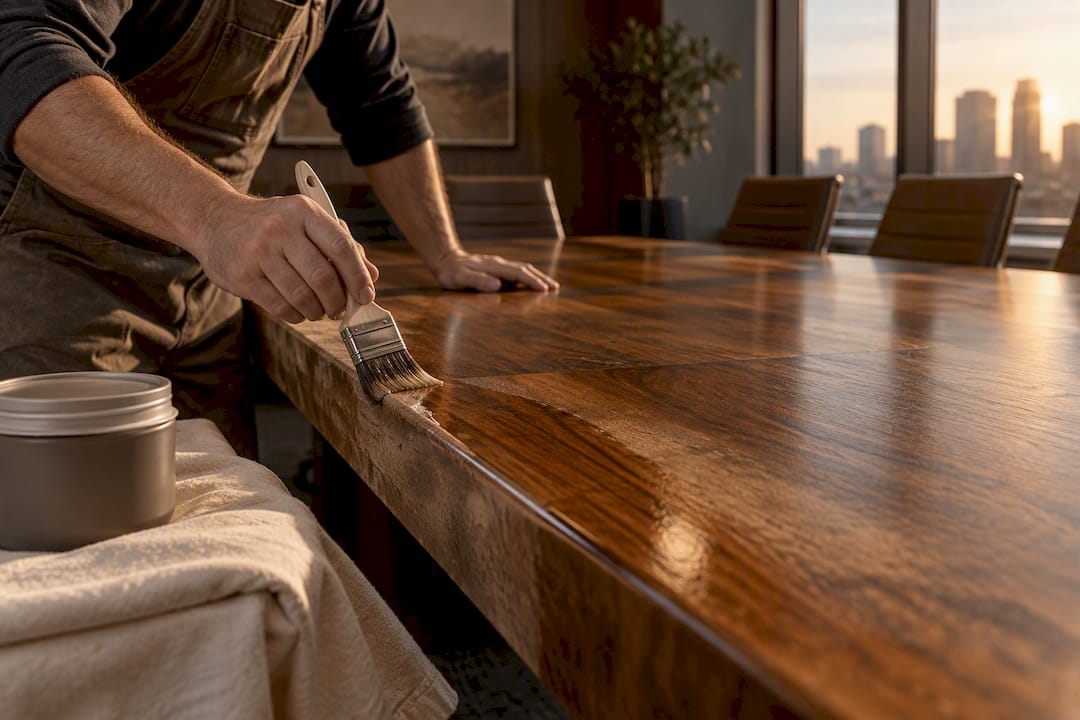
Hire a professional for most office wood refinishing jobs, especially anything veneered, high-value, or on a tight schedule. DIY makes sense only for small, solid-wood pieces where a rougher cosmetic finish is acceptable. The right call hinges on the piece’s value, whether it’s solid wood or veneer, and how much downtime your workplace can absorb. For anything beyond a single side table, a company like Sigma Painting can assess the piece and quote the work before anyone touches a sander.
TL;DR:
- Hiring a professional is essential for veneered, high-value, or time-sensitive office pieces, especially if they need to return to service quickly.
- DIY refinishing is suitable only for small, solid-wood items with low value, where visible imperfections and less durable results are acceptable.
- Professional services typically include assessment, repair, stripping, stain matching, topcoating, and sometimes hardware or upholstery work, provided by specialists with dust-extraction and containment measures.
- The cost ranges from a few hundred to over a thousand dollars depending on size, complexity, and repair needs, with shop work often completing faster than on-site refinishing.
- Safety and VOC regulations, especially in Canada, prioritize low-emission, low-VOC finishes and containment practices to protect occupant health during refinishing projects.
Table of Contents
- Quick Decision Checklist: Should You Hire a Pro or Refinish It Yourself?
- What Professional Office Wood Refinishing Services Include
- Step-by-Step: The Professional Refinishing Process
- DIY Basics: Materials, Steps, and Common Pitfalls
- Typical Costs and Timeline for Office Wood Refinishing
- Safety, VOCs, and Canada-Specific Regulations
- Preparing Your Office Environment for Refinishing Work
- Maintenance and Care Tips Post-Refinishing
- When a Professional Finish Is Worth the Extra Cost
- How Sigma Painting Can Help
- Sources
- FAQ
Quick Decision Checklist: Should You Hire a Pro or Refinish It Yourself?
Five factors decide this in about thirty seconds once you know what to look for.
- Piece value and age. A $150 bookshelf can absorb a DIY mistake. An executive desk or a boardroom table cannot.
- Construction type. Solid wood tolerates sanding and repair. Veneer and plywood do not, and a single aggressive pass can sand straight through the surface layer.
- Finish durability needed. Desks and conference tables see daily abrasion, coffee rings, and laptop heat. A weekend DIY finish rarely holds up the same way a sprayed, multi-coat professional topcoat does.
- Occupancy and timing. If the office runs five days a week, someone needs to plan around fumes, dust containment, and drying time.
- Safety exposure. Chemical strippers and heavy sanding in an occupied building raise real air-quality concerns.
Hire a pro if the piece is veneered, valued above a few hundred dollars, or needs to be back in service on a strict deadline. DIY if it’s solid wood, low value, and you can tolerate visible brush marks or an imperfect stain match.
If you do bring in a contractor, ask about after-hours scheduling and plastic containment around the work zone. That single conversation prevents most of the disruption complaints that come with office refinishing.
What Professional Office Wood Refinishing Services Include
A refinishing specialist or painting contractor doing this work regularly should offer more than “sand and stain.” Full-service providers typically bundle in repair work, color matching, and protective topcoating as one package rather than separate line items.
Expect a proposal to cover:
- Assessment of the wood species, existing finish, and hidden damage like water rings or veneer lifting.
- Repair of gouges, loose joints, and veneer patches before any finish goes on.
- Stripping or sanding to remove the old finish down to bare wood.
- Stain matching to blend new work with existing furniture or millwork in the space.
- Topcoating with a durable sealer suited to daily office use.
- Repainting metal frames or hardware and reupholstering chair seats, when the piece calls for it.
Where the work happens matters. Loose furniture, like a single desk or credenza, often travels to a shop with dust-extraction sanding and a spray booth, which produces a more even topcoat than anything sprayed in an open office. Fixed millwork, built-in shelving, or a boardroom table bolted to the floor gets refinished on-site instead, with plastic containment sealing off the work area. Commercial wood restoration providers generally build both options into their process depending on what the piece is and where it lives.
When comparing quotes, ask to see a portfolio of past work, request a fixed estimate rather than a rough range, and confirm there’s a written workmanship warranty. Also ask directly about low-VOC product use, particularly if the refinishing happens while staff are working nearby.
Step-by-Step: The Professional Refinishing Process
Here’s what actually happens once a crew starts on your furniture, from first inspection to final handoff:
- Assessment and testing. The technician identifies the existing finish type, checks veneer condition, and looks for hidden damage that won’t show up until stripping begins.
- Preparation and repairs. Loose joints get reglued, veneer patches fill gaps, and dents get filled or steamed out before anything else happens.
- Finish removal. Mechanical sanding works well on solid wood with a thick enough surface to sand safely. Chemical stripping suits detailed molding or veneer where sanding risks cutting through the top layer, though it demands better ventilation and containment.
- Stain and sealer application. Once the wood is bare and repaired, stain goes on first, followed by a sealer coat.
- Topcoat and cure. Water-based urethane and lacquer are the two common choices, each requiring multiple coats with light sanding between them before the piece is ready.
- Inspection and handoff. A final walkthrough confirms the finish is even and the warranty paperwork gets signed over.
Pro Tip: Ask your contractor to schedule the stripping and heavy sanding phases for a weekend or overnight shift. It cuts fume exposure for staff and lets the finish cure undisturbed before Monday.
DIY Basics: Materials, Steps, and Common Pitfalls
If you’re refinishing a small, solid-wood piece yourself, here’s the shortlist that actually matters:
- A safer, low-fume stripper alternative rather than a traditional methylene-chloride product
- A random-orbit sander with 120 to 220 grit sandpaper for the final smoothing passes
- Water-based stain and urethane topcoat
- A respirator rated for solvent fumes, plus gloves and eye protection
- Tack cloths to pull dust off the surface between coats
The sequence: clean the piece thoroughly, test a small area with stripper or sandpaper to see how the old finish responds, strip or sand the full surface, make any repairs, test your stain color on a hidden spot, apply the topcoat, and let it cure fully before use.
Most DIY failures trace back to the same handful of mistakes. Over-sanding veneer removes the thin top layer and exposes the substrate underneath, which no amount of stain will fix. Skipping proper cleaning before staining leads to poor adhesion and a blotchy finish. High-VOC strippers used indoors without ventilation create real fume buildup in a closed office. And brush strokes left visible in the final coat are the single most common giveaway that a finish was done at home rather than sprayed.
If you uncover veneer damage, structural cracks, or a finish that won’t respond to your test patch, stop. That’s the point where a priming and prep guide can only take you so far, and calling a professional saves the piece rather than ruining it further.
Typical Costs and Timeline for Office Wood Refinishing
Pricing scales with size, complexity, and how much repair work the piece needs before finishing even starts. Refinishing is generally more cost-effective than replacement when the underlying wood is structurally sound, with typical ranges running from a few hundred dollars for a small desk up to well over a thousand for a large conference table or extensive built-in millwork. Veneer repair, custom color matching, and metal hardware repainting all add to the base cost.
Timelines vary by method: shop work on a standalone piece often turns around faster than on-site refinishing around a fixed schedule, and water-based topcoats need several days to fully cure even though light use is possible within a day.
Before signing off, ask your quote to spell out:
- Whether transport and pickup are included or billed separately
- What containment measures protect surrounding furniture and flooring
- Whether the finish comes with a written warranty and what it covers
Safety, VOCs, and Canada-Specific Regulations
Traditional paint strippers containing dichloromethane (methylene chloride) carry documented health risks, and Canada’s Code of Practice for reducing dichloromethane emissions lays out specific containment and work practices for commercial furniture refinishing.
The regulatory backdrop: Canada’s VOC Concentration Limits for Certain Products Regulations set maximum VOC concentrations across many product categories, which is a large part of why water-based and low-VOC coatings have become the practical default for indoor office work rather than a marketing add-on.
Ask any refinisher directly whether they use gel-based or contained stripping systems and low-emission alternatives where the job allows it. Containment, ventilation, and PPE all add a little time and cost to a project, and a quote that skips those line items is usually cutting corners somewhere else.
Preparing Your Office Environment for Refinishing Work
The biggest source of friction in office refinishing isn’t the finish itself. It’s the disruption to everyone working around it.
Start by clearing the work zone completely. Anything staying in the room, filing cabinets, electronics, rugs, needs to move out or get covered with plastic sheeting, because sanding dust travels farther than people expect and stripper fumes can settle into fabric and carpet. If the piece being refinished is a desk or table that people rely on daily, plan for a temporary replacement or a workaround for however many days the process takes.
Scheduling matters as much as physical prep. Ask whether the crew can work after hours, on weekends, or in phases so one section of the office stays functional while another is under plastic. For fixed millwork or built-ins, that phased approach is often the difference between a smooth week and a shut-down office.
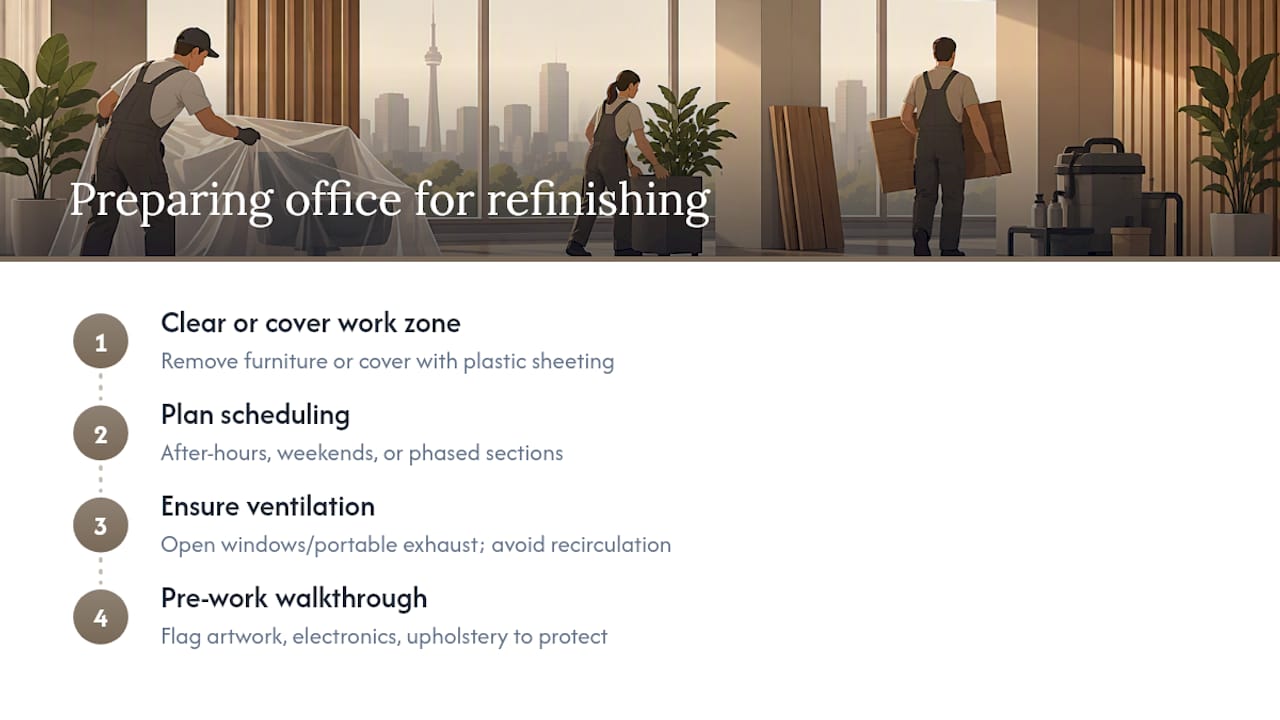
Ventilation deserves its own conversation before work starts. If windows can open or portable exhaust fans can run during stripping and initial coats, fume buildup drops considerably. Confirm HVAC systems aren’t recirculating fumes into other parts of the building, particularly in offices with shared air handling.
Finally, walk the space with whoever’s doing the work and flag anything nearby that shouldn’t get touched by dust or overspray: artwork, electronics, upholstered seating. A five-minute walkthrough before the first drop cloth goes down prevents most of the “who’s responsible for this” arguments that come up afterward.
Maintenance and Care Tips Post-Refinishing
A fresh finish is only as good as how it’s treated in the first few weeks. Water-based urethane needs roughly a week to ten days to reach full cure, even though light use is fine within a day. Avoid setting anything directly on the surface, especially rubber desk mats or plastic organizers, until that curing window closes, since trapped moisture or chemical interaction between materials can cloud a finish that hasn’t fully hardened.
Once cured, daily upkeep is simple. Wipe spills immediately rather than letting coffee or water sit, and use a soft, slightly damp cloth for regular dusting instead of dry paper towels, which can scratch a fresh topcoat over time. Skip ammonia-based glass cleaners and silicone furniture polishes. Both can dull or streak a urethane finish, and silicone buildup makes future touch-up work harder to blend.
Felt pads under lamps, monitor stands, and desk accessories prevent the small scuffs that add up over months of daily use. Coasters for drinks aren’t just a courtesy; they’re the cheapest insurance against the white ring marks that heat and moisture leave on wood.

Plan for a light maintenance coat every few years on high-traffic surfaces like conference tables and reception desks. Catching wear early, before it reaches bare wood, means a quick refresh instead of a full strip-and-refinish redo.
When a Professional Finish Is Worth the Extra Cost
The gap between a DIY finish and a professional one shows up months later, not on day one. A sprayed, properly cured topcoat resists coffee rings and daily wear in ways a brushed finish rarely matches, and controlling air quality during the work protects everyone still using the building. A written workmanship warranty is the real tell: it means the shop stands behind the wood office finishing they deliver. Ask for a fixed estimate and get that warranty in writing before work starts.
— Enrico
How Sigma Painting Can Help
A professional painting company can provide a durable finish without the guesswork of managing containment, stripping, and cure schedules yourself. Such teams often handle luxury wood office finishing both in-shop and on-site, backed by written estimates and a workmanship warranty on their projects.

When you request a quote, ask specifically about site protection during stripping and sanding, low-VOC finish options for occupied spaces, color and stain matching against existing furniture, and the expected cure schedule before the piece returns to daily use. Sigma Painting’s broader commercial and office painting work covers the same containment and scheduling questions this guide walks through, so estimates come back specific rather than vague. Solid wood elements like doors and trim often factor into the same project scope, and comparing solid wood against other materials is worth a look if you’re weighing repair against replacement elsewhere in the office.
Browse the full services list or run your project through the instant quote calculator to get a fixed number before committing to a schedule.
Sources
- Code of Practice for the Reduction of Dichloromethane Emissions from the Use of Paint Strippers in Commercial Furniture Refinishing and Other Stripping Applications
- Why Refinishing Old Furniture Is Worthwhile — Renowned Finishing
- Technical Data Sheet - Water-based varnish (Finico/Ardec)
FAQ
How Much Does It Cost to Refinish a Wood Desk?
A small desk generally falls in the low hundreds of dollars, while larger or veneered pieces cost more due to repair work and stain matching. Complexity, not just size, drives most of the price variation between projects. Sigma Painting provides fixed estimates after an on-site assessment rather than a rough phone quote.
How Do I Refinish an Old Wood Desk Myself?
Clean the surface, test a small area with a low-fume stripper or sandpaper, strip or sand the full piece, repair any damage, test your stain color on a hidden spot, then apply a water-based topcoat and let it cure fully. This works best on solid wood; veneer desks are far more forgiving in a professional shop.
How Do I Resurface My Desk?
Resurfacing usually means stripping or sanding down to bare wood, repairing damage, and applying new stain and topcoat rather than just cleaning the existing finish. If the desk has a veneer top, resurfacing calls for light sanding at most since aggressive sanding can cut straight through the veneer layer.
What Is the Best Finish for a Desk?
Water-based urethane is generally the best fit for office desks because it’s durable, low-odor, and low in VOCs compared to older oil-based options, which matters most in occupied spaces. It typically needs two to three coats with sanding between them and several days to fully cure.