

An epoxy floor coating is a two-part system, resin plus hardener, that chemically cures into a hard plastic-like layer bonded to concrete. Mixed together, the two parts react and harden permanently rather than drying like paint.
Epoxy makes sense as a DIY project on interior, low-moisture slabs with limited direct sunlight: think basements, laundry rooms, and garages without wide-open bay doors baking in UV all day. It’s a tougher call when your slab shows high humidity, damp readings, heavy hot-tire traffic, or major sun exposure, since those conditions favor a different chemistry or a pro-grade install.
Before you buy a single can, run these checks:
- Test the slab for moisture with a calcium chloride kit
- Inspect for oil stains, spalling, or old sealers that block adhesion
- Confirm how much UV exposure the space actually gets
Key Takeaways
Epoxy floor coating success depends less on the product you buy and more on moisture testing, surface profile, and following the manufacturer’s timing windows exactly.
| Point | Details |
|---|---|
| Definition matters | Epoxy is a two-part resin and hardener system that chemically cures into a hard, bonded surface. |
| Test before you coat | Run a calcium chloride moisture test and inspect for cracks, oil, and old sealers first. |
| Prep beats product | Diamond grinding creates a better surface profile than acid etching on contaminated slabs. |
| Timing windows are strict | Recoat windows like the roughly 30-hour primer-to-base rule can’t be skipped without sanding rework. |
| Consider a hybrid | Epoxy base with a polyaspartic topcoat combines adhesion with UV stability for garages. |
| Call a pro when it’s complex | Sigma Painting offers site evaluation, moisture testing, and CSP verification for readers who decide DIY isn’t the right fit. |
Table of Contents
- Epoxy Floor Coating Basics: What the Two-Part System Actually Is
- How Do You Know if Your Floor Is Ready for Epoxy?
- What Tools and Materials Do You Need for a DIY Epoxy Job?
- Step-by-Step: How to Apply an Epoxy Floor Coating
- Common Epoxy Application Mistakes and How to Fix Them
- Staying Safe While Working With Epoxy
- What Does an Epoxy Floor Cost, and When Should You Hire a Pro?
- Epoxy Floor Maintenance Tips and How Long It Actually Lasts
- Epoxy vs. Polyurethane and Other Coatings: What’s the Real Difference?
- A Contractor’s View on What Actually Determines Longevity
- When a Professional Site Evaluation Makes Sense
- Frequently Asked Questions
- Sources
Epoxy Floor Coating Basics: What the Two-Part System Actually Is
Every epoxy product you’ll find, from a $50 hardware store kit to a professional 100% solids system, works the same basic way. Part A is a resin, Part B is a hardener (often called a curing agent), and combining them triggers an exothermic reaction that locks the mixture into a rigid, chemically bonded surface. That reaction is why you’re working against a clock the moment you stir the two parts together.
Manufacturers sell epoxy in three main forms, and knowing the difference keeps you from buying the wrong product:
- Coatings, the thinnest option at roughly 4 to 30 mils, used for standard garage and basement floors
- Slurries, filled with aggregate and applied at 30 to 250 mils for higher wear resistance
- Mortars, the thickest at 125 mils or more, typically used to patch or rebuild damaged concrete before a topcoat goes on
Epoxy isn’t the only chemistry on the shelf. Polyaspartic and polyurea coatings cure in hours instead of days and resist UV yellowing far better, but epoxy remains the harder, more chemically resistant, and generally cheaper option where sunlight exposure is minimal. That tradeoff, cost and hardness versus speed and UV stability, drives most of the epoxy versus polyaspartic debate homeowners run into.
How Do You Know if Your Floor Is Ready for Epoxy?
Not every slab is a good candidate, and skipping this step is the single biggest reason DIY epoxy jobs fail within the first year. Start with a walk-around: look for oil staining that has soaked into the pores, cracks wider than a hairline, flaking or spalled concrete, and any existing sealer or paint that needs to come off first.
Moisture is the quiet killer. A calcium chloride test, sold at most hardware stores, gives DIYers a reasonable read on vapor emission from the slab over a 60 to 72 hour period. If you’re dealing with a below-grade basement or a slab with a history of dampness, in-situ relative humidity testing done by a professional is worth the money, since the ITRC notes epoxy floor coatings are sensitive to substrate moisture and can trap vapor that later causes delamination.
Once moisture is confirmed acceptable, you need the right concrete surface profile, often shortened to CSP. Diamond grinding removes laitance and opens the pore structure mechanically; acid etching does the same job chemically and costs less in tools.
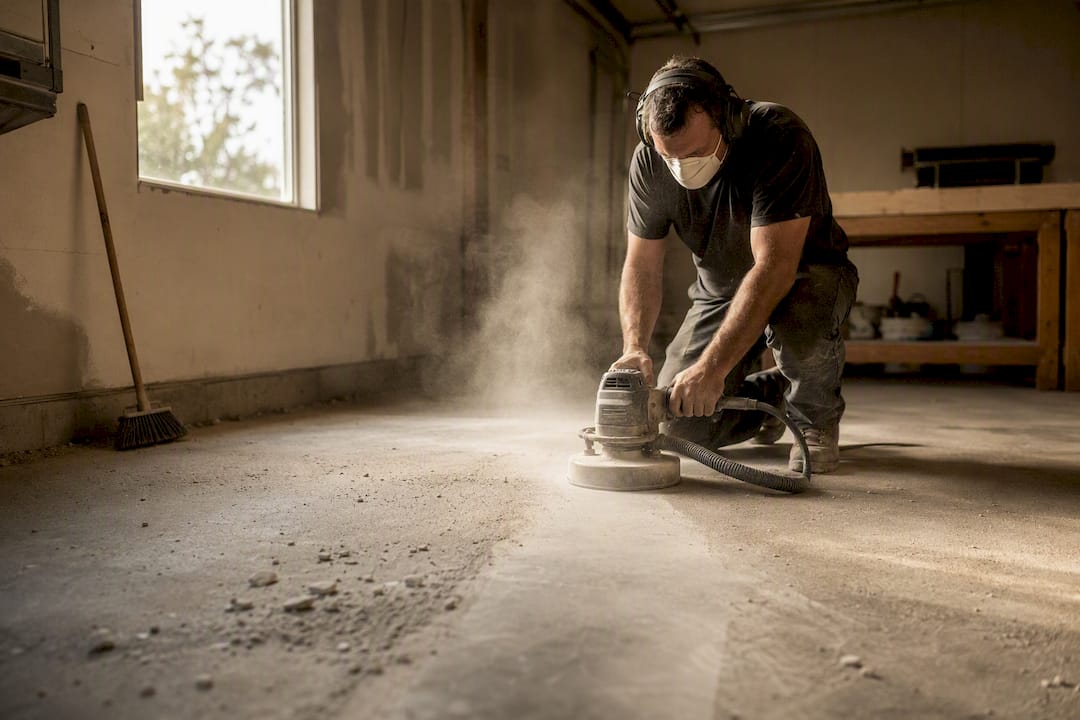
Pro Tip: Acid etching works fine on a clean, lightly used slab, but if you’re looking at oil stains, a sealed floor, or years of tire residue, rent a diamond grinder. Etching alone often can’t cut through heavy contamination, and that’s exactly where adhesion failures start.
What Tools and Materials Do You Need for a DIY Epoxy Job?
Gather everything before you mix a drop, since epoxy doesn’t wait for a hardware store run once the clock starts. On the tool side, you’ll want a diamond grinder or etching kit, a squeegee for spreading, low-nap rollers, a mixing paddle attached to a drill, and a wet mil gauge to confirm you’re laying down enough material.
Materials break into four categories:
- A primer matched to your base coat chemistry
- The base epoxy itself (resin and hardener)
- Decorative flakes, optional, for texture and hiding minor imperfections
- A topcoat, sometimes with added grit for slip resistance
Don’t skip personal protective equipment: a respirator rated for organic vapors, chemical-resistant gloves, eye protection, and cross-ventilation for the space you’re coating.
Step-by-Step: How to Apply an Epoxy Floor Coating
Sequence and timing matter more than technique here. Rush a step or skip a wait window and you’ll be troubleshooting bubbles or peel-up instead of parking your car on a finished floor.
- Clean and degrease the entire slab, removing oil, dust, and any loose debris.
- Repair damage. Fill spalls and cracks with an epoxy mortar or patching compound and let it cure fully before moving on.
- Establish the CSP through diamond grinding or acid etching, matched to how contaminated the slab is.
- Confirm moisture levels with a calcium chloride test. A damp slab now means a delaminated floor later, no matter how well you prep otherwise.
- Mix and apply primer, spreading with a squeegee and back-rolling for even coverage. System Three recommends applying primer during cooler parts of the day to reduce outgassing, since warm slabs release air that can bubble up through wet epoxy.
- Apply the base coat within the manufacturer’s recoat window, broadcasting decorative flakes into the wet epoxy if you’re using them.
- Apply the topcoat, adding an anti-slip additive if the space needs it.
- Cure and return to service on the manufacturer’s schedule.
Pot life is the working time you have once resin and hardener are combined, typically 20 to 40 minutes depending on temperature and batch size. Heat speeds up the reaction and shortens your window; cold slows it down and can leave the coating tacky. Humidity above what the technical data sheet allows increases the odds of a hazy or blushed finish.
Timing callout: Recoat windows are not flexible suggestions. System Three’s own guidance flags a roughly 30-hour window between primer and base coat for some of its systems, and missing it means sanding the surface before you can move forward. Most residential epoxy floors handle light foot traffic within 24 hours and vehicle weight after 3 to 7 days, though full chemical cure often takes 7 to 14 days.
Pro Tip: Mix small batches rather than one giant bucket. A smaller volume generates less heat during the exothermic reaction, buying you more working time and a more even application.
Common Epoxy Application Mistakes and How to Fix Them
Most DIY epoxy failures trace back to three culprits: moisture, contamination, and rushed timing. Here’s what to watch for and what it usually means.
- Bubbles or outgassing almost always mean the slab was warm when primer went on, or the concrete wasn’t fully cured before coating
- Poor adhesion or peeling points to inadequate surface profile, often from acid-etching a slab that needed grinding instead
- Yellowing shows up on epoxy exposed to UV, since standard epoxy lacks the UV stability that polyaspartic topcoats offer
- Fisheyes or craters usually trace back to leftover oil or silicone-based residue that wasn’t fully degreased
A failed bond looks obvious once you know what to check: tap the surface and listen for a hollow sound, or look for lifting at seams and edges. If you find delamination, there’s no patching your way out of it. You strip the coating back to bare concrete and start the prep process over.
Staying Safe While Working With Epoxy
Two-part epoxy resins off-gas volatile organic compounds while curing, so treat ventilation as mandatory, not optional. Open windows, run fans to move air out of the space, and wear a respirator rated for organic vapors, not just a dust mask.
- Wear chemical-resistant gloves and eye protection during mixing and application
- Keep unused hardener and resin sealed and stored away from heat sources
- Never pour leftover mixed epoxy down a drain; let it cure solid in a disposable container and dispose of it as solid waste
- Always check the manufacturer’s Safety Data Sheet for product-specific handling and first-aid instructions
What Does an Epoxy Floor Cost, and When Should You Hire a Pro?
DIY epoxy kits generally run cheaper up front than hiring out, but the math shifts once you factor in rental equipment, wasted material from a botched batch, and your own time. Region, square footage, and how much surface repair the slab needs all swing the final price significantly, so treat any number you see online as a starting point rather than a quote.
Hiring a professional makes sense when any of these apply:
- Your moisture testing comes back high, requiring a vapor-barrier system a DIY kit isn’t rated for
- The slab has major cracking or spalling that needs structural-grade repair before coating
- You don’t have access to a diamond grinder or don’t want to rent one
- You want a premium decorative flake or metallic finish with tight tolerances
- You’re on a deadline and can’t afford a failed batch setting you back a week
Worth noting: retail DIY kits tend to be lower-solids, water-reducible formulations that go on easier but don’t hold up as well under hot-tire pickup compared to the 100% solids systems contractors use. If your slab checks every box on this list, doing it yourself is a reasonable weekend project. If two or three items give you pause, that’s your signal to bring in help before spending money on materials you might have to strip back out.
Epoxy Floor Maintenance Tips and How Long It Actually Lasts
Epoxy floors are low-maintenance, not no-maintenance; for more on keeping your space tidy after installation, check out these simple tricks for organizing your garage. Sweep regularly to keep grit from scratching the topcoat, mop with a pH-neutral cleaner, and spot-treat oil drips before they sit long enough to stain.
Expect a DIY residential epoxy floor to last a moderate lifespan for residential garages with regular vehicle traffic in a garage seeing regular vehicle traffic. Heavier UV exposure and inconsistent cleaning push that number toward the lower end. Basements and light-use spaces often stretch well past that range. Minor scuffs or a dull topcoat usually just need a fresh topcoat recoat rather than a full strip and redo, which is one of epoxy’s better long-term advantages over some alternative finishes.
Epoxy vs. Polyurethane and Other Coatings: What’s the Real Difference?
Homeowners researching epoxy floor coating basics almost always run into polyurethane and polyaspartic as alternatives, and the differences matter more than marketing copy usually admits. Epoxy is thick, builds film quickly, and bonds aggressively to properly prepped concrete, which is exactly why it’s the standard base coat even in hybrid systems. What it doesn’t do well is resist ultraviolet light. Left uncovered, standard epoxy will yellow and chalk over a few years of sun exposure.
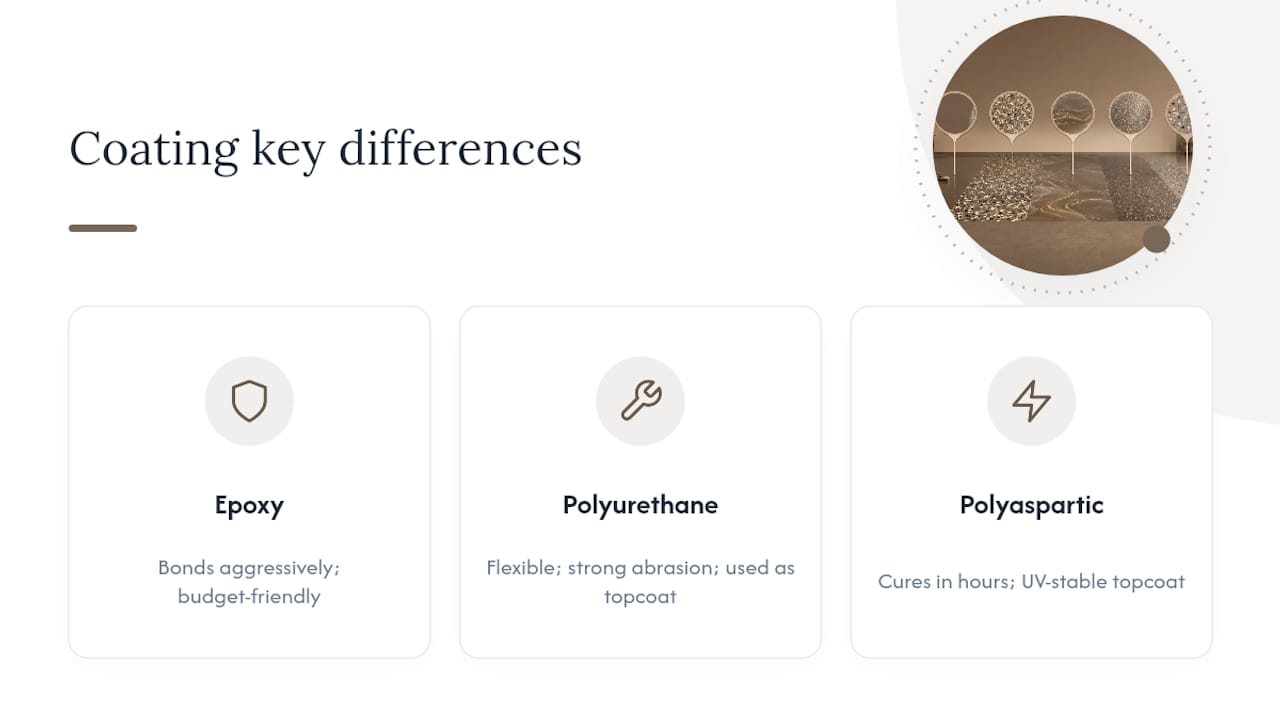
Polyurethane, often applied as a topcoat over epoxy rather than as a standalone floor system, brings flexibility and strong abrasion resistance. It handles thermal expansion and contraction better than straight epoxy, which matters in garages that swing from freezing to hot across a Canadian year. Polyaspartic, a newer polyurea-hybrid chemistry, cures dramatically faster (often within hours rather than days) and holds its color under UV far longer than epoxy.
None of this makes epoxy obsolete. It’s still the most budget-friendly option with the best track record for adhesion on properly prepped concrete, and it remains the default choice for basements, interior rooms, and any space where sunlight isn’t a daily factor. The smartest move for a lot of garage projects isn’t picking one chemistry over the other. Contractors frequently recommend an epoxy base coat topped with a polyaspartic finish, pairing epoxy’s adhesion with a UV-stable, fast-curing top layer. That hybrid approach shows up constantly in the epoxy vs. polyaspartic garage floor conversation for good reason: it solves both weaknesses at once.
A Contractor’s View on What Actually Determines Longevity
Surface prep decides how long an epoxy floor lasts far more than which brand of resin you buy. A perfectly mixed, expensive epoxy poured over a poorly ground or still-damp slab will fail before a cheaper product installed correctly. If you’re torn between straight epoxy and a hybrid polyaspartic topcoat, spend the extra money on the topcoat before you spend it upgrading the base coat.
When a Professional Site Evaluation Makes Sense
If your moisture readings come back high, your slab has damage beyond a simple patch, or you’d rather not gamble a weekend and a few hundred dollars in materials on a first attempt, a professional evaluation removes the guesswork. Sigma Painting handles surface assessment and premium finish work across residential and light commercial properties in the Greater Toronto Area, backed by the same prep discipline this guide walks through: moisture checks, verified concrete surface profile, and mil-thickness confirmation during application, not just at the end.

A site evaluation typically covers:
- Moisture testing to confirm the slab is dry enough to coat safely
- CSP verification to catch adhesion problems before they’re baked into the floor
- Wet mil thickness checks throughout application, not just a final walk-through
Related repair work like drywall repair or water damage restoration often needs to happen before a coating goes down, and Sigma Painting can fold that into a single project plan. If your slab or your timeline has you leaning toward hiring out, request a quote through Sigma Painting’s interior painting services and get a straight answer on scope and cost before you commit.
Frequently Asked Questions
Is epoxy floor coating a good DIY project for a first-timer? Yes, for low-moisture interior spaces without heavy UV exposure. Success depends on moisture testing and proper surface prep more than skill with a roller.
How long does epoxy floor coating take to fully cure? Light foot traffic is usually fine after 24 hours, vehicles after 3 to 7 days, with full chemical cure often taking 7 to 14 days depending on temperature and humidity.
What’s the difference between epoxy paint and epoxy coating? Epoxy paint is a thin, water-based product with epoxy additives mixed into standard paint, offering minimal durability. A true epoxy coating is a two-part resin and hardener system that chemically cures far harder and thicker.
Can I apply epoxy over a damp basement floor? Not without addressing the moisture first. Damp slabs cause delamination, so test with a calcium chloride kit or professional relative humidity testing before coating.
Do I need to grind my garage floor before epoxy, or is acid etching enough? Acid etching works on clean, lightly used slabs. Heavily stained, sealed, or contaminated concrete typically needs diamond grinding to create an adequate surface profile.
Sources
- TS12. ITRC: Epoxy Floor Coatings (EFCs)
- The Ultimate Guide to a Successful Garage Floor Epoxy Application - System Three Resins
- Epoxy Flooring: The Complete Guide | Sherwin‑Williams
- Epoxy vs Polyaspartic vs Polyurea: Which Coating Is Right for You? | EpoxyPros
- Polyaspartic vs Epoxy Garage Floor Coatings: Which Actually Wins? | All American Concrete Coating


