
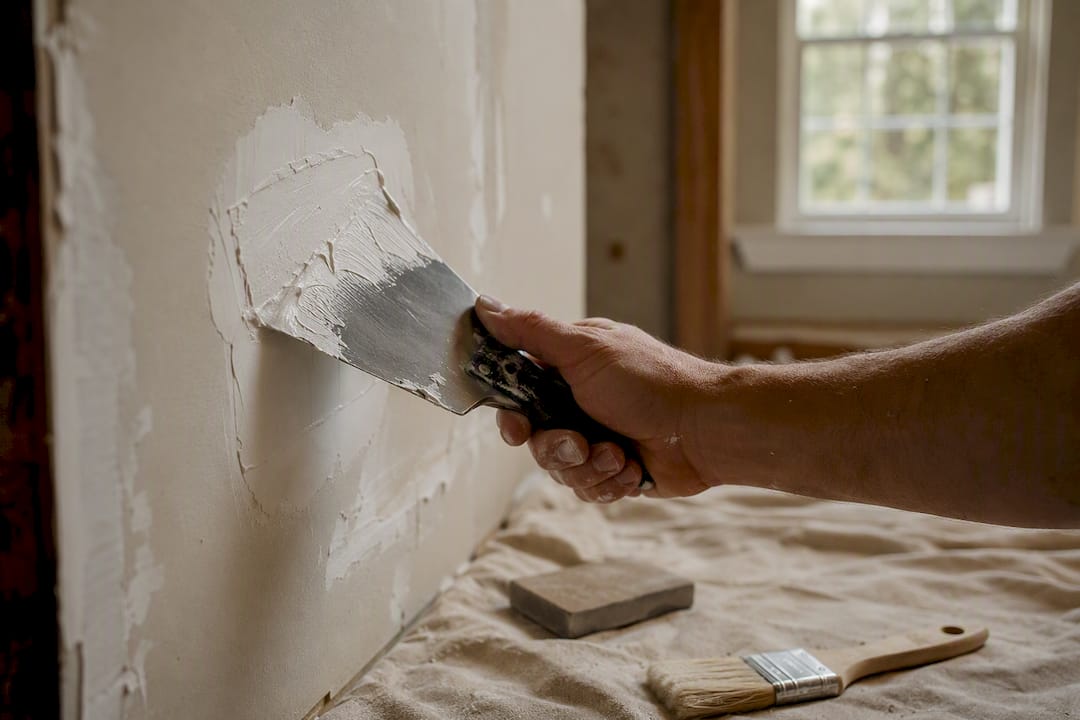
Yes, repair the damage first, then prime the patched area (or the full wall, in many cases) before you pick up a roller. Skipping either step is why so many DIY paint jobs look fine from across the room and rough up close.
Here’s the short version of drywall repair before painting, in order:
- Match the repair method to the damage size (a nail hole and a doorknob hole are not the same job).
- Use setting-type compound for structural fill on anything bigger than a small patch, then finish with premixed mud.
- Sand and feather the edges until you can’t feel where the patch ends.
- Clear off every bit of dust before priming.
- Prime the patch, or the whole wall if light is harsh or patches are numerous, then paint.
Trade guidance consistently treats prep as the biggest factor in how long a paint job lasts, more than the paint brand or the number of coats. Rush the patching and priming, and you’re often repainting within a couple of years.
Key Takeaways
Drywall repair before painting succeeds when the repair method matches the damage size, the mud sequence goes setting-type then premixed, and every patch gets primed before paint.
| Point | Details |
|---|---|
| Match method to damage size | Use spackle for pinholes, mesh for 1 to 4 inches, a California or backed patch for doorknob-sized holes, and full panel replacement past 8 inches. |
| Use the two-compound workflow | Setting-type compound handles structural fill; premixed topping compound finishes it for a smoother, more shrink-resistant result. |
| Feather and sand carefully | Widen your knife with each coat, sand only until flush, and never sand into the drywall’s paper face. |
| Prime before you paint, always | Primer prevents flashing by equalizing porosity between patched compound and the surrounding painted wall. |
| Hire out complex or large jobs | Sigma Painting’s drywall repair and interior painting services handle water damage, texture matching, and multi-room projects with a guaranteed finish. |
Table of Contents
- Tools and Materials You Need Before You Start
- How Do You Assess Drywall Damage Before Repairing It?
- Step-By-Step Drywall Patching Techniques by Size
- Sanding and Feathering the Patch Until It Disappears
- Matching Wall Texture Before You Prime
- Why Priming Patched Drywall Matters More Than People Think
- How to Apply Paint After Priming So Patches Stay Hidden
- Fixing Visible Seams, Flashing, and Cracked Patches
- When Should You Call a Professional Instead of DIYing It?
- What Actually Makes a DIY Patch Look Homemade
- Get a Guaranteed Finish Without the DIY Guesswork
- Sources
Tools and Materials You Need Before You Start
Buying the wrong compound or discovering you’re out of sandpaper mid-patch wastes a Saturday. Stock these before you cut into the wall.
Hand tools: a 6-inch taping knife for small work, a 10 to 12-inch knife for feathering wider coats, a flexible joint knife, a utility knife for cutting damaged drywall, and a sanding sponge or block loaded with 120 to 150 grit paper.
Materials: lightweight spackle for pinholes, premixed topping compound for finish coats, setting-type (hot mud) compound for structural fills, self-adhesive mesh patches, paper tape, drywall screws or backing strips, and both a PVA drywall primer and a stain-blocking primer on hand for different situations.
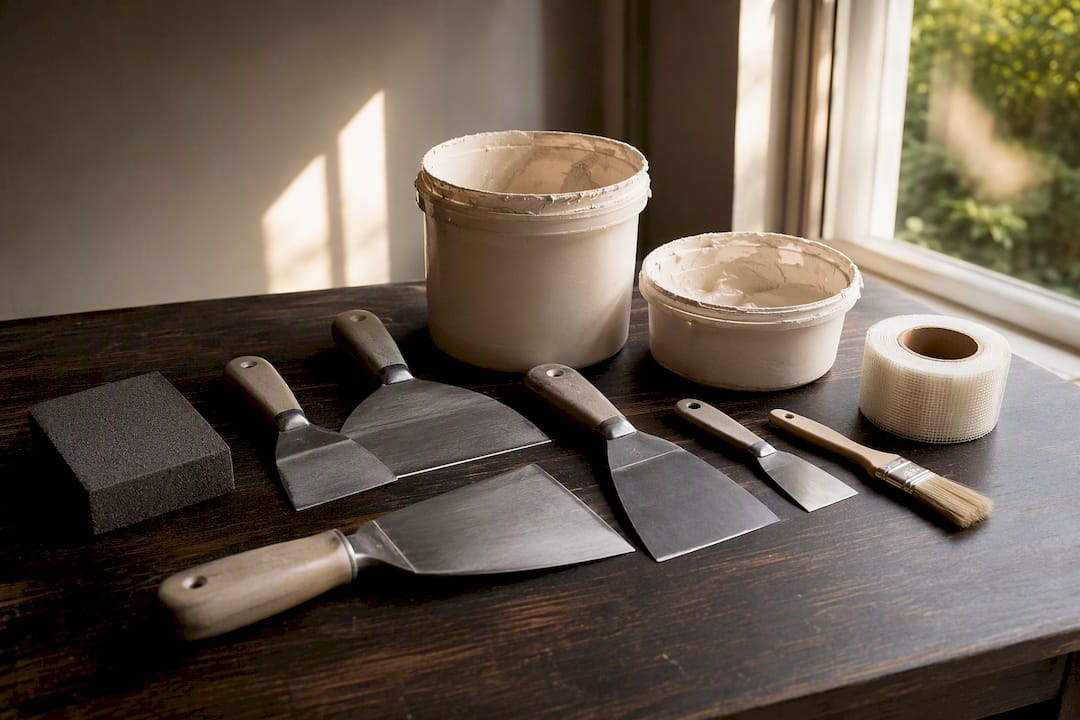
Small equipment: a 4 or 8-inch roller with nap matched to your existing wall texture, a small brush for cutting in edges, a damp microfiber cloth or tack cloth for dust, drop cloths, and a dust mask or respirator with eye protection for sanding.
Budget shortcuts exist. A drywall patch kit handles most 1 to 4 inch holes without buying separate mesh and mud. If you’re new to this, a 45-minute setting compound is more forgiving than the 90-minute version because you get a longer working window before it starts to firm up.
How Do You Assess Drywall Damage Before Repairing It?
The size of the hole tells you almost everything about which repair method to use. Get this wrong and you’ll either over-engineer a nail hole or under-engineer a doorknob hit that comes back to bite you in six months.
- Pin holes and nail holes: dab of spackle, no reinforcement needed.
- 1 to 4 inch holes: self-adhesive mesh patch and joint compound handle these well.
- 4 to 8 inch holes (doorknob range): a California patch (also called a hot patch) or a backed patch outperforms a mesh kit here because mesh alone tends to flex and crack over a wider span.
- 8 inches and larger: you’re replacing a section of panel, adding backing blocks behind it, and taping and mudding it like new drywall.
Beyond size, a few conditions should change your plan. Textured walls, patches near studs, or repairs close together on the same wall often mean priming the entire wall instead of just the patch, since spot-priming several nearby areas tends to create visible blotches anyway. Water stains or any hint of mold are a stop sign. Don’t paint over either; the moisture source needs to be fixed and the area needs to dry out completely, and a stain-blocking primer needs to go down before anything else.
A single nail hole from a picture frame is a five-minute cosmetic fix. A hole from a doorknob, a hole around a busted anchor, or anything involving water damage calls for real structural repair, and if you’re staring at cracked plaster, sagging drywall, or a musty smell behind the wall, that’s the point to call a professional rather than keep patching.
Step-By-Step Drywall Patching Techniques by Size
Once you know which category your damage falls into, the process is mostly the same logic scaled up: fill, reinforce if needed, feather, sand, prime. Here’s how each tier actually plays out.
1. Nail holes and pinholes. Press lightweight spackle or premixed compound into the hole with a flexible knife, slightly overfilling since it shrinks a little as it dries. One or two thin coats is plenty. Let it dry (usually a few hours for spackle), sand lightly with 150 grit, and spot-prime before painting.
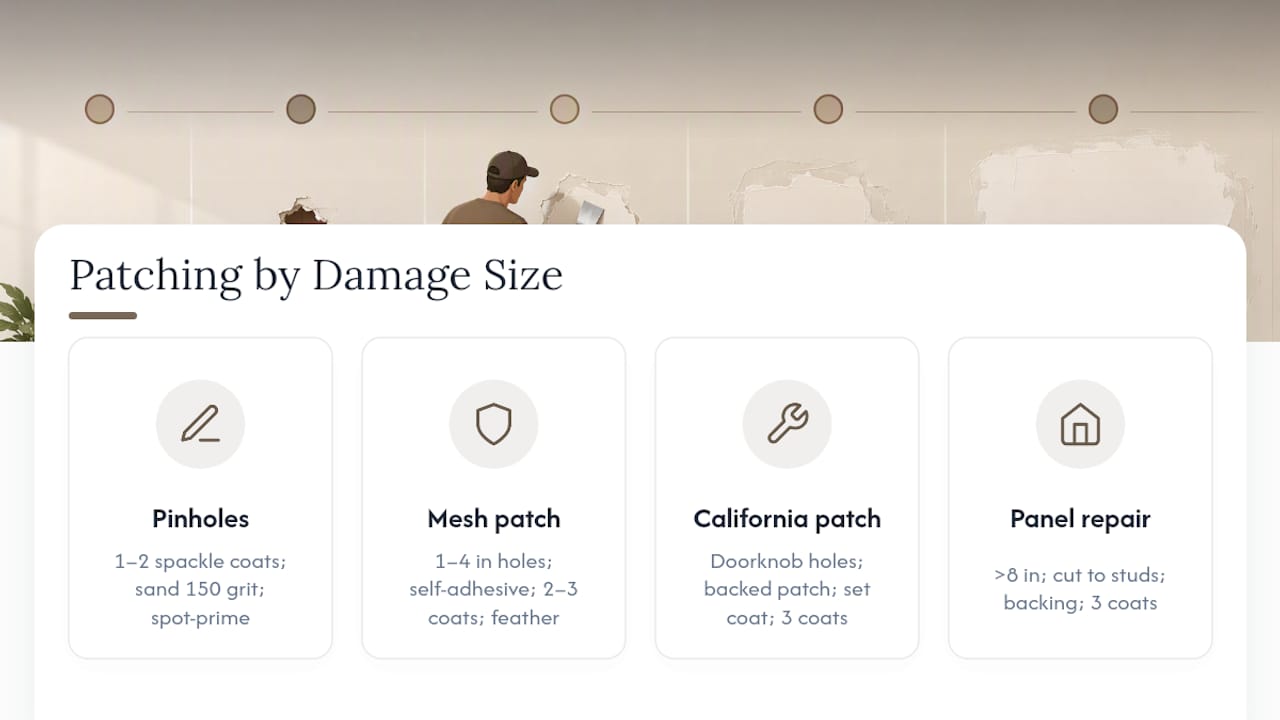
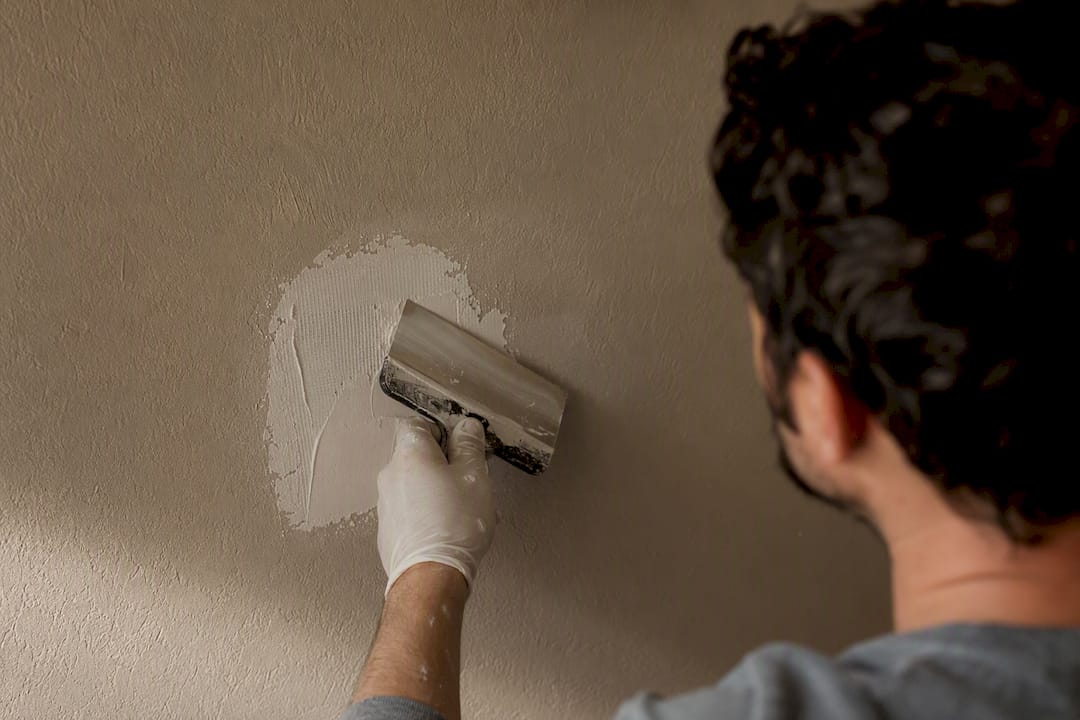
2. Mesh patches for 1 to 4 inch holes. Clean loose debris from the hole, then center the self-adhesive mesh patch over it. Load your knife with joint compound and press it firmly through the mesh in one direction, forcing the mud into the weave rather than dragging it across the surface. Let the first coat dry, then apply a second and third coat with progressively wider knives, feathering each pass 2 to 6 inches beyond the last. Sand lightly between coats only if you see ridges; otherwise wait until the final coat is fully dry.
3. California patch or backed patch for doorknob-sized holes. Cut a piece of drywall slightly larger than the hole, then score and snap off the back paper flange around its edges, leaving about an inch of paper overhanging the drywall core on all sides. Test-fit the patch in the hole before mudding. Butter the back of the paper flange with setting-type compound and press it into place, embedding the paper flush against the wall around the opening. Once that sets, apply two more finish coats with a wider knife each time, for three coats total.
4. Full panel replacement for holes over 8 inches. Cut a clean rectangular opening back to the nearest studs, screw in backing blocks or furring strips behind the exposed edges, and fasten a new drywall patch to that backing. Embed paper tape into a first coat of setting-type compound over every seam, let it cure, then apply two more finishing coats with premixed compound, feathering well beyond the repair on all sides.
Pro Tip: Use setting-type compound for the first, structural coat on anything bigger than a mesh patch, then switch to premixed topping compound for the finish coats. Hot mud sets by chemical reaction instead of drying out, so it shrinks and cracks far less on the fill layer, while premixed mud sands smoother for those final passes.
Dry-time math matters here. A 45-minute setting compound is workable and ready to recoat in under an hour, while a 90-minute version buys you more time to work larger areas but delays your next coat. Premixed compound, by contrast, needs to dry fully overnight in most cases since it cures by evaporation, not chemical set. You’ll know a coat is ready to sand when it’s turned uniformly light in color with no dark or cool-to-the-touch spots. A cool patch under your palm means moisture is still trapped inside.
Sanding and Feathering the Patch Until It Disappears
Good sanding is what separates a patch you can feel with your fingertips from one that’s genuinely invisible. Load a sanding sponge or block with 120 to 150 grit and work in light circular motions, checking constantly with your fingers rather than relying on your eyes alone.
- Stop sanding the instant the patch feels flush with the surrounding wall; don’t keep going out of habit.
- Never sand hard enough to expose or fuzz the paper face of the surrounding drywall. Paper damage can’t be fixed with primer.
- Before your final sanding pass, run a clean, dry knife over the patch to knock down any ridges left from the mud application.
- Confirm flatness with a straightedge or just your fingertips, working outward from the center of the patch.
Feathering is really about your knife width, not the sanding. Each finishing coat should use a slightly wider knife than the last, spreading mud thinner and thinner as it moves away from the center of the repair, which is what makes the transition to the original wall gradual instead of abrupt.
Dust control matters more than most DIYers assume. Vacuum the area with a brush attachment first, then wipe it down with a slightly damp microfiber cloth. Dust left on the surface prevents primer from bonding properly, and that failure shows up as peeling or flaking months later.
Pro Tip: If you sand too aggressively and tear the paper face, don’t try to fix it with more sanding. Apply a thin skim coat of premixed topping compound over the torn area, feather it out, sand lightly once dry, then prime.
Matching Wall Texture Before You Prime
A flawless mud job can still look wrong if the surrounding wall has orange peel, knockdown, or skip trowel texture and your patch is dead smooth. Texture matching is often what separates an invisible repair from an obvious one.
Identify what you’re dealing with first. Orange peel looks like fine, even bumps and usually comes from an aerosol texture spray or a loaded roller dipped in thinned joint compound. Knockdown texture starts the same way, but the peaks get flattened with a wide knife a few minutes after spraying, before the compound fully sets.
- Practice your spray pattern on a scrap of cardboard first, not directly on the wall.
- For knockdown, time your flattening pass carefully; too early and it smears, too late and the knife won’t flatten anything.
- Feather the new texture into the old by overspraying slightly past the patch edges rather than stopping at a hard line.
Large areas with a very fine, even texture, like skip trowel over an entire ceiling, are worth handing to a professional. Getting a consistent hand-applied texture across ten square feet is a different skill than matching a two-foot patch. Texture also affects your priming decision: heavily textured repairs almost always look better with a full-wall prime rather than a spot prime, since texture variations catch light differently than smooth drywall does.
Why Priming Patched Drywall Matters More Than People Think
Joint compound and painted drywall absorb paint at different rates. Skip the primer and that difference shows up as a dull, flat patch surrounded by satin or eggshell sheen, a defect painters call flashing. Primer isn’t optional here; it equalizes suction across the whole surface so the topcoat dries to one uniform sheen.
The Gypsum Association’s finish standards back this up structurally, not just cosmetically. A Level 4 finish, embedded tape, multiple mud coats, and a coat of primer, is the trade standard for painted residential walls. Level 5 adds a full skim coat and is reserved for walls under harsh, glancing light where even a Level 4 finish shows texture variation.
| Primer Type | Best Use | Drying Notes |
|---|---|---|
| PVA/drywall primer | General patches, new drywall seams | Typically dry to touch in 1 hour, recoat in 2 to 3 hours |
| High-build drywall primer | Heavy feathering, uneven patch texture | Fills minor imperfections; check label for extended dry time |
| Stain-blocking primer (shellac or oil-based) | Water stains, smoke or nicotine marks | Blocks bleed-through; shellac-based dries fastest, often under an hour |
A brand like Benjamin Moore’s Fresh Start primer works well for standard patch work, while a stain-blocking formula from a manufacturer like DAP is the better call whenever water damage or old stains are in play.
Spot-prime a single isolated patch. Prime the entire wall when you’ve got multiple repairs scattered across it, when the wall will get semi-gloss or gloss paint where sheen differences are unforgiving, or when the room gets strong side lighting from a window. On timing, hot mud dries fast enough to recoat within the hour; premixed compound needs a full overnight cure. Give primer the full drying window listed on the can, usually a few hours, before you sand it lightly and move to paint.
How to Apply Paint After Priming So Patches Stay Hidden
Primer gets the surface ready, but sloppy paint application can still reveal a patch that was otherwise perfectly repaired. Two thin coats beat one thick one every time, since thick paint drags on the still-different texture underneath and telegraphs the patch outline.
- Use the same roller nap you used for primer so the paint texture stays consistent across the whole wall.
- Follow the paint can’s recoat window between your first and second finish coats; rushing this causes lap marks.
- Dark colors and rooms with strong window light usually need two full finish coats after primer, not one.
- Roll in a consistent W or N pattern, then tip off cut-in edges with a brush before the paint starts to set.
Once the final coat is dry, grab a flashlight and hold it parallel to the wall rather than pointed straight at it. This raking light exposes ridges, dips, and roller marks that look invisible under normal room lighting. If you spot a flaw, resist the urge to just slap more paint on it; a thin skim coat, light sanding, and a quick re-prime of that small area will fix it properly without building up a visible buildup of paint layers.
Fixing Visible Seams, Flashing, and Cracked Patches
Even careful repairs sometimes go sideways. Here’s how to read the failure and fix it without redoing the entire patch from scratch.
- Flashing (a dull patch amid shinier surrounding paint): the fix is almost always more primer, either spot-priming that one area again or priming the full wall if you’re seeing it in several spots.
- Cracking or shrinkage after the mud dried: usually means the first coat was applied too thick or you used premixed compound where setting-type belonged. Sand it back, re-mud the structural layer with setting-type compound, then finish with premixed topping compound.
- Mesh patch edges cracking on larger repairs: mesh alone often isn’t rigid enough past 4 inches. Upgrade to a California patch or add backing support behind it; movement at an unsupported seam is what causes cracks to keep coming back.
- Sanded too deep and tore the paper: don’t try to sand it flush. Apply a light skim coat of premixed topping compound, feather it out, sand lightly once dry, prime, and paint.
Pro Tip: A patch that keeps cracking in the same spot almost always points to a compound or reinforcement problem, not bad luck. Trace it back to which product you used for the structural fill before you patch it a third time.
When Should You Call a Professional Instead of DIYing It?
Some repairs are worth handing off, and knowing the line saves you from a redo. Water-damaged drywall, structural damage that goes past the surface, ceiling repairs (gravity makes every mistake up there worse), and damage spread across multiple rooms all sit past the reasonable DIY line for most homeowners.
- Water stains or soft, spongy drywall mean there’s likely an active leak; that needs diagnosis before any patch goes in.
- Large or numerous repairs across several rooms often make full-wall priming and texture matching a bigger job than a weekend allows.
- Complex or heavily textured ceilings are genuinely hard to match by hand and easy to get visibly wrong.
Professional crews bring dustless sanding equipment, industrial-grade stain-blocking primers, and the kind of texture-matching experience that comes from doing it dozens of times a month, plus a finish that’s guaranteed rather than hoped for. If you’re leaning toward hiring out, Sigma Painting’s drywall repair services cover exactly this kind of work.
Before a contractor visit, clear furniture away from the damaged area, take a few photos of the damage as it looks now, and have a rough idea of which rooms you want painted so the quote reflects the actual scope.
What Actually Makes a DIY Patch Look Homemade
Most visible patches trace back to the same handful of habits, not bad luck. Mud applied too thick on the first coat is probably the single biggest one; it shrinks unevenly as it dries and telegraphs a slight dome or dip that catches light from certain angles.
Skipping primer is the second big offender, and it’s the one homeowners are most likely to rationalize away because the patch looks fine right after the final sand. It’s the paint drying over the next day that reveals the sheen mismatch.
Over-sanding is sneaky because it feels productive. Every extra pass past the point of “flush” risks tearing paper or thinning the patch below the surrounding wall, and both problems are harder to fix than the original hole. And dust left behind before priming is the quiet failure point nobody notices until the primer starts flaking a few weeks later.
A trick worth keeping in your back pocket: a 45-minute setting compound turns a two-day medium repair into a same-day job if you’re comfortable working a bit faster between coats. It’s also worth practicing your texture spray pattern on a spare piece of cardboard before you go near the actual wall. It’s a five-minute test that prevents a repeat trip to the paint store.
Get a Guaranteed Finish Without the DIY Guesswork
Sigma Painting handles the parts of this process where DIY repairs most often go wrong: matching setting-type and premixed compound correctly, blending texture across an entire wall instead of just a patch, and choosing the right primer for water stains or heavy feathering. That’s the real advantage over tackling it solo. You get comprehensive prep, dust-controlled sanding, and a finish backed by a guarantee instead of a hope that the raking-light test comes back clean.

Sigma Painting’s drywall repair services cover everything from small patches to full water-damage restoration, and pair naturally with interior painting once the walls are ready. Every project includes a complimentary color consultation, so the paint choice and the repair work get planned together instead of as two separate headaches. If your project also involves trim or doors, a partner resource like One Day Doors & Closets covers color matching for adjoining surfaces.
Ready to see what your project costs before committing to anything? Run the numbers through Sigma Painting’s instant quote calculator and get a real estimate in minutes.
Sources
For deeper technical detail beyond this guide, see Lowe’s patch and repair guidance, The Home Depot’s drywall how-to, and Sherwin-Williams’ wall repair advice. Always follow the drying times printed on your specific compound and primer labels rather than general estimates, and wear a dust mask when sanding.
- Homeowner
- Touch-up paint and painting advice - Benjamin Moore
- How to patch and repair drywall - The Home Depot


