

Yes. Cedar deck staining protects the wood from UV breakdown and moisture damage while keeping that warm, honey-brown color from graying out. The short version: pick a penetrating semi-transparent or oil-based stain for the best mix of looks and longevity. Then spend more time on prep than you think you need to.
Before you buy a can, do three things:
- Test a small, hidden area with your chosen stain and let it cure fully.
- Check the forecast for a dry window with mild temperatures.
- Confirm the wood itself is dry enough to accept stain (more on that next).
Key Takeaways
Cedar deck staining works when thorough prep, correct wood moisture levels, and a penetrating stain suited to your climate come together.
| Point | Details |
|---|---|
| Check wood readiness first | Confirm moisture is below roughly 15 to 19 percent before staining, especially on new cedar. |
| Remove mill glaze | Sand new boards to break the factory glaze so stain can actually penetrate the grain. |
| Choose stain by exposure | Semi-transparent oil-based stains like Ready Seal or Cabot suit high-sun decks best. |
| Treat end grain heavily | Coat cut ends and fastener holes until the wood stops absorbing stain. |
| Follow a recoat schedule | Plan on 1 to 2 years for transparent finishes, up to 5 for solid stains. |
| Call a pro for complex jobs | Sigma Painting offers full prep, premium stains, and warrantied cleanup for GTA homeowners. |
Table of Contents
- When Is the Right Time for Cedar Deck Staining?
- Which Stain Actually Works Best on Cedar?
- How Do You Properly Prepare a Cedar Deck for Stain?
- How Do You Apply Stain to a Cedar Deck Step by Step?
- How Often Should You Maintain and Re-Stain a Cedar Deck?
- Why Does Cedar Stain Fail? Common Problems and Fixes
- When Should You Hire a Pro Instead of DIY?
- Get Professional Cedar Deck Staining Done Right
- Frequently Asked Questions
- Sources
When Is the Right Time for Cedar Deck Staining?
New cedar needs to weather before it will take stain evenly. Most mills apply a glaze during cutting that seals the surface and blocks penetration, so boards installed within the last few weeks often need to sit for 4 to 8 weeks, or longer in humid climates, before staining. Olympic’s application guidance recommends sanding that mill glaze off new boards rather than waiting it out entirely, since glaze does not always disappear on its own.
Test readiness with water. Sprinkle a few drops on the deck. If it beads up, the wood is not ready. If it soaks in within a few minutes, you’re good to go. A moisture meter is more precise: aim for a reading below roughly 15 percent before applying water-based stain.
Weather matters as much as wood condition:
- Pick a stretch of at least two to three dry days, since rain right after application can wash out an unfinished coat.
- Stay in the 50 to 85 degree Fahrenheit range. Cold slows curing; heat causes the stain to flash off before it penetrates.
- Avoid direct midday sun on the boards while working, which dries the surface too fast and invites lap marks.
Which Stain Actually Works Best on Cedar?
Opacity is the first decision. Transparent stains show off the grain but offer the shortest UV protection. Semi-transparent stains add pigment for better sun resistance while still letting the wood’s character show through. Solid stains behave more like thin paint, hiding grain entirely but lasting longest between coats.
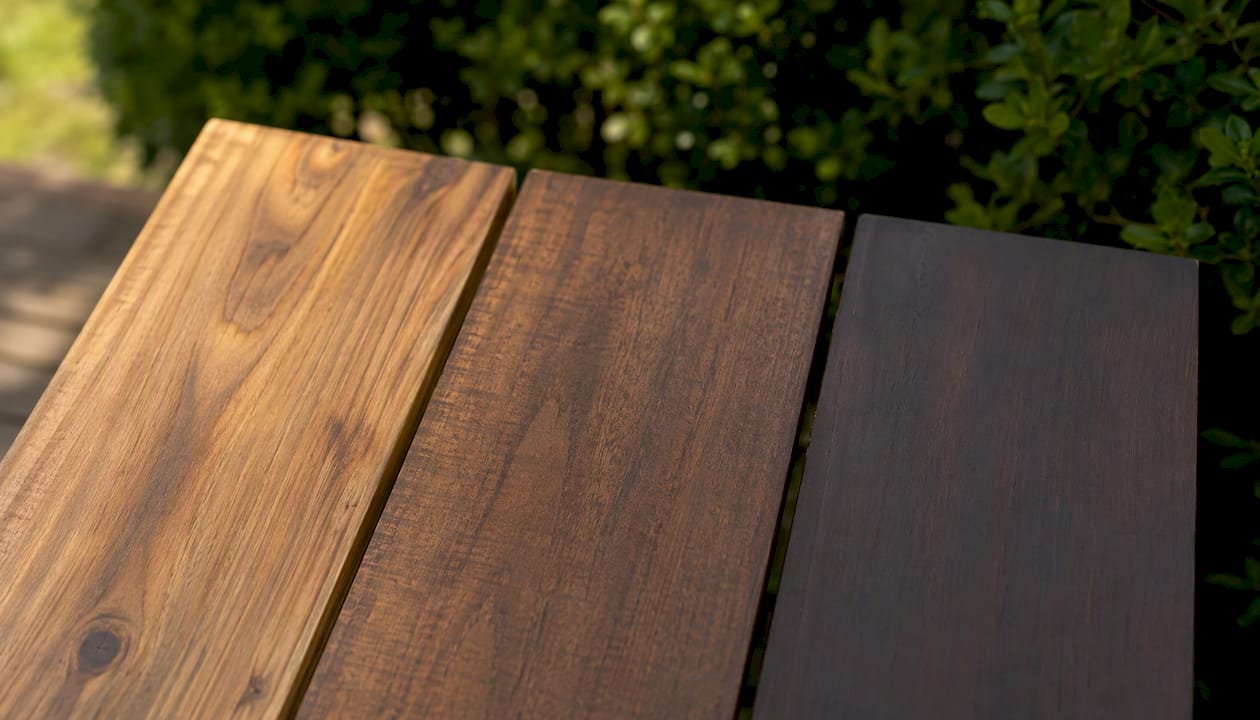
Oil-based formulas penetrate cedar’s open grain more deeply and tend to self-level, which helps hide brush strokes. BobVila’s testing found penetrating oil-based options generally outlast water-based alternatives on horizontal surfaces, though water-based stains dry faster, carry lower VOCs, and clean up with soap and water instead of mineral spirits.
Here’s how the products homeowners actually find on shelves stack up:
- Behr Naturaltone is a widely available semi-transparent oil-based option with solid UV protection for the price.
- Cabot Australian Timber Oil is known for deep penetration into dense grain, a good fit for older or drier cedar.
- Olympic stain and sealant combos simplify the process into one step, useful for smaller decks or first-time DIYers.
- Defy Extreme Semi-Transparent is a water-based formula with strong UV blockers, a good pick if VOCs are a concern.
- Ready Seal 512 Natural Cedar is an oil-based, no-lap-mark formula that many pros favor for large surfaces.
- Minwax PolyShades blends stain and polyurethane, better suited to furniture-grade cedar accents than full deck surfaces exposed to foot traffic.
Before deciding, check the label’s horizontal-surface coverage rate, since decking wears faster than siding and manufacturers often list separate figures for each.
How Do You Properly Prepare a Cedar Deck for Stain?
Preparation determines whether stain lasts one season or five. Skipping steps here is the single biggest reason DIY jobs fail early.
- Clear the deck completely, sweep debris from between boards, and wash with a cedar-safe deck cleaner or an oxygen bleach solution to lift dirt and gray weathering.
- On new boards, remove mill glaze with light sanding, a 60 to 80 grit is usually enough, following the manufacturer’s abrasive recommendation.
- Rinse thoroughly and let the deck dry fully. Depending on humidity, that can take anywhere from 24 to 72 hours. A moisture meter reading below 15 to 19 percent confirms readiness.
- Use a low-pressure rinse only. High-pressure washing tears cedar’s soft fibers and creates fuzzy, uneven surfaces that never stain well again.
- If you’re removing an old finish by sanding or scraping, treat it as a potential lead hazard on decks built or coated before 1978. Wear a NIOSH-approved respirator, contain dust with a HEPA vacuum, and follow EPA lead-safety guidance before starting.
Pro Tip: Save your leftover cleaner and stain containers for proper drop-off instead of the trash. ProductCare Ontario runs designated recycling programs for paint and stain packaging.
How Do You Apply Stain to a Cedar Deck Step by Step?
Gather your tools before you start:
- A natural or synthetic-blend brush for oil-based stain, or nylon bristles for water-based formulas.
- A roller with a medium nap for open field areas, plus an extension pole to save your back.
- A pump sprayer if you’re covering a large deck, though back-brushing afterward is still necessary.
- Rags, a 5-in-1 scraper for touch-ups, and painter’s tape for railings or siding you want protected.
Work in short runs of two to three boards at a time, moving with the grain rather than across it. RealCedar’s finishing guide recommends back-brushing every section after rolling, which pushes stain deeper into the grain and evens out any shiny, over-applied spots before they set.
End grain and cut edges soak up far more stain than face grain, since that’s where moisture enters the board fastest. Apply extra coats to ends and fastener holes until the wood stops absorbing, a point pros call refusal.
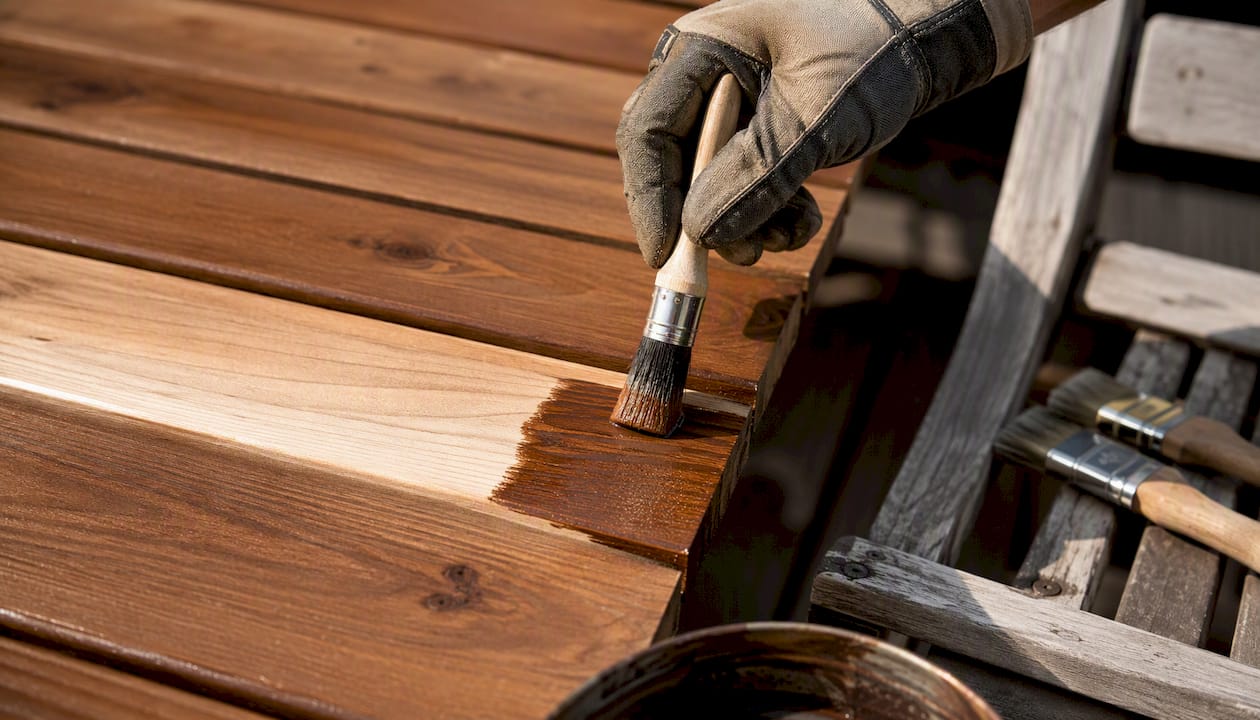
Most semi-transparent oil-based products need a single coat; solid stains and some water-based formulas benefit from two, with a recoat window of two to four hours in warm, dry conditions and up to 24 hours in cooler weather. Field testing on real decks shows oil-based semi-transparent stains commonly hold up for 2 to 3 years before needing a fresh coat, depending on sun exposure and foot traffic.
Pro Tip: Oil-soaked rags can combust spontaneously as they dry. Lay them flat outside to dry completely, or submerge them in a sealed metal container of water before disposal.
How Often Should You Maintain and Re-Stain a Cedar Deck?
Recoat frequency depends entirely on the finish you chose. Transparent stains typically need a fresh coat every 1 to 2 years. Semi-transparent stains stretch to 1 to 3 years. Solid stains can last 3 to 5 years before they start to fail. Full-sun exposure, pool-side splashing, and heavy foot traffic all shorten those windows.
A simple seasonal routine keeps you ahead of full restaining:
- Sweep and rinse the deck each spring, checking for mildew spots or dark discoloration.
- Inspect fasteners and boards for movement or splitting after winter freeze-thaw cycles.
- Spot-clean high-wear areas like stair treads and entry points more often than the rest of the deck.
- Use a wood brightener and light sanding on faded patches instead of jumping straight to a full recoat.
Decks that get direct afternoon sun year-round often need attention closer to the shorter end of your finish’s typical window.
Why Does Cedar Stain Fail? Common Problems and Fixes
Blotching usually traces back to inconsistent prep or mixing oil and water-based products across coats. Brighten the wood, sand lightly, and stick to one product family going forward.
Lap marks happen when a section dries before the next one overlaps it. Work in small runs and keep a wet edge; if marks already set, a light sanding and fresh thin coat usually blends them out.
Peeling or flaking means poor adhesion, often from staining over a damp or dirty surface. Test adhesion with tape; if the finish lifts, strip it back before recoating.
Dark spots are almost always mildew. Clean with an appropriate deck cleaner and let the area dry fully before spot-treating with stain.
When Should You Hire a Pro Instead of DIY?
Large square footage, ornate railings, or a deck that’s been neglected for years can turn a weekend project into a multi-week ordeal. Rot, soft spots, or structural movement are signs to call a contractor before staining anything.
A quality contractor handles full prep, removes mill glaze properly, seals end grain, and backs the work with a cleanup plan and warranty. Before hiring, ask what stain brand they use, what workmanship guarantee they offer, and whether they can show photos of past cedar projects.
What Most Homeowners Get Wrong About Deck Staining
Most people obsess over which can to buy and rush past the prep work that actually determines how long it lasts. The stain matters less than the surface it’s going onto.
Get Professional Cedar Deck Staining Done Right
If prep work, sanding schedules, and weather windows sound like more than you want to manage on a ladder, Sigma Painting handles cedar deck staining across the Greater Toronto Area with the same standard we bring to interior and exterior painting projects.

Every job includes full surface prep, mill glaze removal on new cedar, premium stain products matched to your deck’s exposure and wear pattern, end-grain sealing, and complete site cleanup when we’re done. We also handle stair staining if your steps need the same attention as the deck surface. Get a project estimate through our deck and fence staining page or run the numbers yourself with our instant quote calculator to see what a professional finish costs before committing to a full DIY weekend.
Frequently Asked Questions
How long should a new cedar deck sit before staining? Most new cedar needs 4 to 8 weeks to shed mill glaze and start absorbing stain evenly, though sanding the glaze off speeds that timeline considerably.
What is the best stain for a cedar deck that gets full sun? Penetrating semi-transparent oil-based stains, like Ready Seal or Cabot Australian Timber Oil, tend to hold up best under direct UV exposure.
Can I use a power washer to clean cedar before staining? Only at low pressure. High-pressure washing damages cedar’s soft grain and creates a fuzzy surface that stains poorly afterward.
How many coats of stain does a cedar deck need? Most semi-transparent oil-based stains need one coat; solid stains and some water-based formulas often need two for full coverage.
Is it cheaper to stain a cedar deck myself or hire a contractor? DIY costs less upfront in materials, but a contractor’s warranty, proper prep, and end-grain sealing often extend the finish’s life enough to offset the labor cost over time.
Sources
- EPA — Lead
- How to Finish Western Red Cedar Decking — RealCedar
- How To Stain a Cedar Wood Deck — Olympic
- Best Exterior Cedar Wood Stain: 7 Options Compared — BobVila


