

The best trim paint for most homes is waterborne alkyd or urethane-acrylic enamel in semi-gloss. These formulas level like oil, clean up with water, and resist scuffs far better than plain acrylic latex. If you want the shortest possible answer: Benjamin Moore Advance and Sherwin-Williams Emerald Urethane Trim Enamel lead the pack for cabinets, doors, and baseboards that need to survive kids, pets, and vacuum cleaners for the next decade.
Here’s the quick shortlist, with the one trade-off you need to know about each:
- Benjamin Moore Advance — best all-around pick for baseboards and doors; waterborne alkyd leveling rivals oil, but full cure takes about a month.
- Sherwin-Williams Emerald Urethane Trim Enamel — toughest, most scuff-resistant film in hands-on testing; premium price reflects it.
- PPG Break-Through — fast-drying waterborne acrylic-alkyd that’s easier to recoat same-day; slightly less self-leveling than Advance if you rush it.
- Behr Alkyd (Marquee/Premium lines) — solid budget-to-mid performer from big-box stores; workable, but leveling lags the premium hybrids on close inspection.
- Cloverdale Paint and Dulux trim options — dependable regional choices with good coverage, worth checking if you’re near a pro dealer that carries them.
None of these are wrong choices. The difference comes down to how much patience you have for cure time versus how much toughness you need on day one.
Every one of these belongs to one of three paint families, and knowing which family you’re buying from tells you almost everything about how it will behave on your trim, your baseboards, or your kitchen cabinets. Testing across a dozen trim paints found that price tracked performance closely, with the best hybrids and urethane-acrylics running $35 to $93 a gallon and consistently outperforming cheaper acrylic latex on leveling and toughness. That’s the number that should anchor your budget conversation before you even look at brand names.
Key Takeaways
Waterborne alkyd and urethane-acrylic enamels in semi-gloss deliver the durability and leveling that make trim paint look professionally finished and last for years.
| Point | Details |
|---|---|
| Choose chemistry first | Waterborne alkyds and urethane-acrylics level like oil, resist yellowing, and clean up with water. |
| Semi-gloss is the default | It resists scuffs and cleans easily; save gloss for near-perfect surfaces and satin for low-traffic rooms. |
| Prep decides the outcome | Clean, sand, and prime with a high-hiding acrylic primer before any topcoat goes on. |
| Respect cure time | Waterborne alkyds need two to four weeks to fully harden, even though they’re dry to the touch in hours. |
| Hire Sigma Painting for whole-home jobs | Sigma Painting applies premium waterborne alkyd and urethane-acrylic finishes with full prep and a complimentary color consultation across the GTA. |
Table of Contents
- What Are the Different Types of Trim Paint?
- How Do Painters Test and Rate Trim Paint?
- Which Trim Paint Wins on Durability and Finish?
- How Do You Choose the Right Trim Paint?
- Prep and Primer: What Do You Need Before You Paint?
- What’s the Best Technique for Painting Trim?
- How Long Does Painted Trim Really Last?
- What Does Trim Paint Cost and Where Should You Buy It?
- What Do Contractors Know That Most DIYers Don’t?
- Why Chemistry Matters More Than the Brand on the Can
- When Does It Make Sense to Call a Painter Instead of DIY?
- Sources
What Are the Different Types of Trim Paint?
Trim paint splits into three chemistry families, and each one solves a different problem. Get this part right and the rest of your decision (sheen, brand, price) falls into place fast.
Acrylic latex is the workhorse. It’s water-based, dries quickly, cleans up with soap and water, and doesn’t yellow. The catch: standard acrylic latex doesn’t self-level as well as oil or hybrid formulas, so brush marks show more on flat trim surfaces unless you thin it slightly or roll and tip carefully. It’s a fine choice for low-traffic trim where speed and easy cleanup matter more than a mirror-smooth finish.
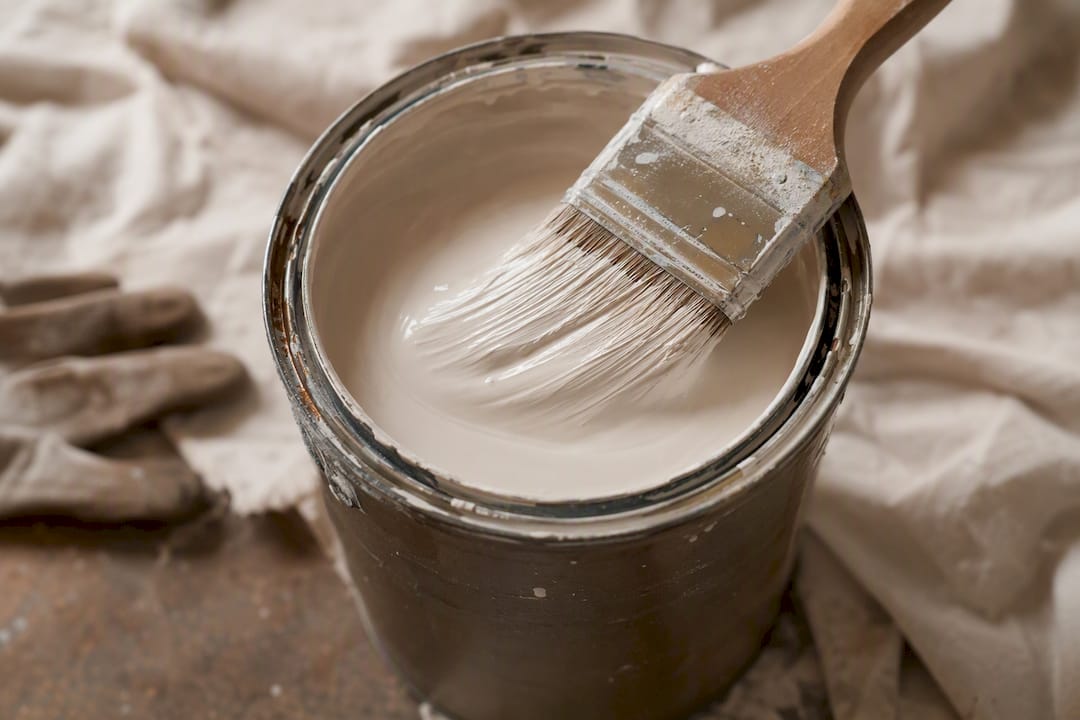
Waterborne alkyd (acrylic-alkyd hybrid) is where most serious trim work happens now. These paints combine acrylic’s easy water cleanup with alkyd resin’s flow and hardness, so they level almost like oil while resisting yellowing far better than traditional oil enamel. Benjamin Moore Advance and PPG Break-Through both fall into this category. Cure time runs longer than latex, often two to four weeks before the film reaches full hardness, but the leveling and durability payoff is real.
Oil-based alkyd, the traditional choice, still exists for a reason. It flows beautifully and fills minor imperfections that a thinner waterborne product might not hide. The downsides are well known: strong solvent odor, mineral-spirits cleanup, and a tendency to yellow over years, especially in low-light hallways or closets. Most homeowners today choose a waterborne alkyd instead and get 90% of the leveling with none of the smell.
- Acrylic latex: fastest dry, easiest cleanup, weaker leveling on flat trim.
- Waterborne alkyd: best balance of leveling, toughness, and low yellowing.
- Oil-based alkyd: best fill and flow, but odor, solvent cleanup, and yellowing risk.
Pro Tip: If you’re painting cabinet doors or a front entry door people touch constantly, spend the extra cure-time patience on a waterborne alkyd or urethane-acrylic. For baseboards in a guest bedroom nobody kicks, standard acrylic latex in satin is perfectly reasonable.
How Do Painters Test and Rate Trim Paint?
Professional painters don’t judge a can of paint by the label. They judge it by how it behaves under a brush and how it holds up six months later, which is why hands-on comparative testing matters more than marketing claims.
- Abrasion and scuff testing. Testers rub cured panels with an abrasive pad or scrub brush to simulate years of shoe contact on baseboards and hand contact on doors. Urethane-acrylic and waterborne alkyd formulas consistently outlast standard latex here.
- Leveling and workability checks. A test panel gets brushed, then examined under raking light for brush marks and stipple. This is where oil and hybrid alkyds pull ahead of thinner acrylics.
- Blocking resistance. Painters press two painted surfaces together, like a door against its frame, after a set cure time to see if they stick. Poor blocking resistance means a door that won’t close right for weeks.
- Recoat and cure timing. Manufacturer datasheets state a recoat window (often two to four hours) separate from full cure (two to four weeks for alkyds). Pros track both, because recoating too early traps solvent and softens the finish.
What this means at the paint counter: a can that dries to the touch in an hour isn’t necessarily ready for real-world abuse. Adhesion, leveling, and blocking resistance matter more than dry time when you’re picking a finish that has to survive a busy household, and premium high-hiding acrylic primers matter just as much as the topcoat you choose.
Which Trim Paint Wins on Durability and Finish?
The five names below cover the range most homeowners actually encounter, from premium urethane-acrylic to reliable big-box alkyd.
Benjamin Moore Advance remains the benchmark for homeowners who want a factory-smooth finish without spray equipment. It self-levels well enough that brush marks all but disappear once cured, and Sigma Painting reaches for it constantly on kitchen cabinet refinishing jobs where clients expect a lacquer-like result. The one caveat: give it the full cure window before hanging heavy hardware or stacking books against painted shelving.
Sherwin-Williams Emerald Urethane Trim Enamel takes the toughness crown. In comparative testing, urethane-acrylic formulas produced the hardest, most scuff-resistant film of any trim product evaluated, which makes it the right call for stair railings, mudroom trim, and anywhere small hands and shoes make constant contact. It costs more per gallon, but on high-abuse surfaces the extra durability pays for itself in fewer touch-ups. Sigma Painting has a longer breakdown of this brand’s strengths versus Benjamin Moore if you’re torn between the two.
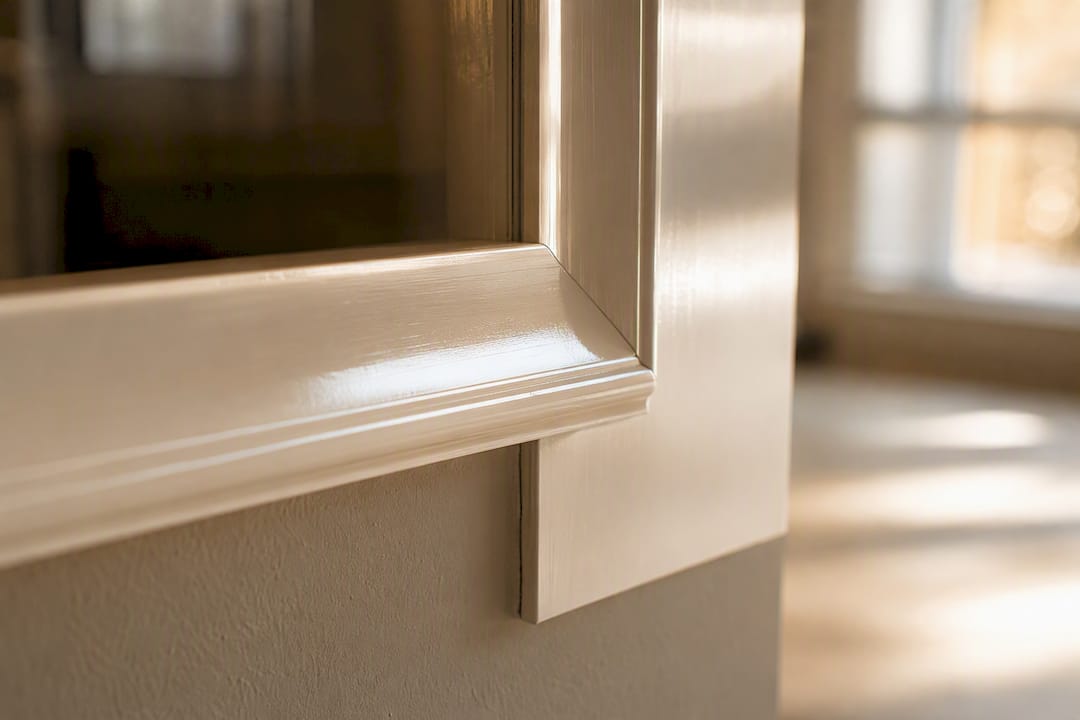
PPG Break-Through earns its spot for anyone on a tighter schedule. It’s a fast-drying waterborne acrylic-alkyd that allows same-day recoating in many conditions, which shortens a multi-day trim project considerably. The trade-off is a touch less open time to work the paint before it starts to set, so it rewards a steady, practiced brush hand more than the slower-drying Advance does. PPG’s product line is worth a look if your painter or local pro-dealer stocks it.
Behr Alkyd, including the Marquee and Premium interior lines, is the name most homeowners already know from weekend trips to the hardware store. It’s a genuinely workable paint for baseboards and door casings in lower-traffic rooms, and the price makes it easy to repaint an entire main floor without blowing the budget. Where it falls short of the premium hybrids is fine leveling under raking light. Close inspection on a freshly painted door can reveal faint brush texture that Advance or Emerald would have smoothed away.
Cloverdale Paint and Dulux round out the list as dependable, less flashy options. Cloverdale has a strong regional following, and both brands offer acrylic-alkyd trim lines that perform respectably on leveling and scuff resistance. Cloverdale’s product range is a sensible choice if you’re near a dealer that carries it and want pro-grade quality without hunting down a specific national brand. Availability varies more than with Benjamin Moore or Sherwin-Williams, since neither has the same density of dedicated stores, so check your nearest pro-paint dealer before planning a project around them.
How Do You Choose the Right Trim Paint?
Before you buy anything, answer four questions: what’s the substrate, how much traffic will this surface see, how patient are you with cure time, and what’s your ceiling on cost per gallon. Those four answers point you to one of the products above almost automatically.
Substrate and existing finish come first. Bare wood, previously painted trim, MDF, and PVC all behave differently under a brush. MDF and PVC are non-porous and need a bonding primer or they’ll shed paint within a year. Previously oil-painted trim needs a light scuff-sand and a bonding primer before you switch to a waterborne topcoat, or adhesion will suffer.
Traffic level determines how much you should spend. A baseboard in a formal dining room that gets touched twice a year doesn’t need the toughest urethane-acrylic on the market. A stair handrail or a kitchen cabinet door absolutely does.
Timeline matters more than people expect. If you need furniture back in the room within 48 hours, a fast-drying waterborne acrylic-alkyd like PPG Break-Through beats a slower-curing option, even if the slower one levels slightly better. Fast-dry formulas trade some self-leveling for speed, so work in smaller sections and keep a wet edge.
Odor and VOC tolerance narrows the field fast. Anyone with young kids, pets, or asthma should stick to waterborne alkyds and acrylics. Traditional oil-based paint still exists, but the solvent smell lingers for days and most people regret choosing it in an occupied home.
Picking the right sheen
Sheen is not just an aesthetic choice on trim. It directly affects scuff resistance and how forgiving the paint is of surface flaws.
- Semi-gloss is the practical default for trim and doors. It levels smoothly, wipes clean, and resists everyday scuffs without demanding a flawless surface underneath.
- Satin works well on baseboards in bedrooms or low-traffic hallways where a slightly softer sheen looks more intentional and hides minor wall imperfections better than semi-gloss.
- Gloss delivers the hardest, most washable film of the three, but it’s unforgiving. Every sanding mark, nail hole, or brush stroke shows under raking light, so gloss only makes sense on trim you’ve prepped to a near-perfect surface.
If you’re painting interior doors specifically, sheen choice interacts with how the door gets used day to day, so match the finish to hand contact and light exposure in that particular room rather than defaulting to whatever sheen you used last time.
What does each price tier actually get you?
Budget acrylic latex runs the least per gallon and gets the job done on low-traffic trim. Mid-tier Behr alkyd options add better hide and workability for a modest premium. Premium waterborne alkyds and urethane-acrylics, Benjamin Moore Advance and Sherwin-Williams Emerald among them, cost the most per gallon but deliver the leveling and scuff resistance that make a repaint last a decade instead of three years.
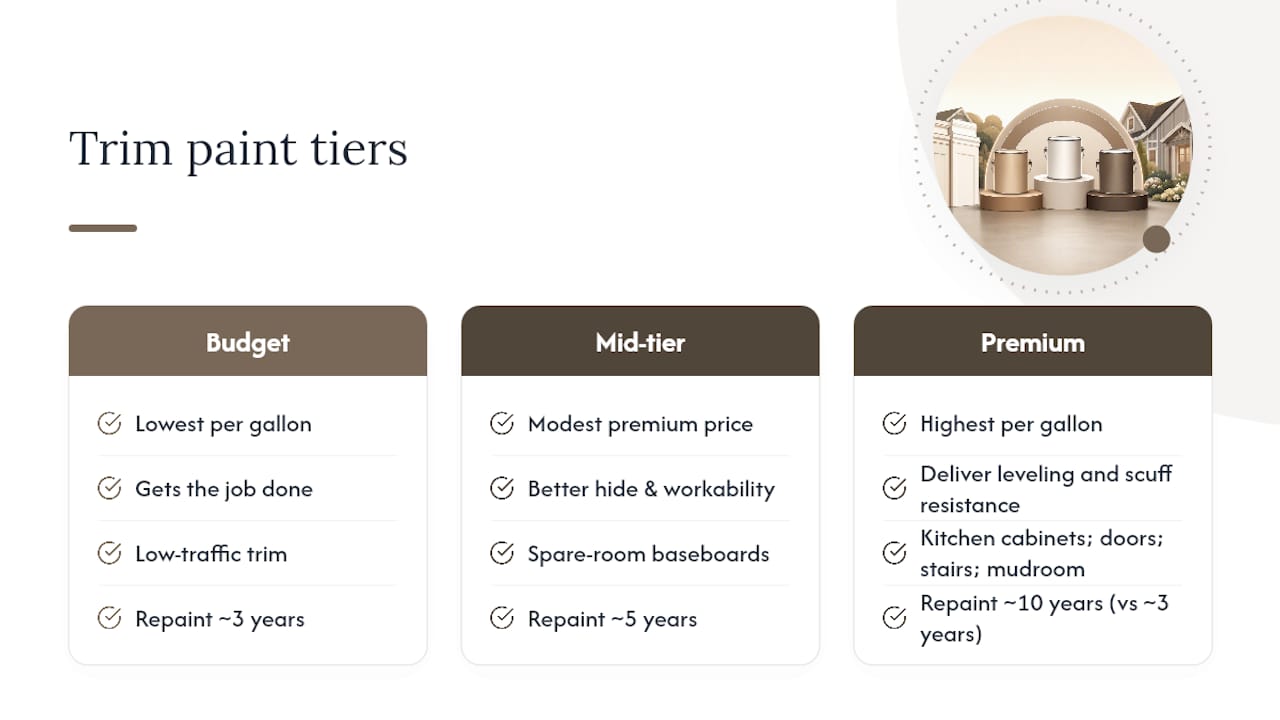
The upgrade to premium is worth it anywhere hands and shoes make regular contact: kitchen cabinets, entry doors, stair rails, and mudroom trim. For a spare room baseboard you’ll repaint again in five years anyway, a mid-tier product is money well spent elsewhere.
Prep and Primer: What Do You Need Before You Paint?
A flawless topcoat starts with prep work that most DIYers underestimate. Skipping this step is the single most common reason a $70 gallon of premium enamel still looks amateur once it’s dry.
- Clean every surface. Trim collects grease and dust that repels paint. A degreaser or simple soap-and-water wash followed by a rinse handles most household trim.
- Test the old finish. If you’re not sure whether existing trim is oil or latex, rub a hidden spot with denatured alcohol. Latex softens; oil doesn’t. This tells you whether you need a bonding primer before switching chemistries.
- Sand lightly. A scuff-sand with 220 grit dulls the old sheen so the new coat has something to grip. Wipe away dust with a tack cloth before priming.
- Repair damage. Fill nail holes and dents with wood filler or spackle, then sand flush once dry.
- Prime where needed. A high-hiding acrylic primer is worth the extra step on bare wood, MDF, stained or knotty surfaces, and anywhere you’re switching from oil to waterborne paint.
The right tools matter almost as much as the paint itself. Sigma Painting reaches for quality nylon/polyester angled sash brushes in the 1.5 to 2.5 inch range for cutting in along trim edges, since cheap bristles shed and drag, leaving visible texture in the cured film. A mini foam or microfiber roller handles flat door panels and wider baseboard faces faster than a brush alone, and a sprayer earns its setup time only on large jobs like a full staircase or an entire set of cabinet doors.
Pro Tip: Buy one good angled sash brush and treat it well rather than a set of cheap ones. Rinse it immediately after use, reshape the bristles, and it’ll outlast a dozen throwaway brushes while laying down noticeably smoother lines.
What’s the Best Technique for Painting Trim?
Good technique matters more than any single product choice. The best trim paint in the world still shows brush marks if you rush the application.
- Cut in first. Run a loaded brush along the edge where trim meets wall or ceiling before tackling the broad surface.
- Lay off in long strokes. Apply paint in manageable sections, then drag the brush the full length of the piece in one direction to even out the coat.
- Tip off lightly. Finish each section with a nearly dry brush, using light pressure to smooth out any ridges before the paint starts to set.
- Sand lightly between coats. A quick pass with 320 grit knocks down dust nibs and raised grain, then wipe clean before the next coat.
The most common mistakes are overloading the brush, laying on one thick coat instead of two thin ones, and skipping the sand between coats. Thick coats sag on vertical trim and take far longer to cure properly.
- For flat door panels and wide baseboard faces, a mini roller followed by brush tip-off usually levels better than brush-only work.
- For narrow casings, spindles, and detail work, stick with the brush the entire way through.
How Long Does Painted Trim Really Last?
Well-prepped trim painted with a quality waterborne alkyd or urethane-acrylic should look sharp for eight to ten years in normal household conditions. Normal wear looks like slight dulling of sheen in high-touch spots, not peeling, cracking, or paint lifting in sheets. Peeling or adhesion failure within the first year points to a prep problem, not a paint problem.
- Clean trim with mild soap and warm water; avoid ammonia-based or abrasive cleaners that dull sheen over time.
- Blot spills immediately rather than scrubbing, especially on semi-gloss and gloss finishes.
- For small chips, sand the spot smooth, spot-prime bare wood, and feather in matching paint with a small artist’s brush.
- Keep leftover paint labeled with the brand, color code, and sheen so touch-ups match years later without guesswork.
What Does Trim Paint Cost and Where Should You Buy It?
Budget acrylic latex generally runs on the lower end per gallon, Behr alkyd options sit in the middle, and premium waterborne alkyds and urethane-acrylics like Benjamin Moore Advance and Sherwin-Williams Emerald sit at the top, with tested trim paints spanning roughly $35 to $93 a gallon depending on line and finish.
- Big-box retailers carry Behr reliably and often stock Sherwin-Williams or Benjamin Moore-adjacent lines depending on region.
- Dedicated paint stores and pro dealers are the more consistent source for Benjamin Moore, PPG, Cloverdale, and Dulux, especially for exact-match tinting and higher-end sheens.
- Online ordering through manufacturer sites works for specialty finishes, but color-matching in person still beats a screen for anything but a repeat order.
A mid-priced hybrid earns its cost on any surface with regular hand or foot contact. Save the economy latex for low-traffic trim you’re comfortable repainting sooner.
What Do Contractors Know That Most DIYers Don’t?
Sequencing matters more than most homeowners assume on a full-room repaint. Trim, cabinets, and walls each have different dry times, and painting trim last after walls are fully cured avoids smudging fresh wall paint while you’re cutting in edges.
- Schedule cure time realistically. If cabinet doors need two to four weeks to fully harden, plan the kitchen reinstall around that window instead of rushing hardware back on.
- Protect floors and hardware before the first brushstroke, not halfway through. Painter’s tape lifts cleanly only when applied to a clean, dry surface.
- Remove hardware entirely rather than taping around hinges and knobs. It takes ten extra minutes and produces a noticeably crisper line.
- Work in the order that lets you close doors and walk through rooms without touching wet trim.
Sigma Painting’s crews apply this sequencing on everything from single-room refreshes to full multi-unit development repaints, and the same logic scales down to a single homeowner tackling one hallway on a weekend.
Pro Tip: Photograph your hardware layout before removing it. It sounds unnecessary until you’re trying to remember which hinge went where on door number six.
Why Chemistry Matters More Than the Brand on the Can
Most buying guides rank trim paint by brand name first, and that’s backwards. The chemistry inside the can, acrylic latex, waterborne alkyd, or oil, determines 80% of how your finished trim will look and hold up. Brand matters mostly at the margins, in pigment quality and resin consistency, once you’ve picked the right family for the job.
Here’s the part that gets underrated: cure time isn’t a delay you’re waiting through, it’s when the actual chemistry that makes waterborne alkyd durable is still happening. A lot of homeowners judge a paint as “bad” because they stacked books on a freshly painted shelf three days in and got a mark, when the product needed three more weeks to reach full hardness. That’s not a product failure. That’s an expectations problem, and it’s the single biggest reason people give premium hybrids worse reviews than they deserve.
The other overlooked point is that tool quality changes outcomes almost as much as paint choice does. A $70 gallon of Benjamin Moore Advance applied with a shedding dollar-store brush will look worse than a $35 can of decent acrylic latex applied with a proper angled sash brush and patient technique. If you only upgrade one thing in your painting kit, upgrade the brush before the paint.
When Does It Make Sense to Call a Painter Instead of DIY?
DIY trim painting works well for a single room, a weekend timeline, and a homeowner willing to sand between coats and wait out a full cure. It stops making sense once you’re staring down an entire main floor of trim, cabinet doors that need to come off and go back on without misaligning hinges, or a timeline where wet paint simply can’t be in the way of daily life for weeks.

That’s where Sigma Painting fits into everything covered above. Instead of researching which sheen resists scuffs best or waiting three weeks for cabinet doors to fully cure before rehanging them, you get a crew that already knows this chemistry cold and applies it correctly the first time, with premium materials, full prep, and a complimentary color consultation included in the quote. For anyone across the Greater Toronto Area weighing a full trim repaint against a busy month, that’s the real trade-off: your time and certainty versus a weekend of sanding dust. Get a fast estimate through the instant quote calculator and see what a factory-smooth finish costs before you commit to doing it yourself.
Sources
- How to Buy Better Trim Paint | Family Handyman
- Paintit
- Best Paint for Trim and Doors | PaintPricing
- Best Paint for Trim (Interior and Exterior), Solved! - Bob Vila
- Contractor series nylon/polyester angle sash brush | Sherwin-Williams


